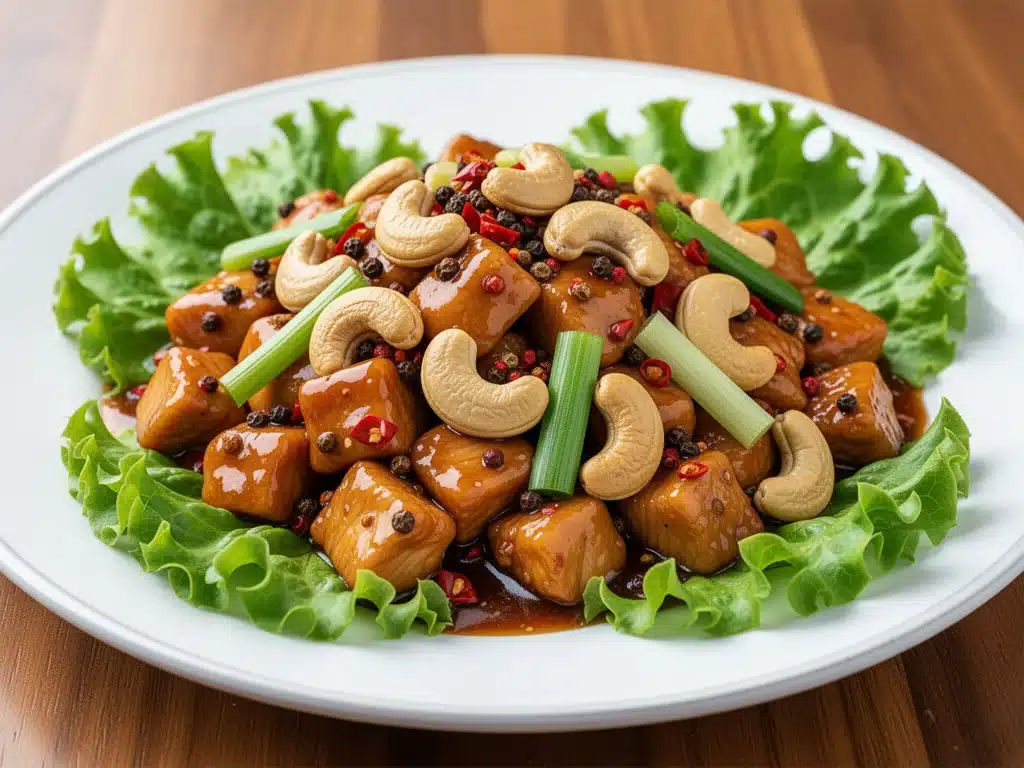
It started with a takeout container. You know the kind—the cheap white plastic one that arrives lukewarm, stained with oil, and leaves you staring at a screen wondering if you should just eat cereal for dinner. I had ordered what I thought would be a treat: Kung Pao Chicken. I got back home, opened the lid, and found soggy peanuts, rubbery chicken pieces that tasted like they’d been simmering in a dark basement since Tuesday, and a sauce that was basically just sweet soy sauce with no depth.
I was frustrated. Not just because I’d wasted $18, but because I remembered the first time I had this dish in a tiny, bustling restaurant in San Francisco. The chicken was crisp on the outside and tender inside. The peanuts were toasted to perfection. The sauce had this incredible balance of sweet, sour, salty, and spicy that made you take another bite before you realized you were already halfway through the container. It was complex. It was alive.
So, I went to work. I spent the next six months testing versions in my kitchen. I burned garlic. I overcooked chicken until it was like shoe leather. I used too much cornstarch and ended up with a gloopy mess that coated my tongue. I even tried using ketchup in the sauce once (don’t ask, I was desperate). But after about fifteen attempts, I finally nailed it. The version I’m sharing with you today is the one that actually made my husband stop scrolling through his phone and ask, “Wait, did you order this from somewhere?”
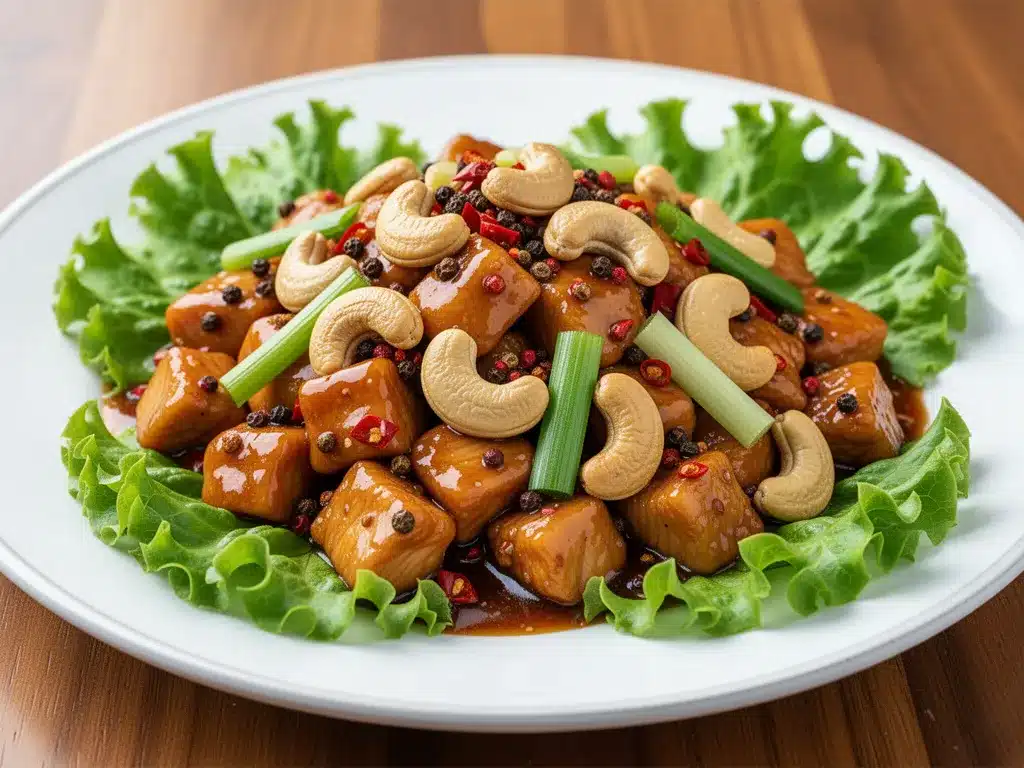
This is Restaurant-Style Kung Pao Chicken. It’s better than takeout, faster than delivery, and honestly? It’s easier than you think. The secret isn’t in having a wok or a commercial kitchen. It’s in the marinade, the sauce ratio, and knowing exactly when to pull the chicken off the heat. If you’re tired of disappointing takeout and want to bring that authentic Sichuan flavor home, you’re in the right place. Let’s get cooking.
Why This Kung Pao Chicken Recipe Wins Every Time
There are a million chicken stir-fry recipes out there. So why make this one? Here’s the real talk: most home cooks get the sauce wrong. They make it too sweet, or too thin, or they skip the crucial step of velveting the chicken. This recipe fixes all of that.
- It’s Actually Fast — People say stir-fry is quick, but if you spend 20 minutes chopping, it’s not. I’ve streamlined this so prep is minimal. The chicken marinates while you chop veggies, so active time is under 15 minutes.
- Perfect Texture Every Time — The secret is the cornstarch marinade. It locks in moisture and gives you that slippery, tender bite you get at restaurants. No dry, chalky chicken here.
- Complex Flavor, Simple Ingredients — You might think you need ten different obscure sauces. You don’t. You probably have everything in your pantry. The magic is in the balance of vinegar, sugar, soy, and chili.
- Crispy Peanuts That Stay Crispy — Ever open a takeout container and find sad, chewy peanuts? We toast our own. They stay crunchy even after sitting in the sauce for a few minutes.
- Customizable Heat — Some people love it fiery, some like it mild. This recipe lets you control the heat level easily, so everyone at the table is happy.
This isn’t just dinner; it’s a confidence booster. You’ll walk into your kitchen, throw things in a pan, and come out with something that smells incredible and tastes like you spent hours on it. My family asks for this Restaurant-Style Kung Pao Chicken at least once a week. It’s become our go-to when we want something bold but don’t want the guilt or the cost of ordering out.
Ingredients You’ll Need
Before we dive in, let’s talk about what goes into this. I’m particular about a few things here, mostly because they make or break the final flavor. Don’t skip the steps I’ve noted below—they’re there for a reason.
For the Chicken & Marinade
Chicken thighs (1.5 lbs / 700g) — Boneless, skinless. I use thighs because they stay juicy. Breast meat works, but it’s easy to overcook and end up dry. If you must use breast, cut it into smaller pieces and watch the heat closely.
Shaoxing wine (1 tablespoon) — This is Chinese cooking wine. It adds a depth of flavor that regular wine just can’t match. If you can’t find it, dry sherry is the best substitute. Avoid using cooking wine from the vinegar aisle—it’s salted and weird.
Soy sauce (1 tablespoon) — Use regular soy sauce, not low-sodium, for this marinade. You need that saltiness to penetrate the meat.
Cornstarch (1 teaspoon) — This is the velveting agent. It coats the chicken and protects it from the high heat, keeping it tender.
White pepper (½ teaspoon) — This is non-negotiable if you want that authentic Sichuan taste. It has a different heat profile than black pepper—more earthy and floral. Black pepper works in a pinch, but white is better.
For the Sauce
Chinkiang vinegar (2 tablespoons) — Also known as black vinegar. It’s maltier and less acidic than regular vinegar. This is crucial for the authentic tang. If you can’t find it, balsamic vinegar mixed with rice vinegar is a weird but workable substitute.
Rice vinegar (1 tablespoon) — Adds brightness. Don’t skip this; Chinkiang is deep, rice vinegar is sharp. You need both.
Sugar (1 tablespoon) — Granulated white sugar. It balances the acidity and salt. Don’t use brown sugar unless you want a molasses flavor.
Light soy sauce (2 tablespoons) — This is for seasoning. It’s saltier and thinner than the soy sauce in the marinade.
Doubanjiang (Pixian chili bean paste) (1 tablespoon) — This is the heart of the dish. It’s a fermented broad bean paste that’s spicy, salty, and umami-rich. I use Lao Gan Ma brand, but any Pixian brand works. If you can’t find it, you can substitute with gochujang mixed with a little soy sauce, but the flavor will be different.
For the Stir-Fry
Roasted peanuts (½ cup) — Unsalted, unskinned if possible. If you can’t find unskinned, regular roasted peanuts work fine. Just avoid salted ones so you don’t over-salt the dish.
Dried red chilies (10-15 pieces) — These provide the aroma and heat. Remove the seeds if you want less spice. They should be fragrant, not moldy.
Garlic (4 cloves, sliced) — Sliced, not minced. Slices release flavor more slowly and don’t burn as fast.
Fresh ginger (1 tablespoon, sliced or minced) — Fresh is best. Powdered ginger tastes like dust in this dish.
Scallions (4-5 stalks) — White parts for cooking, green parts for garnish. Cut into 1-inch pieces.
Celery (1 stalk, sliced diagonally) — Adds crunch. Some versions use zucchini or bell peppers, but celery is traditional and adds a nice crisp texture.
Vegetable oil (3 tablespoons) — Neutral oil with a high smoke point. Canola or peanut oil works best.
Equipment Needed
You don’t need a fancy restaurant setup, but having the right tools helps.
Wok or Large Skillet — A carbon steel wok is ideal because it heats up fast and distributes heat evenly. If you don’t have one, a large cast-iron skillet or a heavy-bottomed stainless steel pan works perfectly. The key is surface area—don’t crowd the pan.
Sharp Knife — For slicing chicken and veggies. A dull knife will squish the chicken and make uneven cuts.
Measuring Spoons — Precision matters in the sauce. Too much vinegar and it’s sour; too much sugar and it’s cloying.
Slotted Spoon or Tongs — For removing chicken from the wok without splashing oil everywhere.
Bowl for Mixing Sauce — Mix the sauce ingredients in a small bowl before you start cooking. Stir-frying happens fast, and you won’t have time to measure things one by one while the chicken is browning.
How to Make It: Step-by-Step
Alright, let’s get into the kitchen. This process is straightforward, but timing is everything. Here’s exactly how I make my Restaurant-Style Kung Pao Chicken.
Step 1: Marinate the Chicken (10 minutes)
Cut your chicken thighs into 1-inch cubes. Place them in a bowl and add the soy sauce, Shaoxing wine, white pepper, and cornstarch. Mix well with your hands until the chicken is coated and slightly sticky. Let it sit for at least 10 minutes while you prep the other ingredients. This step is crucial for tenderness.
Step 2: Mix the Sauce
In a small bowl, whisk together the Chinkiang vinegar, rice vinegar, sugar, light soy sauce, and a teaspoon of cornstarch (this helps thicken the sauce later). Set aside. The sauce should taste slightly sweet and tangy before it hits the pan.
Step 3: Prep the Aromatics
Slice the garlic, ginger, and scallions. Slice the celery. Pit and crush the dried red chilies slightly to release their oils (but don’t turn them to dust). Have your peanuts ready. Mise en place is key here because once you start cooking, it moves fast.
Step 4: Sear the Chicken
Heat your wok or skillet over high heat until it’s smoking hot. Add 2 tablespoons of oil. Once the oil shimmers, add the chicken in a single layer. Don’t crowd the pan—if you have too much chicken, cook it in batches. Let it sit for 1-2 minutes without moving it to get a golden crust. Then stir-fry until cooked through, about 3-4 minutes. Remove the chicken from the wok and set aside on a plate. Leave any excess oil in the pan.
Step 5: Bloom the Spices
Reduce the heat to medium. Add the remaining 1 tablespoon of oil. Add the dried red chilies, garlic, and ginger. Stir-fry for 30 seconds until fragrant. Be careful not to burn the garlic—it should just turn golden. Add the doubanjiang paste and stir constantly for 1 minute. You want the paste to fry in the oil until it turns a deep red color. This releases all the flavor.
Step 6: Add Veggies and Chicken Back
Throw in the celery and the white parts of the scallions. Stir-fry for 1 minute. Add the cooked chicken back into the wok. Toss everything together for 30 seconds to reheat the chicken and combine flavors.
Step 7: Sauce and Finish
Give your sauce a quick stir (the cornstarch settles) and pour it into the wok. It will thicken almost immediately. Toss everything to coat the chicken and veggies in the glossy sauce. Cook for another 30 seconds until the sauce is thick and clinging to the ingredients.
Step 8: The Final Touch
Remove from heat. Immediately toss in the roasted peanuts and the green parts of the scallions. The residual heat will wilt the greens slightly without making them mushy. Serve immediately.
Expert Tips & Tricks for Success
Here’s everything I’ve learned from making this dozens of times. These tips will save you from my early mistakes.
Don’t Skip the High Heat
Stir-frying is about speed and intensity. If your pan isn’t hot enough, the chicken will steam instead of sear, and you’ll end up with a soupy mess. Get that pan smoking hot before adding oil.
Fry the Doubanjiang
A lot of people skip frying the chili bean paste. Don’t. Frying it in oil for a minute transforms it from a raw, salty paste into a fragrant, deep sauce base. It’s the difference between good and great.
Add Peanuts Last
If you add peanuts too early, they absorb moisture and get soft. Add them right at the end, off the heat, so they stay crunchy. This texture contrast is essential to the dish.
Use Thighs, Not Breast
I know breast meat is leaner, but thighs have more fat and connective tissue, which breaks down during cooking to keep the meat juicy. In a high-heat stir-fry, breast meat dries out in seconds. Thighs are forgiving.
Control the Spice
The heat comes from two sources: the dried chilies and the doubanjiang. If you’re sensitive to spice, remove the seeds from the dried chilies and use a mild doubanjiang or reduce the amount. Remember, you can always add more heat, but you can’t take it away.
Variations & Substitutions
Once you’ve mastered the basic version, here’s how you can mix it up. I’ve tried all of these in my own kitchen.
Vegetarian Kung Pao
Swap the chicken for firm tofu. Press the tofu for 20 minutes, cube it, and pan-fry it until crispy before adding it back at the end. You can also add cubed mushrooms or bamboo shoots for texture.
Kung Pao Cauliflower
Roast cauliflower florets until crispy, then toss them in the sauce at the end. This is a great low-carb option, though the texture is different from chicken.
Shrimp Version
Shrimp cooks very quickly. Sear them for 1-2 minutes per side, remove, and add them back at the very end with the peanuts. Overcooked shrimp are rubbery, so timing is critical.
Gluten-Free Option
Use tamari instead of soy sauce, and check your doubanjiang label (some brands contain wheat). Most traditional doubanjiang is gluten-free, but always double-check.
No Shaoxing Wine?
Use dry sherry. If you don’t have that, a splash of rice vinegar and a pinch of sugar can mimic the sweetness, though it won’t be identical.
Serving & Storage
How to Serve
This dish is best served over steamed jasmine rice. The fluffy rice soaks up the extra sauce perfectly. I also like to serve it with a simple cucumber salad or blanched broccoli to balance the richness.
Leftovers
Store leftovers in an airtight container in the fridge for up to 3 days. The chicken will continue to absorb the sauce, so it might get saucier. The peanuts will lose their crunch, so if you’re meal-prepping, store the peanuts separately and add them when you reheat.
Reheating
Reheat in a skillet over medium heat with a splash of water or chicken broth to loosen the sauce. Microwave heating tends to dry out the chicken, so the stovetop method is best.
Freezing
I don’t recommend freezing this dish. The texture of the chicken and vegetables changes when frozen and reheated, and the sauce can separate. It’s best enjoyed fresh.
Nutrition Information
I’m not a nutritionist, but here’s the breakdown if you’re tracking. This is per serving (based on 4 servings).
- Calories: 380
- Protein: 28g
- Carbs: 18g
- Fat: 22g
- Fiber: 2g
- Sugar: 8g
This dish is higher in protein thanks to the chicken, but it does have some fat from the oil and peanuts. If you’re watching calories, you can reduce the oil to 2 tablespoons and use skinless chicken breast. But honestly? It’s a treat. Enjoy it as part of a balanced meal with plenty of veggies.
Final Thoughts
Making Restaurant-Style Kung Pao Chicken at home has completely changed my weeknight dinners. I used to dread takeout night because I always felt disappointed by the quality. Now, I look forward to it because I know I can make something better, cheaper, and healthier in my own kitchen.
This recipe is forgiving, but it rewards attention to detail. The velvety chicken, the spicy-sweet sauce, the crunch of the peanuts—it all comes together to create something truly special. It’s a dish that feels fancy but is actually quite simple. I hope you give it a try. Trust me, your family will thank you.
If you make this, let me know how it turns out! I love hearing about your kitchen experiments. And if you’re looking for more Asian-inspired dishes, check out my crispy garlic chicken or my sweet and sour pork for more weeknight wins.
Frequently Asked Questions
Can I use chicken breast instead of thighs?
Yes, but thighs are much more forgiving. If you use breast, cut the pieces smaller and cook them quickly. Remove them from the pan as soon as they’re white to prevent drying out. Thighs stay juicy even if you leave them in the pan a minute longer.
What is Doubanjiang?
It’s a fermented broad bean chili paste, often called Pixian bean paste. It’s the base for many Sichuan dishes. It’s salty, spicy, and umami-rich. You can find it in the Asian aisle of most grocery stores or online. If you can’t find it, gochujang is the closest substitute, but the flavor will be slightly different.
Why is my sauce too thin?
Usually, this means you didn’t cook the sauce long enough after adding it to the wok. The cornstarch needs a minute to activate and thicken. Also, make sure you’re using light soy sauce, not heavy soy sauce, which can be thicker and saltier.
Can I make this ahead of time?
You can prep the chicken and chop the veggies ahead of time, but don’t cook it until you’re ready to eat. Stir-fry is best made fresh. The chicken will get tough if marinated for more than 24 hours, and the veggies will lose their crunch.
Is Kung Pao Chicken spicy?
It can be! The heat comes from the dried chilies and the doubanjiang. You can control the spice level by adjusting the amount of chilies and removing the seeds. The traditional version is moderately spicy with a numbing sensation from Sichuan peppercorns, but this recipe is mild enough for most palates.
What can I serve with Kung Pao Chicken?
Steamed jasmine rice is the classic choice. You can also serve it with fried rice, lo mein, or a simple cucumber salad. It pairs well with a light beer or a glass of Riesling.
Pin This Recipe!
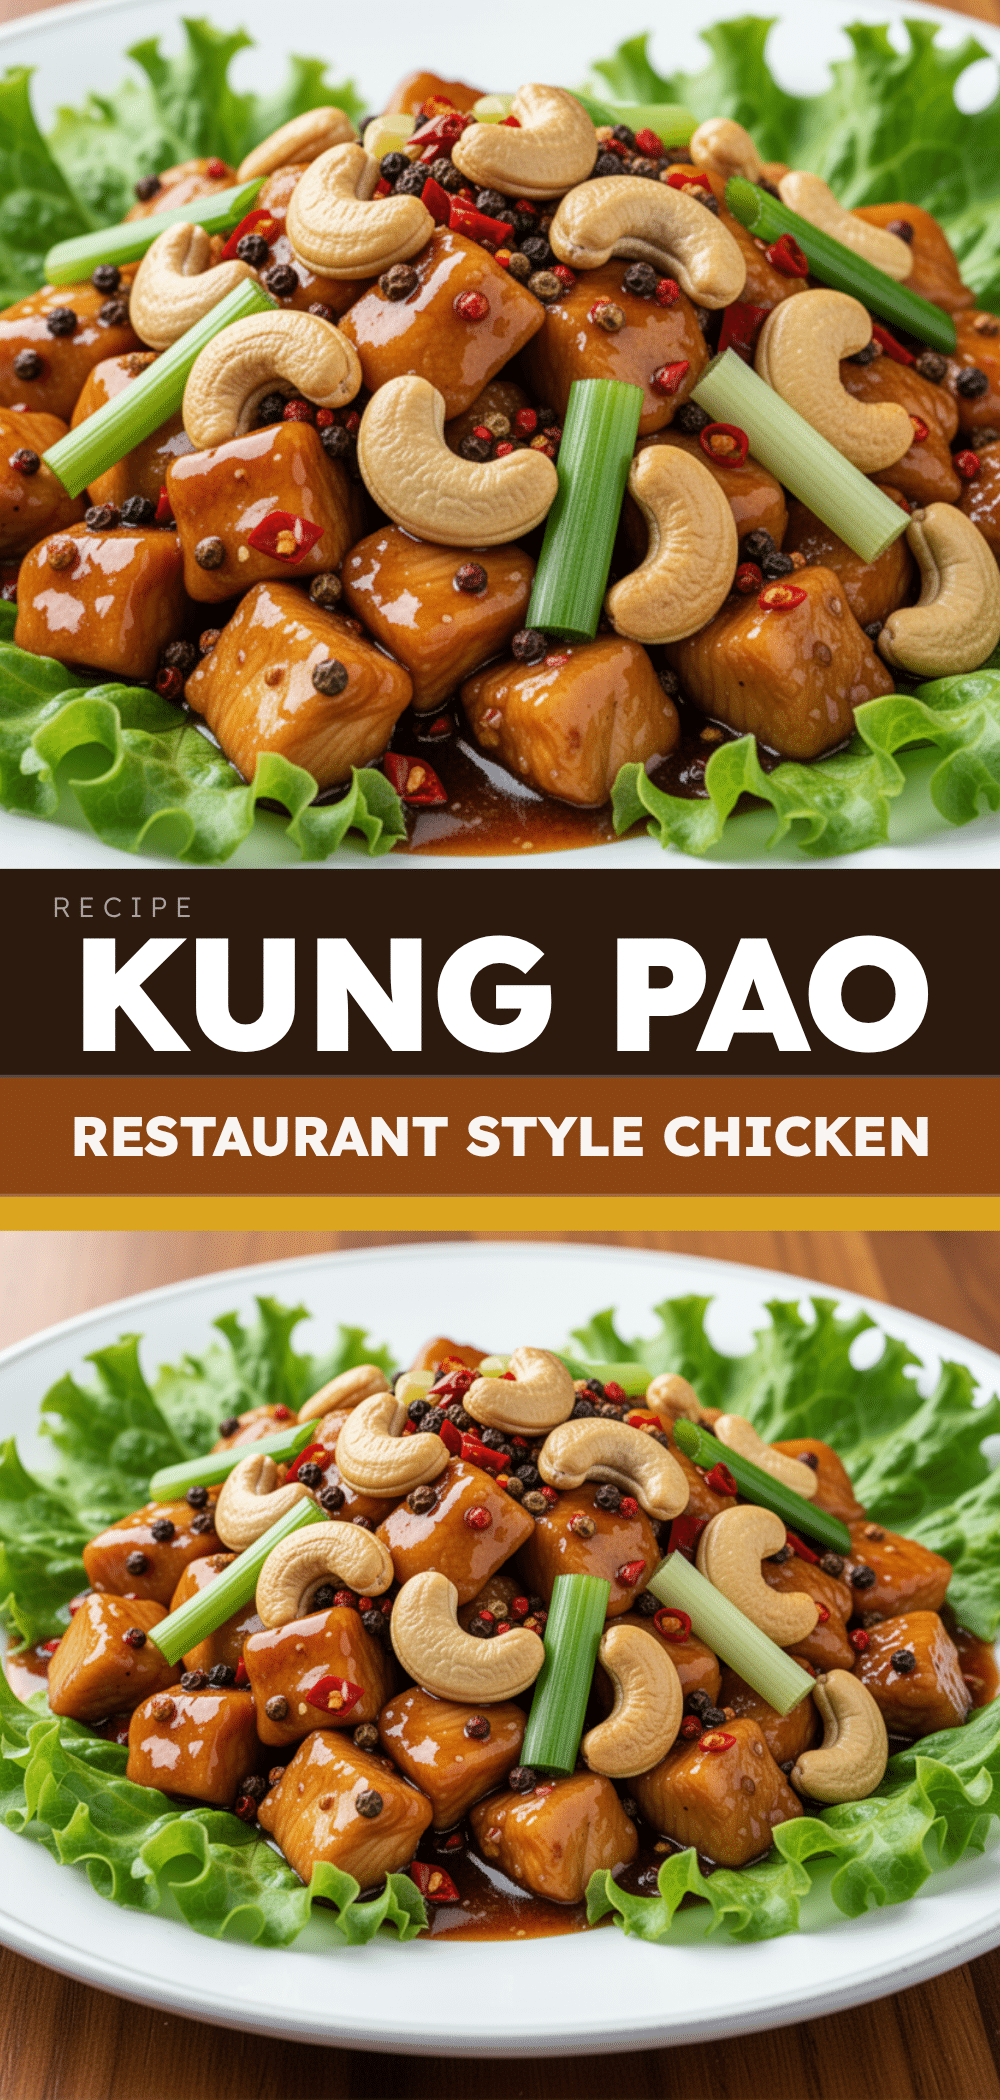
Restaurant-Style Kung Pao Chicken: Best 30-Minute Dinner
- Total Time: 25 minutes
- Yield: 4 servings 1x
Description
An authentic, restaurant-quality Kung Pao Chicken recipe that is faster than takeout and easier than you think. Features velvety chicken, crispy peanuts, and a complex sweet-sour-spicy sauce.
Ingredients
- 1.5 lbs boneless, skinless chicken thighs, cut into 1-inch cubes
- 1 tablespoon Shaoxing wine (or dry sherry)
- 1 tablespoon regular soy sauce
- 1 teaspoon cornstarch
- ½ teaspoon white pepper
- 2 tablespoons Chinkiang vinegar (black vinegar)
- 1 tablespoon rice vinegar
- 1 tablespoon granulated white sugar
- 2 tablespoons light soy sauce
- 1 tablespoon Doubanjiang (Pixian chili bean paste)
- ½ cup roasted unsalted peanuts
- 10–15 dried red chilies
- 4 cloves garlic, sliced
- 1 tablespoon fresh ginger, sliced or minced
- 4–5 stalks scallions, cut into 1-inch pieces (white and green parts separated)
- 1 stalk celery, sliced diagonally
- 3 tablespoons vegetable oil (divided)
Instructions
- Marinate the chicken: In a bowl, mix chicken cubes with soy sauce, Shaoxing wine, white pepper, and cornstarch. Let sit for 10 minutes.
- Mix the sauce: Whisk together Chinkiang vinegar, rice vinegar, sugar, light soy sauce, and 1 teaspoon of cornstarch in a small bowl. Set aside.
- Prep aromatics: Slice garlic, ginger, and scallions. Slice celery. Crush dried red chilies slightly to release oils.
- Sear the chicken: Heat a wok or skillet over high heat until smoking. Add 2 tablespoons oil. Add chicken in a single layer (cook in batches if necessary). Sear for 1-2 minutes until golden, then stir-fry for 3-4 minutes until cooked. Remove chicken and set aside.
- Bloom spices: Reduce heat to medium. Add remaining 1 tablespoon oil. Add dried chilies, garlic, and ginger; stir-fry for 30 seconds until fragrant. Add Doubanjiang and stir-fry for 1 minute until the paste turns deep red.
- Add veggies and chicken: Add celery and white parts of scallions; stir-fry for 1 minute. Add cooked chicken back to the wok and toss for 30 seconds.
- Sauce and finish: Stir the sauce mixture and pour into the wok. Cook for 30 seconds until the sauce thickens and coats the ingredients.
- Final touch: Remove from heat. Toss in roasted peanuts and green parts of scallions. Serve immediately.
Notes
For best results, use chicken thighs for juiciness. Ensure the pan is smoking hot before adding oil to achieve proper searing. Add peanuts at the very end to maintain crunch. If using chicken breast, cut smaller and cook quickly to avoid drying out. For a vegetarian version, substitute chicken with firm tofu or cauliflower.
- Prep Time: 10 minutes
- Cook Time: 15 minutes
- Category: Main Course
- Cuisine: Chinese
Nutrition
- Serving Size: 1 serving (approx. 1
- Calories: 380
- Sugar: 8
- Sodium: 800
- Fat: 22
- Saturated Fat: 4
- Carbohydrates: 18
- Fiber: 2
- Protein: 28
Keywords: Kung Pao Chicken, Sichuan Chicken, Stir Fry, Chinese Recipe, Dinner, Spicy Chicken, Restaurant Style


