It was 7:15 PM on a Tuesday, and I was standing in front of an open freezer, staring at a bag of frozen shrimp like it owed me money. My husband had mentioned something about “seafood night” over the weekend, which in our house usually means we order takeout from the Thai place three blocks away. But I was tired. Tired of the grease, tired of the $25 bill, and tired of feeling like I was failing at dinner just because I didn’t want to stand over a hot stove for an hour.
I pulled out the shrimp. I looked at the coconut flakes. And I had a sudden, desperate craving for that sweet, crispy coconut shrimp you get at those slightly upscale Asian fusion places—the kind that takes 45 minutes to make because you have to fry it in oil and then wait for the oil to cool down before you can clean your kitchen.
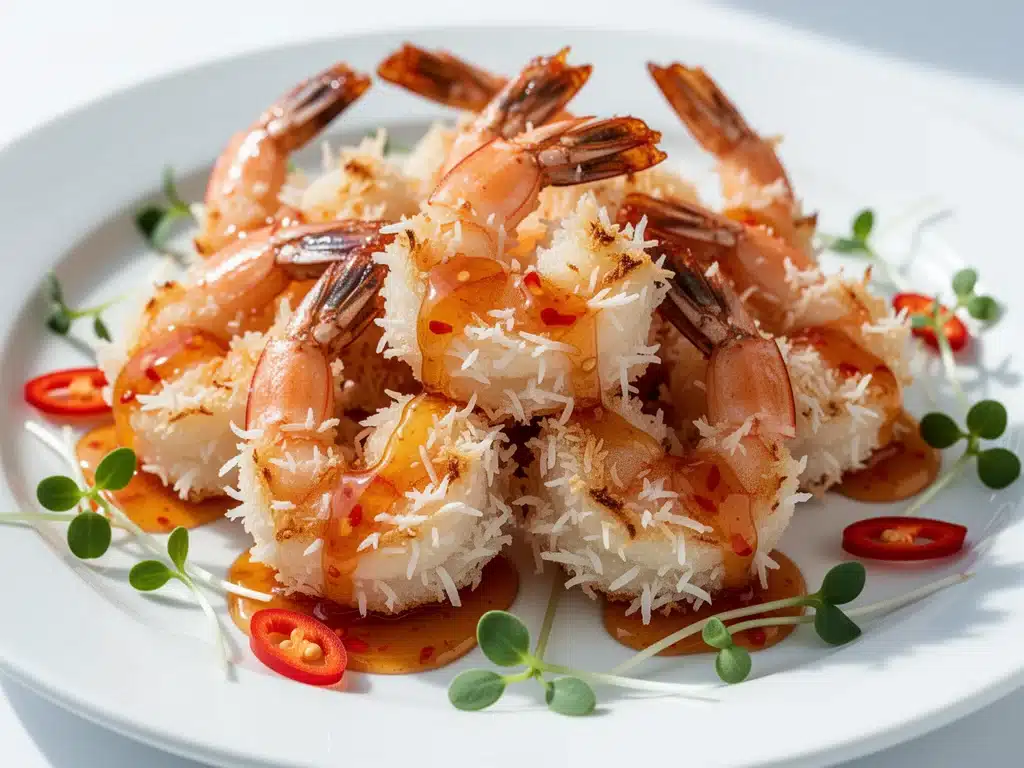
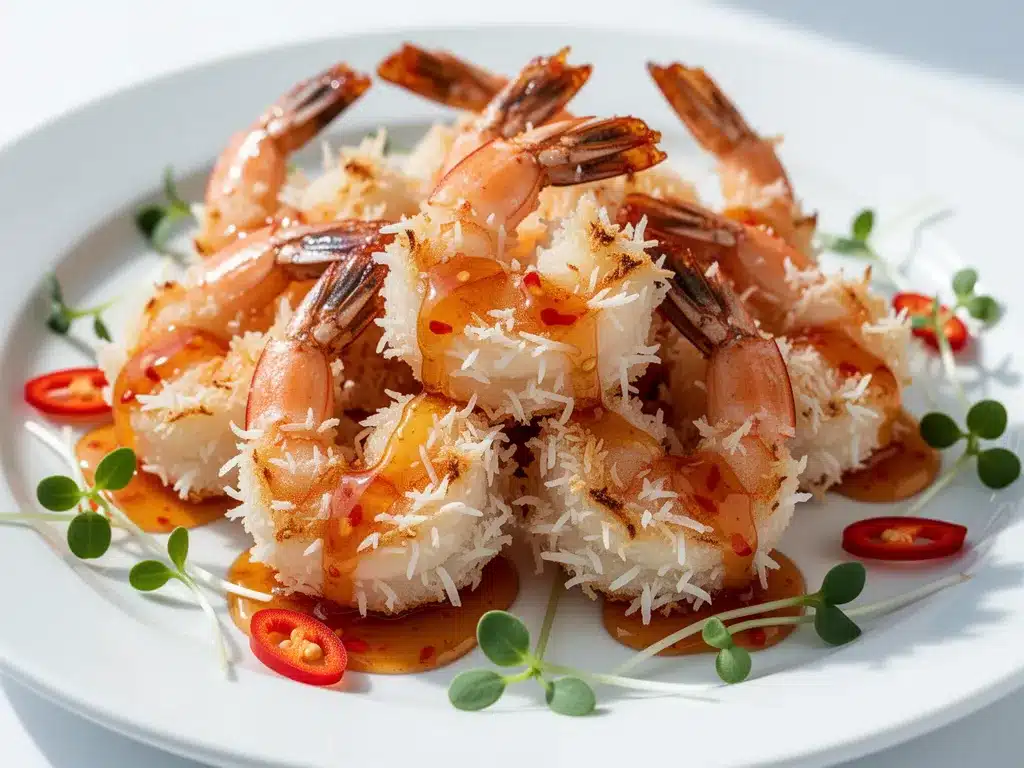
I didn’t have time for frying. I had 30 minutes. So I did something I’d been meaning to try for years: I baked it. I coated the shrimp in panko, dipped them in egg, rolled them in sweetened coconut flakes, and threw them in the oven. When they came out 20 minutes later, they were golden, crispy, and smelled like a tropical vacation. My husband took one bite, closed his eyes, and said, “This is better than takeout.” And honestly? He was right.
This recipe for crispy baked coconut shrimp has become my secret weapon for busy weeknights. It’s the perfect balance of sweet and savory, it’s ready in under 30 minutes, and it doesn’t leave your kitchen smelling like a deep fryer. I’ve made this at least a dozen times since that Tuesday, tweaking the breading ratio and testing different oven temperatures until I landed on the method that gives you that restaurant-quality crunch without the oil slick. If you’re looking for a dinner that feels special but actually fits into a real schedule, this is it.
Why You’ll Love This Recipe
There are a lot of reasons to keep this crispy baked coconut shrimp in your weekly rotation. It’s not just about the taste (though that’s a big part of it). It’s about how easy it is to pull off when you’re running on empty.
- Stupid Simple Setup — Seriously, if you can dip something in egg and roll it in flakes, you can make this. I’ve walked my teenage daughter through it over FaceTime while she was at college. No fancy techniques, no hard-to-find tools.
- Lightning Fast — 30 minutes from start to finish. That includes prep time. I make this on weeknights when I get home at 6:30 PM and need to be eating by 7:00 PM. It’s faster than waiting for a delivery driver.
- No Messy Oil — Baking means no splatter, no grease fires, and no waiting for oil to cool down to clean the pan. You just put a sheet pan in the dishwasher and call it a day.
- Crowd-Pleaser — I’ve served this to my pescatarian sister, my husband who claims he “doesn’t like fish,” and a group of friends who are usually picky about seafood. Everyone goes back for seconds. The sweet coconut and savory shrimp combo is just universally liked.
- Great for Meal Prep — I make a double batch on Sundays. They reheat surprisingly well in the air fryer (which restores the crunch), making them perfect for quick lunches or easy weeknight dinners later in the week.
This is my go-to when I need dinner to just work. No complicated techniques, no weird ingredients, just reliable, delicious food that makes everyone happy.
Ingredients You’ll Need
Here’s the best part: you probably have most of this already. The beauty of this crispy baked coconut shrimp recipe is how few ingredients it takes to get that big flavor. I’m particular about three things here, and I’ll tell you exactly why.
For the Shrimp
Large shrimp (21-25 count) (1.5 lbs / 680g, peeled and deveined) — This is the sweet spot. Too small, and they’re just snacks. Too large, and they’re hard to coat evenly. I buy them frozen and thaw them in cold water for 15 minutes. Pat them DRY. I can’t stress this enough. Wet shrimp = soggy breading.
For the Breading Station
All-purpose flour (1 cup / 125g) — Just a light dusting to help the egg stick. Don’t skip this step, or the coconut will slide right off.
Eggs (2 large) — Whisked with a pinch of salt and pepper. Some people use milk, but I stick to straight egg for the best binding power.
Panko breadcrumbs (1 cup / 80g) — This is non-negotiable. Regular breadcrumbs are too fine and dense. Panko gives you those light, airy, crunchy shards that make the shrimp feel fancy. I always use the Japanese-style panko; it’s lighter and crispier.
Shredded sweetened coconut (1.5 cups / 105g) — Look for the flakes, not the fine shreds. Flakes stay crunchier in the oven. Sweetened coconut adds that caramelized flavor when it bakes. Unsweetened works too, but you’ll need to add a tablespoon of sugar to the panko.
For the Dip
Thai Sweet Chili Sauce (½ cup / 120ml) — This is the classic pairing. The sweetness cuts the heat, and the vinegar cuts the richness. I buy the bottle at the Asian market, but any sweet chili sauce works.
Optional: Sriracha — If you like it spicy, mix in a teaspoon of sriracha. It turns the sauce into a fiery-sweet dip that’s addictive.
Equipment Needed
You don’t need fancy equipment for this. Here’s what I actually use:
- Sheet pans — I use two standard 13×18 inch baking sheets. Line them with parchment paper or a silicone mat. This prevents sticking and makes cleanup a breeze.
- Three shallow bowls — You need three for the breading station: one for flour, one for egg, one for panko-coconut mix. I use pie plates or shallow casserole dishes.
- Fork or tongs — To dip the shrimp. I use a fork for the egg and tongs for the coconut mix to keep my fingers clean.
- Cooling rack (optional) — For extra crispiness, you can place a wire rack on top of the sheet pan and put the shrimp on the rack. This lets air circulate underneath so the bottom doesn’t get soggy. I do this when I’m feeling fancy, but it’s not required.
- Oven — Obviously. Preheated to 425°F (220°C).
I’m obsessed with my silicone baking mats—they last forever and save me from scrubbing pans. If you don’t have them, parchment paper works just fine.
How to Make It: Step-by-Step
Alright, let’s make this! I’m walking you through exactly how I do it, including the little tricks I’ve picked up to ensure every bite is crunchy.
Step 1: Prep Your Shrimp (5 minutes)
If you’re using frozen shrimp, thaw them in a bowl of cold water for 15-20 minutes. Once thawed, pat them completely dry with paper towels. This is the most important step. If the shrimp are wet, the breading won’t stick, and you’ll end up with a sad, soggy mess. Once dry, trim any long tails if you want, but leave them on for presentation—it looks nicer.
Step 2: Set Up Your Breading Station (5 minutes)
Get three shallow bowls or plates. In the first, put the flour. In the second, whisk the eggs with a pinch of salt and pepper. In the third, mix the panko breadcrumbs and shredded coconut together. I usually mix them with my hands to ensure the coconut is evenly distributed throughout the panko. If you have large chunks of coconut, give them a quick pulse in a food processor, but don’t turn it into powder.
Step 3: Coat the Shrimp (5 minutes)
This is the assembly line part. Pick up a shrimp by the tail (or just hold it firmly). Dredge it in the flour, shaking off any excess. Dip it into the egg mixture, making sure it’s fully coated. Then, roll it in the panko-coconut mixture, pressing gently to make sure the flakes stick. Place the coated shrimp on your prepared baking sheet. Repeat with all the shrimp. Don’t crowd them! Leave a little space between each shrimp so the hot air can circulate. If your pan is small, do two batches.
Step 4: Bake Until Golden (15-20 minutes)
Preheat your oven to 425°F (220°C). Place the baking sheets in the oven and bake for 15-20 minutes. You’ll know they’re done when the shrimp are pink and opaque, and the coconut topping is golden brown and crispy. I usually rotate the pans halfway through cooking to ensure even browning. If you want extra crispiness, you can broil for the last 1-2 minutes, but watch them like a hawk—coconut burns fast.
Step 5: Serve Immediately (2 minutes)
Take them out of the oven and let them rest for 2 minutes. This helps the coating set so it doesn’t fall off when you pick them up. Serve immediately with Thai sweet chili sauce for dipping. The crunch is at its peak right out of the oven.
Total Time: About 30 minutes (10 minutes prep, 20 minutes cooking)
Expert Tips & Tricks
Here’s everything I’ve learned from making this dozens of times. These tips will save you from my mistakes.
Pat Them Dry!
I can’t say this enough. Moisture is the enemy of crispiness. If your shrimp are wet, the flour won’t stick, the egg will slide off, and the coconut will just fall into a pile on the pan. Use paper towels. Be thorough. It takes 30 seconds but makes a huge difference.
Don’t Skip the Panko
Regular breadcrumbs are too dense. They absorb moisture and get soft. Panko is light and airy, creating that shatteringly crisp texture. If you can’t find panko, you can make your own by processing plain bread slices in a food processor until they’re coarse crumbs, but buying it is easier.
Use Sweetened Coconut
Unsweetened coconut works, but it doesn’t caramelize the same way. Sweetened coconut gets golden and nutty in the oven. If you only have unsweetened, add a tablespoon of sugar to the panko mix. It’s worth the extra step.
Keep the Oven Hot
425°F is the magic number. Lower temperatures will dry out the shrimp before the coating crisps up. Higher temperatures might burn the coconut before the shrimp is cooked. 425°F is the sweet spot.
Reheating Right
Leftovers? Store them in an airtight container in the fridge for up to 3 days. To reheat, use an air fryer at 375°F for 3-4 minutes. This restores the crunch. In the oven, 400°F for 5-7 minutes works too. Don’t microwave them—they’ll get rubbery and soggy. Trust me, I’ve tried.
Variations & Substitutions
Once you’ve nailed the basic version, here’s how you can mix it up. I’ve tried all of these.
Spicy Coconut Shrimp
Add 1 teaspoon of cayenne pepper or red pepper flakes to the panko mixture. It adds a nice kick that pairs well with the sweet chili sauce. My friend Sarah loves it this way.
Gluten-Free Version
Substitute the all-purpose flour with gluten-free flour or almond flour. Use gluten-free panko (there are brands like Bob’s Red Mill that make it). The texture is slightly denser, but still delicious.
Dairy-Free
This recipe is naturally dairy-free! Just make sure your panko and coconut don’t have any hidden dairy ingredients (some brands add whey, so check the label). Serve with dairy-free sweet chili sauce.
Vegetarian Option
Not really a shrimp substitute, but you can use large portobello mushroom caps or thick slices of king oyster mushrooms. Coat them the same way. They get a nice meaty texture. Not the same, but good.
Different Sauces
Thai sweet chili is classic, but you can also try:
– Mango salsa for a fresh, fruity twist.
– Spicy mayo (mayo + sriracha + lime juice) for a creamy kick.
– Pineapple jalapeño jam for a gourmet touch.
Serving & Storage
How to Serve:
I usually serve this straight from the sheet pan at the dinner table—it looks rustic and stays warm. But here are other ways I’ve enjoyed it:
- As an Appetizer: Serve with toothpicks and small bowls of dipping sauce. Perfect for parties.
- As a Main Course: Serve over jasmine rice or with a side of steamed broccoli and coconut rice. Add a simple green salad with lime vinaigrette.
- In Lettuce Wraps: Put the shrimp in butter lettuce cups with some chopped peanuts, cilantro, and a drizzle of sweet chili sauce. It’s like a deconstructed spring roll.
Storage Instructions:
Refrigerator: Store in an airtight container for up to 3 days. The coating will soften slightly, but it’s still good.
Freezing: You can freeze the uncooked shrimp on a baking sheet, then transfer to a freezer bag. Cook from frozen, adding 2-3 minutes to the baking time. Do not freeze cooked shrimp—they become rubbery.
Reheating: Air fryer is best. 375°F for 3-4 minutes. Oven: 400°F for 5-7 minutes. Microwave: Not recommended.
Nutrition Information
I’m not a nutritionist, but here’s the breakdown if you’re tracking. This is per serving (based on 4 servings).
| Nutrient | Amount |
|---|---|
| Calories | 320 |
| Protein | 24g |
| Carbs | 28g |
| Fiber | 3g |
| Sugar | 12g |
| Fat | 12g |
| Sodium | 450mg |
What’s Good:
– High protein from the shrimp.
– Relatively low carb if you watch the coconut amount.
– Good source of calcium from the coconut.
What to Know:
– Higher in sugar due to the sweetened coconut.
– Contains gluten and coconut (allergen alert!).
– Moderate sodium.
My Take:
Look, this is a treat. It’s not a salad. But it’s way better than takeout, costs less, and I know exactly what’s in it. When I want to make it lighter, I use unsweetened coconut and reduce the panko. But usually? I just eat a reasonable portion and enjoy it.
Final Thoughts
So that’s my crispy baked coconut shrimp! I’ve probably talked your ear off at this point, but when you make a recipe this often, you have a lot to say about it.
This has saved weeknight dinners more times than I can count. It’s my answer to “what’s for dinner” when I’m tired, don’t want takeout, and still want something that tastes really good. My kids are happy, my husband’s happy, and I’m happy because I’m not stressed about cooking.
Make it yours! Try different add-ins, swap in your favorite vegetables, adjust the spice level. The best recipes are the ones you adapt to your family’s tastes.
If you make this, drop a comment and let me know what you think! I love hearing how recipes turn out in your kitchen. And if something doesn’t work, tell me that too—I’m here to help troubleshoot.
Happy cooking! And I hope your kitchen smells half as good as mine does right now.
Frequently Asked Questions
Can I use frozen shrimp?
Yes! Just make sure to thaw them completely in cold water and pat them VERY dry. Wet shrimp = soggy breading. If you don’t thaw them fully, the ice crystals will ruin the coating.
Why did my coconut burn?
Coconut burns quickly because of its natural oils and sugar content. If yours burned, your oven might be too hot, or you broiled it for too long. Keep an eye on the last 2 minutes of baking. If you see it browning too fast, cover it loosely with foil.
Can I make this ahead of time?
You can coat the shrimp and keep them on the baking sheet in the fridge for up to 4 hours before baking. Just cover them with plastic wrap. When you’re ready to cook, pop them in the oven. Don’t leave them coated for more than 4 hours, or the breading might get soggy.
What size shrimp should I use?
Large shrimp (21-25 count per pound) are ideal. They’re big enough to be a satisfying bite but small enough to cook evenly in the oven. If you use extra-large shrimp, just add 2-3 minutes to the cooking time.
Can I use unsweetened coconut?
Yes, but you’ll miss out on that caramelized, golden sweetness. If you use unsweetened, add 1-2 tablespoons of sugar to the panko mixture. It helps it brown better and adds that classic flavor.
How do I store leftovers?
Store in an airtight container in the fridge for up to 3 days. Reheat in an air fryer or oven to restore crispiness. Do not microwave, or they’ll get rubbery.
Pin This Recipe!
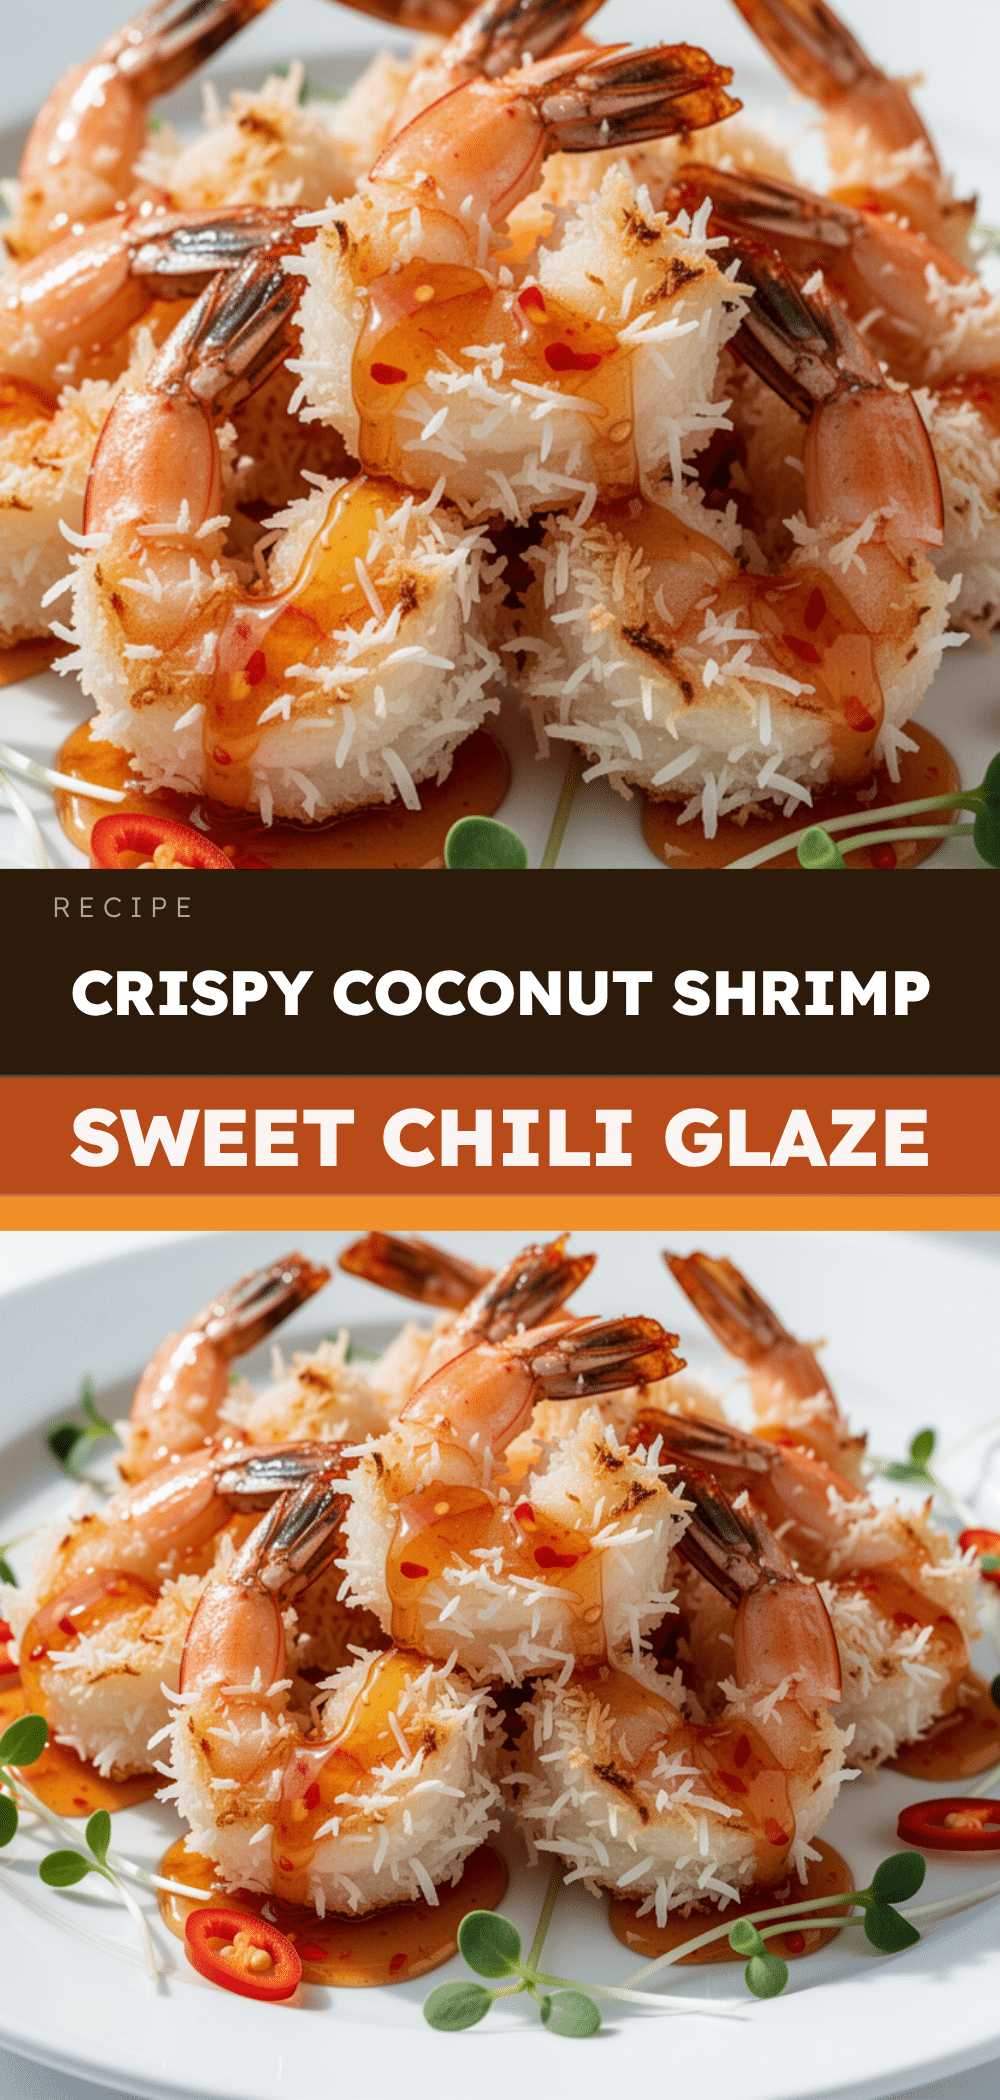
Crispy Baked Coconut Shrimp: 5-Step Dinner
- Total Time: 30 minutes
- Yield: 4 servings 1x
Description
A quick and easy weeknight dinner featuring shrimp coated in panko and sweetened coconut flakes, baked until golden and crispy. This recipe offers a healthier alternative to deep-fried takeout, ready in under 30 minutes.
Ingredients
- 1.5 lbs large shrimp (21–25 count), peeled and deveined
- 1 cup all-purpose flour
- 2 large eggs
- 1 tsp salt (for egg mixture)
- 1 tsp black pepper (for egg mixture)
- 1 cup panko breadcrumbs
- 1.5 cups shredded sweetened coconut flakes
- 1/2 cup Thai sweet chili sauce
- 1 tsp sriracha (optional, for spicy dip)
Instructions
- Preheat oven to 425°F (220°C). Line two standard baking sheets with parchment paper or silicone mats.
- If using frozen shrimp, thaw in cold water for 15-20 minutes. Pat shrimp completely dry with paper towels to ensure breading sticks.
- Set up a breading station with three shallow bowls: one with flour, one with whisked eggs and salt/pepper, and one with mixed panko and coconut flakes.
- Dredge each shrimp in flour, shaking off excess. Dip into the egg mixture, then roll in the panko-coconut mixture, pressing gently to adhere.
- Place coated shrimp on the prepared baking sheets, ensuring they are not crowded.
- Bake for 15-20 minutes, rotating pans halfway through, until shrimp are pink and coconut is golden brown and crispy.
- Optional: Broil for the last 1-2 minutes for extra crispiness, watching closely to prevent burning.
- Let rest for 2 minutes before serving immediately with Thai sweet chili sauce.
Notes
Patting the shrimp dry is crucial for crispiness. Use sweetened coconut for better caramelization; if using unsweetened, add sugar to the panko. For extra crispiness, place a wire rack on the baking sheet. Reheat in an air fryer or oven to restore crunch; do not microwave.
- Prep Time: 10 minutes
- Cook Time: 20 minutes
- Category: Main Course
- Cuisine: Asian Fusion
Nutrition
- Serving Size: Approximately 4-6 sh
- Calories: 320
- Sugar: 12
- Sodium: 450
- Fat: 12
- Carbohydrates: 28
- Fiber: 3
- Protein: 24
Keywords: coconut shrimp, baked shrimp, seafood dinner, weeknight meals, healthy takeout alternative, panko shrimp, easy recipes


