I have a confession to make. For years, I treated gluten-free baking like a punishment. You know the kind—the dry, crumbly, chalky disaster that falls apart if you look at it wrong. So when my sister-in-law went gluten-free, I panicked. I thought, “How am I supposed to make comfort food? How do I make the things that actually feel like a hug?”
Then came the Great Pot Pie Incident of 2019. I attempted a standard gluten-free flour blend crust. It was a mistake. It was tough. It was sad. My family politely ate three bites and then politely never mentioned it again. I was ready to give up. I was ready to just serve chicken and veggies in bowls and call it a day.
But last winter, I stumbled onto a trick that changed everything. Almond flour. Not just as a thickener, but as the star of the crust. I decided to skip the wheat entirely and build a crust that was actually flaky, buttery, and sturdy enough to hold a hot, creamy filling without turning into mush. I made it on a whim, half-expecting another failure.
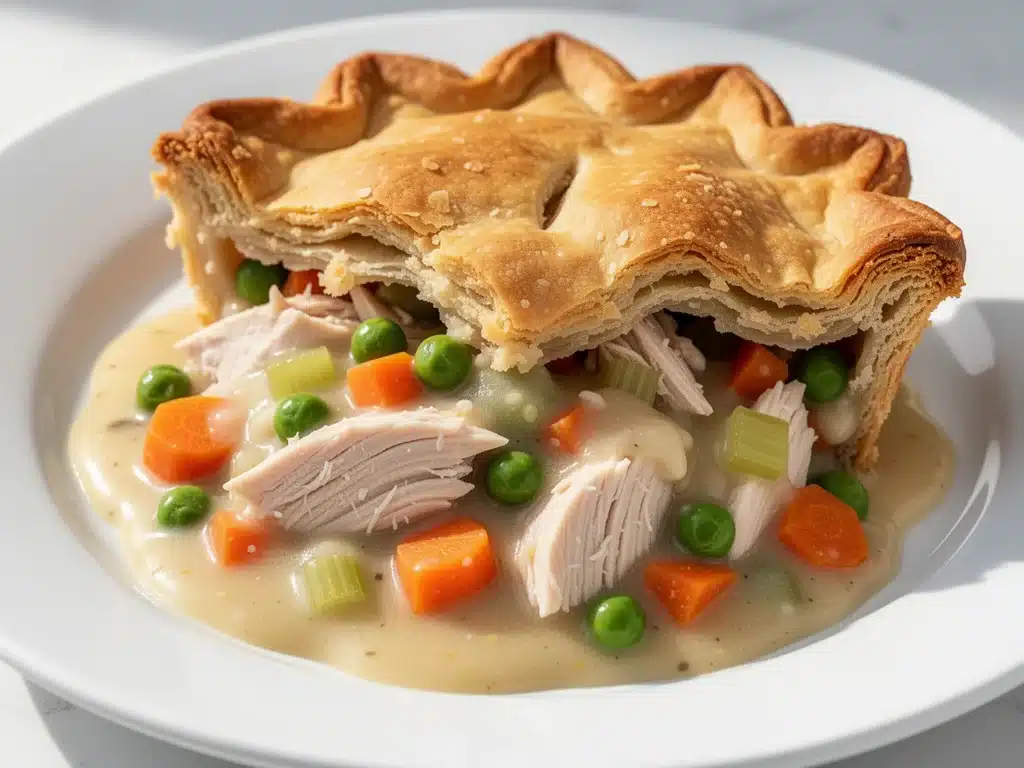
Instead, my husband took one bite, closed his eyes, and said, “This is better than the original.” I didn’t believe him until I made it again three days later. And again. Now, this gluten-free chicken pot pie with almond flour crust is our go-to when the weather turns cold and we need something that tastes like it came from a high-end bistro, not a diet book.
If you’ve been avoiding pot pie because you’re gluten-free, or if you’re just tired of crusts that taste like cardboard, you need to try this. It’s tender, it’s rich, and it’s honestly the best pie crust I’ve ever made—gluten-free or otherwise. Let me show you how to make it without the stress.
Why You’ll Love This Gluten-Free Chicken Pot Pie
There are about ten reasons I keep coming back to this recipe, but let’s be real. It’s not just about being gluten-free. It’s about the fact that this actually tastes incredible. Here’s why this dish has earned a permanent spot in our weekly rotation:
Crust That Actually Works — This is the big one. Traditional gluten-free crusts are often gummy or sandy. By using almond flour mixed with a touch of coconut flour and xanthan gum, you get a texture that’s genuinely flaky. It holds its shape when you cut it, but it crumbles beautifully in your mouth. I’ve tested this with three different GF flour blends, and the almond base wins every time.
No Weird Aftertaste — Some gluten-free flours leave a bitter, chemical finish. Almond flour is nutty and rich, which pairs perfectly with the savory chicken and herbs. You don’t taste the “free” part; you just taste the pie.
One-Pan Wonder — Once the crust is in the pan, you’re pretty much done. The filling cooks right on top. Cleanup is a breeze because you’re just washing one baking dish and a few bowls. This is crucial for weeknight dinners when I’m already exhausted.
Meal Prep Friendly — This freezes surprisingly well. I often double the recipe, freeze half the unbaked pie (crust and all), and bake it later. It’s my secret weapon for busy weeks. The leftovers are also amazing cold (okay, maybe not *that* amazing, but still good).
Protein-Packed — Between the chicken, the eggs in the crust, and the almonds, this isn’t just empty carbs. It’s a solid, filling meal that keeps you satisfied for hours. No 3 PM crash here.
So basically, this is comfort food that doesn’t make you feel guilty or hungry an hour later. It’s just good, honest food.
Ingredients You’ll Need for the Best GF Crust
Here’s the best part: you probably have most of this already. The beauty of this recipe is that it relies on whole foods, not a bag of mysterious chemical powders. I’m particular about three ingredients here, and I’ll tell you exactly why.
For the Almond Flour Crust
Almond Flour (2 cups / 200g) — This is non-negotiable. Do not use almond *meal* (which is coarser and has the skins on). You want fine, blanched almond flour. It creates that tender, cake-like texture. I buy mine from Bob’s Red Mill or make my own by pulsing blanched almonds in a food processor until fine. If it’s too oily, it won’t hold together.
Coconut Flour (2 tablespoons / 15g) — This is the secret weapon. Coconut flour is super absorbent. It soaks up the moisture from the eggs and butter, preventing the crust from being greasy or dense. Don’t skip it, and don’t substitute it with more almond flour, or it will be too soft.
Xanthan Gum (½ teaspoon) — Since we’re not using gluten, we need something to bind the dough. Xanthan gum acts like the gluten would, giving the crust elasticity and structure. If your almond flour blend already has xanthan gum in it, skip this. Check your label!
Unsalted Butter (½ cup / 115g, cold and cubed) — Cold butter is key. When it hits the hot oven, the water in the butter turns to steam, creating little pockets of air. This is what makes it flaky. Keep it in the fridge until the second you need it.
Egg (1 large, room temperature) — This binds everything together. Room temperature eggs incorporate easier into the fat, creating a smoother dough.
Salt (½ teaspoon) — Enhances the flavor. Don’t be shy here.
Ice Water (1-2 tablespoons) — Just enough to bring the dough together. Too much water makes it tough.
For the Filling
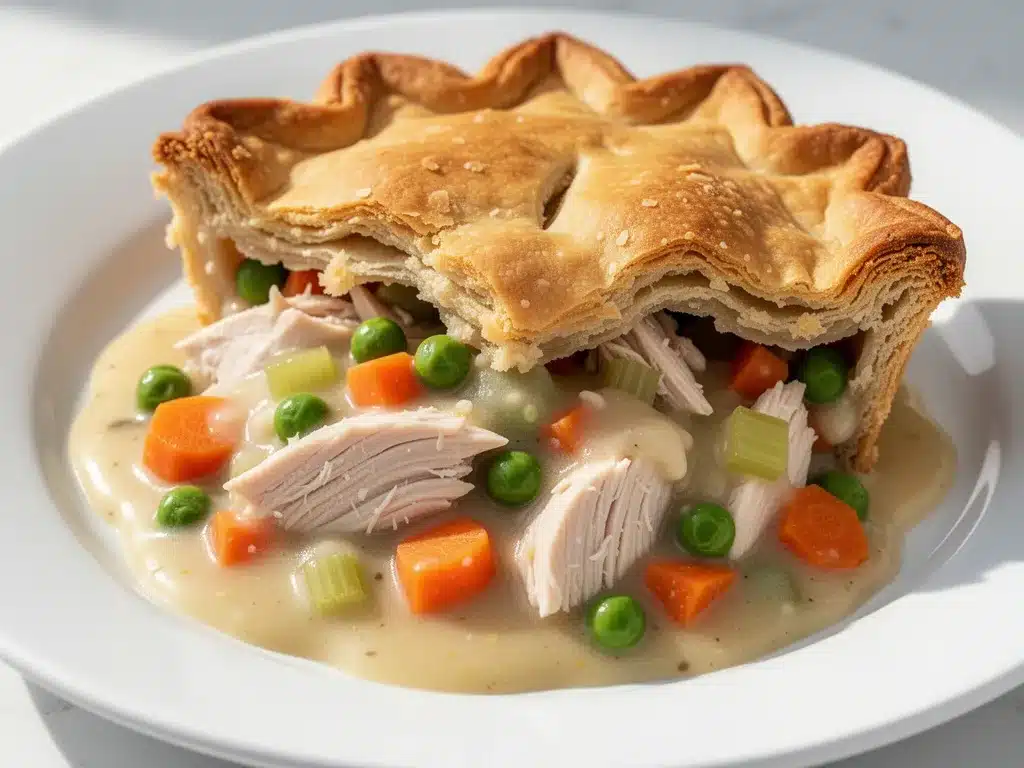
Chicken Breast (2 large breasts, about 1.5 lbs / 700g) — I poach mine in the broth for extra flavor. You can use rotisserie chicken to save time, but fresh poached chicken is juicier.
Butter (3 tablespoons) — For the roux. This thickens the sauce.
All-Purpose Gluten-Free Flour (3 tablespoons) — Wait, what? Yes. A tiny bit of GF all-purpose flour helps thicken the sauce better than almond flour alone. Use a 1:1 blend like King Arthur Measure for Measure.
Chicken Broth (2 cups / 480ml) — Low sodium so you can control the salt. Homemade is best, but good quality store-bought works fine.
Heavy Cream (1 cup / 240ml) — For richness. Half-and-half works if you want it lighter, but heavy cream gives that luxurious mouthfeel.
Vegetables — 1 cup frozen peas, 1 cup diced carrots, 1 cup diced potatoes. Classic combo. I like small dice so it’s easy to eat with a fork.
Herbs — 1 teaspoon dried thyme, 1 teaspoon dried parsley, salt, and black pepper. Fresh thyme is great if you have it, but dried is more potent for cooking.
Equipment Needed
You don’t need fancy equipment for this. Here’s what I actually use:
9-inch Pie Dish — Glass or ceramic works best. It heats evenly. I use a Pyrex dish because I can see the bottom browning.
Food Processor — This makes the crust a breeze. You can do it by hand with a pastry cutter, but it takes longer and warms the butter too much. The food processor keeps everything cold and quick.
Large Pot — For poaching the chicken and making the filling. A Dutch oven is perfect.
Whisk — Essential for the roux. You need to break up any lumps of flour immediately.
Rolling Pin — Or you can press the dough into the pan. I usually roll mine out between two sheets of parchment paper. It’s messy-free and easy to transfer.
How to Make It: Step-by-Step
Alright, let’s make this! I’m walking you through exactly how I do it, including the little tricks I’ve picked up so your crust doesn’t crack or fall apart.
Step 1: Poach the Chicken (15 minutes)
Start by placing your chicken breasts in a large pot. Cover them with chicken broth. Bring to a simmer (not a boil) over medium heat. Cover and cook for 12-15 minutes until the internal temperature reaches 165°F (74°C). Remove the chicken and let it rest on a cutting board for 10 minutes. Pro tip: Save the broth! You’ll need it for the sauce. Shred the chicken with two forks once it’s cool enough to handle.
Step 2: Make the Crust (10 minutes)
In a food processor, pulse the almond flour, coconut flour, xanthan gum, and salt. Add the cold, cubed butter. Pulse about 10-15 times until the mixture looks like coarse crumbs with some pea-sized pieces of butter remaining. Do not over-process, or the butter will melt and the crust will be tough.
Add the egg and pulse once to combine. Then, add ice water one tablespoon at a time, pulsing after each addition, until the dough starts to clump together. It should hold together when you pinch it. If it’s too dry, add another tablespoon of water. If it’s too sticky, add a sprinkle of almond flour.
Turn the dough out onto a sheet of plastic wrap. Form it into a disc, wrap it tightly, and refrigerate for at least 30 minutes. This is crucial. Cold dough is easier to handle and bakes better.
Step 3: Make the Filling (15 minutes)
While the crust chills, preheat your oven to 375°F (190°C). In a large pot or Dutch oven, melt the 3 tablespoons of butter over medium heat. Add the diced carrots and potatoes. Cook for 5 minutes, stirring occasionally, until they start to soften.
Whisk in the gluten-free all-purpose flour. Cook for 1 minute, stirring constantly, to cook off the raw flour taste. This is your roux.
Slowly pour in the reserved chicken broth (or fresh broth if you used it all for poaching) and the heavy cream. Whisk continuously to prevent lumps. Bring to a simmer and cook for 3-4 minutes until the sauce thickens enough to coat the back of a spoon.
Stir in the shredded chicken, frozen peas, thyme, parsley, salt, and pepper. Taste and adjust seasoning. The mixture should be creamy and chunky, not soupy. If it’s too thick, add a splash more broth.
Step 4: Assemble the Pie (10 minutes)
Remove the crust from the fridge. Place a sheet of parchment paper on your counter. Roll out the dough between two sheets of parchment paper to fit your 9-inch pie dish. It doesn’t need to be perfect; rustic is fine.
Remove the top sheet of parchment and carefully lift the dough by the bottom sheet, then invert it over the pie dish. Peel off the parchment. Gently press the dough into the dish, trimming the edges to hang slightly over the rim. Pour the filling into the crust.
For a top crust, roll out a second disc of dough and place it on top. Cut slits in the top to let steam escape. For a rustic open-faced style (which I love), just leave it open. If you’re doing a top crust, crimp the edges with your fingers or a fork.
Step 5: Bake (45-50 minutes)
Place the pie on a baking sheet (to catch any drips) and bake at 375°F (190°C) for 45-50 minutes. The crust should be golden brown, and the filling should be bubbling vigorously in the center. Note: Almond flour browns faster than wheat flour. If the top is getting too dark after 30 minutes, tent it loosely with aluminum foil.
Let the pie cool for at least 20 minutes before cutting. This allows the filling to set. If you cut it hot, it will be runny.
Expert Tips & Tricks
Here’s everything I’ve learned from making this dozens of times. These tips will save you from my mistakes.
Don’t Skip the Chill — I know you’re hungry. But if you skip chilling the dough, it will crack and tear when you roll it out. Cold butter = flaky crust. It’s physics.
Use a Baking Sheet — Pot pie filling can bubble over. Always put your pie dish on a rimmed baking sheet. It saves your oven floor from a sticky mess.
Check the Doneness — The crust is done when it’s deep golden brown. The filling is done when it’s bubbling. Use a thermometer to check the internal temp of the pie; it should be at least 165°F.
Leftover Crust? — You might have a little extra dough. Press it into a muffin tin, add some extra filling, and make mini pot pies! They bake in 25 minutes and are perfect for lunch.
Thickening Issues — If your filling is still too thin after baking, it’s okay. It will thicken as it cools. If it’s still soupy the next day, you can add a slurry of cornstarch and water next time.
Variations & Substitutions
Once you’ve nailed the basic version, here’s how you can mix it up. I’ve tried all of these.
Turkey Pot Pie — Swap chicken for shredded turkey. Great for using up holiday leftovers.
Veggie-Loaded — Add chopped mushrooms, celery, or green beans. Mushrooms add a great earthy flavor that mimics the “meatiness” of chicken.
Herb Garden — Swap thyme for rosemary and sage. This gives it a more robust, wintery flavor profile.
Spicy Kick — Add a pinch of cayenne pepper or red pepper flakes to the filling. It cuts through the richness of the cream.
Dairy-Free Option — Use coconut oil instead of butter in the crust, and coconut milk instead of heavy cream in the filling. It tastes slightly coconutty, but it works!
Serving & Storage
How to Serve: I usually serve this straight from the skillet at the dinner table—it looks rustic and stays warm. Pair it with a simple green salad with balsamic vinaigrette to cut the richness. Garlic bread is optional (since we’re already having pie), but if you’re not gluten-free, serve it with crusty bread for dipping.
Refrigerator: Store leftovers in an airtight container for up to 4 days. The crust will soften slightly in the fridge, which is normal.
Reheating: Best method: Oven or toaster oven at 350°F for 15-20 minutes. This keeps the crust crispy. Microwave works in a pinch (30-60 seconds), but the crust will get chewy. Do not microwave for too long, or the almond flour will turn rubbery.
Freezing: You can freeze the unbaked pie for up to 3 months. Wrap it tightly in plastic and foil. Bake from frozen, adding 15-20 minutes to the cooking time. Cooked leftovers also freeze well, though the texture changes slightly.
Nutrition Information
I’m not a nutritionist, but here’s the breakdown if you’re tracking. This is a richer dish due to the almond flour and cream.
Per serving (based on 8 servings):
- Calories: ~450
- Protein: 25g
- Carbs: 12g
- Fiber: 4g
- Fat: 32g
- Sodium: 600mg
It’s high in protein and healthy fats from the almonds, and lower in carbs than a traditional pot pie. It’s a satisfying meal that won’t spike your blood sugar as much as a wheat-based crust would.
Final Thoughts
So that’s my go-to gluten-free chicken pot pie! I’ve probably talked your ear off at this point, but when you make a recipe this often, you have a lot to say about it. This pie has saved weeknight dinners more times than I can count. It’s my answer to “what’s for dinner” when I’m tired, don’t want takeout, and still want something that tastes really good.
Make it yours! Try different add-ins, swap in your favorite vegetables, adjust the herbs. The best recipes are the ones you adapt to your family’s tastes. If you make this, drop a comment and let me know what you think! I love hearing how recipes turn out in your kitchen. And if something doesn’t work, tell me that too—I’m here to help troubleshoot.
Happy cooking! And I hope your kitchen smells half as good as mine does right now.
Frequently Asked Questions
Can I use almond meal instead of almond flour?
You can, but the texture will be different. Almond meal is coarser and has the skins on, which can make the crust gritty and speckled. For a smoother, more tender crust, stick with blanched almond flour. If you only have almond meal, pulse it in a food processor for a minute to break it down.
Why did my crust crack?
Almond flour dough is more fragile than wheat dough. It usually cracks because the dough was too dry or you handled it too much. Make sure you add enough ice water, and handle it as little as possible. Rolling it between parchment paper also helps prevent cracking.
Can I make this ahead of time?
Yes! You can assemble the pie up to 24 hours ahead. Keep it covered in the fridge. When you’re ready to bake, you might need to add 5-10 minutes to the baking time since the filling will be cold.
Why is my filling runny?
This usually happens if you didn’t cook the roux long enough or if you added too much liquid. Make sure the sauce thickens before you pour it into the crust. Also, let the pie cool for at least 20 minutes after baking. The filling continues to set as it cools.
Can I freeze the baked pie?
You can, but the crust might lose some flakiness. It’s better to freeze the unbaked pie. If you must freeze the baked pie, wrap it tightly and reheat in the oven to restore some crispiness.
What if I don’t have xanthan gum?
Xanthan gum helps bind the dough. If you don’t have it, you can try adding an extra egg yolk, which adds binding power. However, the crust may be more crumbly. Alternatively, use a gluten-free flour blend that already contains xanthan gum for the almond flour portion (though this will change the flavor slightly).
Pin This Recipe!

Gluten-Free Chicken Pot Pie: 5 Easy Almond Flour Crust
- Total Time: 85-90 minutes
- Yield: 8 servings 1x
Description
A rich and comforting chicken pot pie featuring a flaky, buttery crust made from almond flour and coconut flour, eliminating the need for traditional wheat-based dough.
Ingredients
- 2 cups (200g) fine blanched almond flour
- 2 tablespoons (15g) coconut flour
- 1/2 teaspoon xanthan gum
- 1/2 teaspoon salt
- 1/2 cup (115g) unsalted butter, cold and cubed
- 1 large egg, room temperature
- 1–2 tablespoons ice water
- 2 large chicken breasts (about 1.5 lbs / 700g)
- 2 cups (480ml) low-sodium chicken broth
- 3 tablespoons butter
- 3 tablespoons all-purpose gluten-free flour
- 1 cup (240ml) heavy cream
- 1 cup frozen peas
- 1 cup diced carrots
- 1 cup diced potatoes
- 1 teaspoon dried thyme
- 1 teaspoon dried parsley
- Black pepper to taste
Instructions
- Poach chicken breasts in chicken broth over medium heat for 12-15 minutes until internal temperature reaches 165°F. Remove, let rest for 10 minutes, then shred. Reserve the broth.
- In a food processor, pulse almond flour, coconut flour, xanthan gum, and salt. Add cold cubed butter and pulse 10-15 times until mixture resembles coarse crumbs.
- Add the egg and pulse once. Add ice water one tablespoon at a time, pulsing after each addition, until dough clumps together.
- Turn dough onto plastic wrap, form into a disc, wrap tightly, and refrigerate for at least 30 minutes.
- Preheat oven to 375°F (190°C). In a large pot, melt 3 tablespoons butter over medium heat. Add diced carrots and potatoes; cook for 5 minutes until softened.
- Whisk in gluten-free all-purpose flour and cook for 1 minute to create a roux.
- Slowly whisk in reserved chicken broth and heavy cream. Simmer for 3-4 minutes until sauce thickens.
- Stir in shredded chicken, peas, thyme, parsley, salt, and pepper. Adjust seasoning.
- Roll out chilled dough between parchment paper to fit a 9-inch pie dish. Press into dish and pour in filling.
- Top with a second layer of dough (optional) or leave open-faced. Cut slits in top crust to vent steam.
- Place pie on a baking sheet and bake at 375°F for 45-50 minutes until crust is golden brown and filling is bubbling. Tent with foil if browning too quickly.
- Let cool for at least 20 minutes before cutting to allow filling to set.
Notes
Ensure butter is very cold for a flaky crust. Do not skip the chilling step for the dough. If the crust browns too quickly, tent with foil. The filling will thicken as it cools, so allow at least 20 minutes cooling time before slicing.
- Prep Time: 40 minutes
- Cook Time: 45-50 minutes
- Category: Main Course
- Cuisine: American
Nutrition
- Serving Size: 1 slice
- Calories: 450
- Sugar: 3
- Sodium: 600
- Fat: 32
- Saturated Fat: 14
- Carbohydrates: 12
- Fiber: 4
- Protein: 25
Keywords: gluten-free, chicken pot pie, almond flour crust, keto friendly, comfort food, dairy-free option, meal prep


