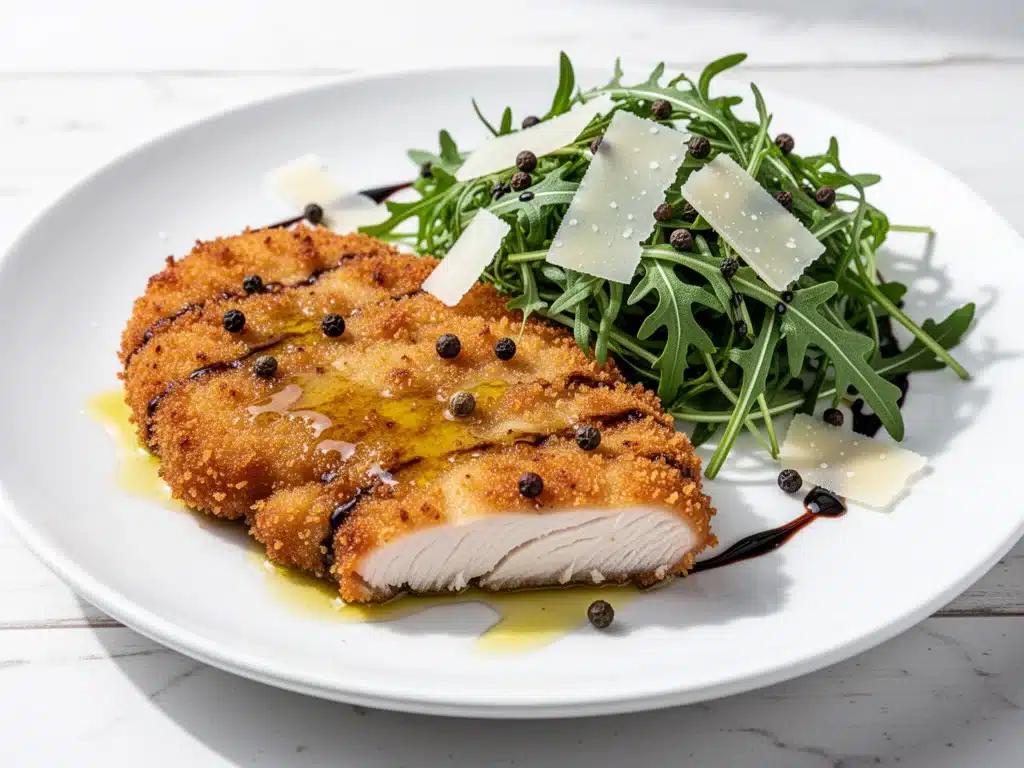
Last November, I was tasked with the ultimate test: cooking dinner for my husband’s parents, who are, to put it mildly, critical eaters. His dad thinks ketchup is a condiment for everything except ice cream (thankfully), and his mom has a PhD in finding flaws in my cooking. I didn’t want to make lasagna (too heavy) or roast chicken (too boring). I wanted something that looked fancy, tasted incredible, and—most importantly—had a texture that would shut them up.
That’s when I made the decision to go all-in on crispy panko crusted chicken Milanese. I’ve made this dish probably fifty times since then, and let me tell you: it is the single most impressive dinner you can pull off in under 30 minutes. It’s not just chicken. It’s a crispy, golden, garlicky, lemony masterpiece that feels like you spent hours in the kitchen, even though you’re really just breading, frying, and smiling nervously at your guests.
The secret isn’t just the chicken. It’s the panko. Regular breadcrumbs are fine, but panko? Panko is flaky, airy, and creates that shatteringly crisp crust that makes you stop mid-chew to appreciate it. I’ve tried every variation—some people use crushed crackers, some use crushed cornflakes—but once you go panko, there is no going back. The texture is just superior.
I remember the first time I made this for my in-laws. I was sweating over the stove, worried the oil would splatter or the breading would burn. But then I heard the crunch. You know that sound? That deep, satisfying *crunch* when you cut into something perfectly fried? His mom put down her fork, looked at me, and said, “This is restaurant quality.” I didn’t say anything, but internally, I was doing a little dance. That moment cemented this recipe as a permanent fixture in my weekly rotation. It’s my go-to for date nights, Sunday suppers, and whenever I need to feel like a culinary genius without actually trying very hard.
Why You’ll Love This Crispy Panko Crusted Chicken Milanese
There are a lot of chicken recipes out there. Some are healthy, some are quick, some are cheap. But this crispy panko crusted chicken Milanese hits a sweet spot that few other dishes manage. It’s not just about taste; it’s about the experience of eating it. Here’s why this recipe has stolen the show in my kitchen:
- The Crunch Factor is Unmatched — I’m not exaggerating when I say this crust is audible. Panko breadcrumbs are larger and drier than standard breadcrumbs, which means they absorb less oil and stay crispier. You get that shattering crunch with every bite, followed by the tender, juicy chicken underneath. It’s the contrast that makes people close their eyes.
- It Feels Fancy (But Isn’t) — Milanese is a classic Italian dish that screams “fancy dinner party.” But the ingredients? Flour, eggs, panko, chicken breast, butter, olive oil. You probably have all of this in your kitchen right now. It’s a low-effort, high-reward recipe that makes you look like you went to culinary school.
- Ready in 20 Minutes — From start to finish, this takes about 20 minutes. That’s 5 minutes of prep, 10 minutes of frying, and 5 minutes of plating. It’s faster than ordering takeout, and it tastes 100 times better. I make this on weeknights when I want something special but don’t have the energy to chop a dozen vegetables.
- Perfect for Leftovers (If You Have Any) — And you probably won’t. But if you do, the chicken is great cold or reheated in the oven to keep it crispy. It’s also amazing in sandwiches the next day. I’ve even put leftover Milanese on top of salads for lunch. It’s versatile like that.
- Customizable to Your Tastes — Want it spicier? Add cayenne to the flour. Want it herby? Mix dried oregano and thyme into the panko. Want to serve it with something other than pasta? Go for it. This recipe is a blank canvas for your creativity.
This isn’t just a recipe; it’s a confidence booster. Every time I make this, I feel like I’m in control. The kitchen smells amazing, the food looks beautiful, and everyone at the table is happy. That’s the kind of dinner I live for.
Ingredients You’ll Need
One of the best things about this crispy panko crusted chicken Milanese is how simple the ingredient list is. You don’t need anything obscure or hard to find. Here’s what you’ll need to make magic happen:
For the Chicken:
Chicken Breasts (2 large, about 1.5 lbs / 680g) — I prefer boneless, skinless chicken breasts because they cook evenly and are easy to pound thin. If you can’t find large ones, use 4 smaller ones. Just make sure they’re all roughly the same size so they cook at the same rate.
Panko Breadcrumbs (2 cups / 160g) — This is non-negotiable. Use Japanese-style panko for the best crunch. Regular breadcrumbs will make the crust dense and soggy. I buy a big bag of it and keep it in the pantry because I use it for everything from fried pickles to this chicken.
All-Purpose Flour (1 cup / 120g) — Just plain old flour. It helps the egg wash stick to the chicken. Don’t skip this step, or your breading will slide right off in the pan.
Eggs (2 large) — Beaten until smooth. I whisk them with a fork until there are no streaks of white left. Some people add a splash of milk or cream, but I like it plain so the egg flavor doesn’t overpower the chicken.
Salt and Black Pepper — To taste. I season the flour, the eggs, and the panko. This ensures every layer of the crust has flavor. Don’t just salt the chicken; salt everything.
Garlic Powder (1 teaspoon) — Optional, but I highly recommend it. It adds a subtle savory depth that complements the garlic in the sauce. If you don’t have it, use fresh minced garlic, but be careful not to burn it.
For Cooking and Serving:
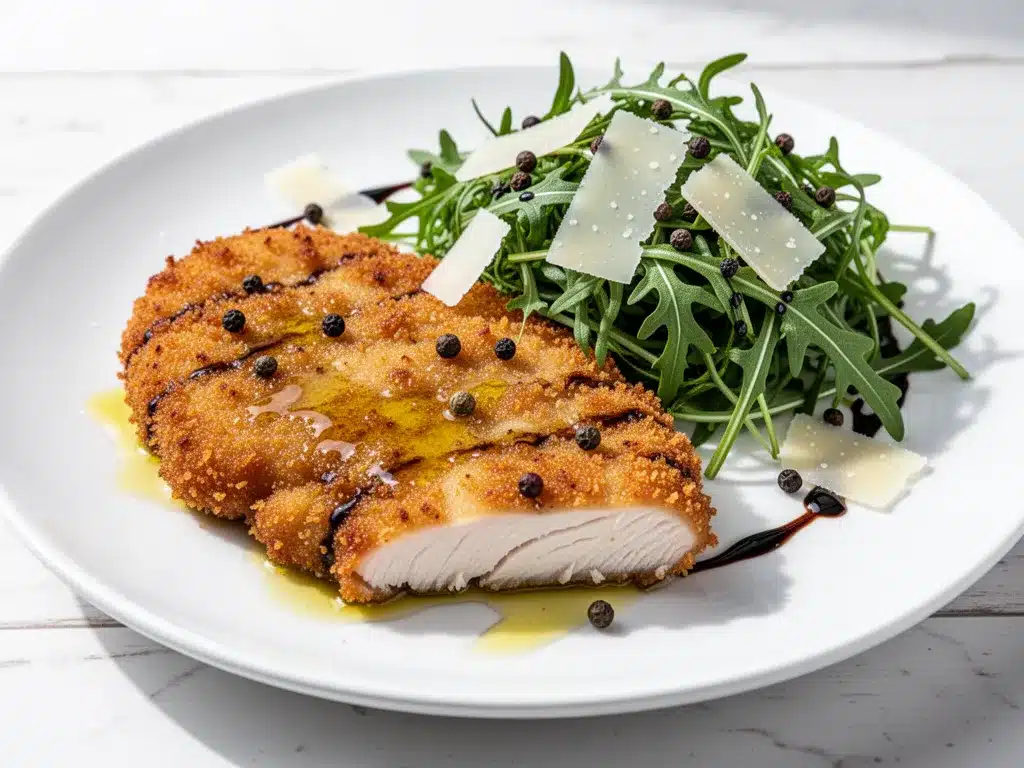
Olive Oil (3 tablespoons) — I use extra virgin olive oil for the frying. It has a lower smoke point than some other oils, but it adds a beautiful fruity flavor that pairs perfectly with the chicken. If you’re worried about burning, mix it with a neutral oil like canola.
Unsalted Butter (2 tablespoons) — Added at the end of cooking to baste the chicken. It adds richness and helps the crust turn a beautiful golden brown. I use unsalted so I can control the sodium.
Garlic (2 cloves, minced) — For the lemon butter sauce. Fresh garlic is a must here. Jarred garlic tastes metallic and won’t give you the bright, fresh flavor you need.
Lemon (1 large) — You’ll need the juice of one lemon and a few slices for garnish. The acidity cuts through the richness of the fried chicken and butter, balancing the whole dish. Don’t skimp on the lemon; it’s the star of the show.
Fresh Parsley (2 tablespoons, chopped) — For garnish. It adds a pop of color and a fresh, herbaceous note. If you don’t have parsley, basil or chives work too, but parsley is the traditional choice.
Optional: Parmesan Cheese (¼ cup, grated) — Some people mix Parmesan into the panko for extra umami. I don’t usually do this because I want the panko flavor to shine, but if you’re a cheese lover, go for it.
Equipment Needed
You don’t need a fancy kitchen to make this crispy panko crusted chicken Milanese. Here’s the gear I actually use:
Large Skillet — I use a 12-inch stainless steel skillet. It holds heat well and allows me to cook two cutlets at a time. Cast iron is great too, but stainless steel is easier to clean. Non-stick works, but you won’t get as nice of a crust because the breading doesn’t stick as well.
Meat Mallet or Rolling Pin — You need to pound the chicken breasts thin. A meat mallet is ideal because it’s flat and easy to use. If you don’t have one, a heavy-bottomed pan or a rolling pin works fine. Just be gentle; you want to flatten the chicken, not shred it.
Three Shallow Bowls — For the breading station. One for flour, one for eggs, one for panko. I use shallow pie dishes or wide bowls because they make it easier to dredge the chicken without making a mess.
Tongs — For flipping the chicken. I prefer tongs over a spatula because they give me better control and don’t scrape off the breading. A fork works too, but tongs are safer and easier.
Cutting Board — For pounding the chicken and slicing the lemon. I use a large plastic board because it’s easy to sanitize and doesn’t dull my knives.
Wire Rack — Optional, but recommended. I place the fried chicken on a wire rack set over a baking sheet to keep it crisp. If you put it on a plate, the steam will make the bottom soggy. I learned this the hard way.
How to Make It: Step-by-Step
Alright, let’s make this! I’m walking you through exactly how I do it, including the little tricks I’ve picked up over the years.
Step 1: Prep the Chicken (5 minutes)
Start by placing the chicken breasts between two sheets of plastic wrap or in a heavy-duty ziplock bag. Use your meat mallet or rolling pin to pound them until they are about ¼-inch thick. This is crucial. Thin chicken cooks faster and more evenly, and it’s easier to eat. Don’t worry if they tear a little; it’s fine. Just try to keep them in one piece.
Season the chicken generously with salt and pepper on both sides. This helps the seasoning penetrate the meat.
Step 2: Set Up the Breading Station (3 minutes)
Get your three bowls ready. In the first bowl, mix the flour with a pinch of salt, pepper, and garlic powder. In the second bowl, beat the eggs until smooth. In the third bowl, spread out the panko breadcrumbs. I like to mix a little salt and pepper into the panko too, just for extra flavor.
Step 3: Dredge the Chicken (5 minutes)
This is where the magic happens. Take a piece of chicken and dredge it in the flour, shaking off any excess. Then dip it into the egg wash, making sure it’s fully coated. Finally, press it into the panko breadcrumbs. Use your hands to press the crumbs onto the chicken, ensuring an even, thick coating. Don’t be shy; you want a good layer of crust.
Place the breaded chicken on a plate and repeat with the remaining pieces. If you’re frying in batches, you can leave the breaded chicken on the plate while you cook the first batch.
Step 4: Fry the Chicken (10 minutes)
Heat the olive oil in your large skillet over medium-high heat. You want the oil to be hot but not smoking. A good test is to drop a few panko crumbs into the oil; if they sizzle and turn golden in about 30 seconds, you’re ready.
Add the chicken cutlets to the pan. Don’t overcrowd the pan; cook two at a time if your skillet is small. Fry for about 3-4 minutes on each side, until the crust is deep golden brown and crispy. Flip only once to keep the crust intact.
Once the chicken is cooked through (internal temperature of 165°F / 74°C), transfer it to a wire rack to drain. This keeps the bottom crisp. Don’t put it on a paper towel; that will trap steam and make it soggy.
Step 5: Make the Lemon Garlic Butter Sauce (3 minutes)
In the same skillet, reduce the heat to medium-low. Add the butter and let it melt. Add the minced garlic and cook for 30 seconds, stirring constantly. Don’t let the garlic brown; you just want it fragrant.
Remove the skillet from the heat and stir in the lemon juice. The sauce will bubble and thicken slightly. Taste and add a pinch of salt if needed.
Step 6: Serve (2 minutes)
Place the fried chicken on a serving platter. Spoon the lemon garlic butter sauce over the top. Garnish with fresh parsley and lemon slices. Serve immediately while the chicken is still hot and crispy.
Total time: About 20 minutes. Active time: 15 minutes.
Expert Tips & Tricks
Here’s everything I’ve learned from making this dozens of times. These tips will save you from my mistakes.
Keep the Oil Temperature Steady
If the oil is too hot, the panko will burn before the chicken cooks. If it’s too cool, the chicken will absorb too much oil and become greasy. Medium-high heat is the sweet spot. If you see the breading turning dark brown too quickly, lower the heat slightly.
Pound Evenly
I can’t stress this enough. Uneven chicken means uneven cooking. Some parts will be raw, others will be dry. Use your meat mallet to get them all to the same thickness. It takes an extra minute, but it’s worth it.
Don’t Skip the Wire Rack
I know it’s an extra step, but it makes a huge difference. The wire rack allows air to circulate around the chicken, keeping the crust crisp. If you don’t have a rack, place the chicken on a cooling rack set over a baking sheet.
Use Fresh Lemon Juice
Don’t use bottled lemon juice. It tastes flat and artificial. Fresh lemon juice has a bright, vibrant flavor that elevates the entire dish. If you’re out of lemons, a splash of white wine vinegar works in a pinch, but fresh lemon is best.
Make-Ahead Strategy
You can bread the chicken up to 4 hours ahead and store it in the fridge. Just cover it with plastic wrap. When you’re ready to cook, let it sit at room temperature for 10 minutes before frying. This ensures even cooking.
Variations & Substitutions
Once you’ve nailed the basic version, here’s how you can mix it up. I’ve tried all of these.
Spicy Milanese
Add 1 teaspoon of red pepper flakes to the panko breadcrumbs. Or, mix in some cayenne pepper to the flour. This gives the chicken a nice kick that pairs well with the lemon sauce.
Herb-Crusted
Mix 1 tablespoon of dried Italian seasoning or fresh chopped herbs (parsley, thyme, rosemary) into the panko. This adds a fragrant, earthy flavor that complements the garlic butter.
Gluten-Free
Use gluten-free flour and gluten-free panko breadcrumbs. Many brands make great gluten-free panko now. The texture might be slightly different, but it’s still delicious.
Pork Milanese
Substitute the chicken breasts with pork loin cutlets. Pound them thin and follow the same breading and frying process. Pork pairs beautifully with lemon and garlic too.
Veggie Option
You can use this same breading method for eggplant slices or zucchini. Just salt the vegetables first to draw out moisture, then pat dry before breading. Fry until golden. It’s a great vegetarian alternative.
Serving & Storage
This crispy panko crusted chicken Milanese is best served immediately. The crust is at its crispiest right out of the pan.
How to Serve
I usually serve this with a simple arugula salad tossed with lemon vinaigrette, or with some angel hair pasta topped with a little parmesan. It also goes well with roasted potatoes or steamed asparagus. The key is to keep the sides simple so the chicken can shine.
For a fancy presentation, garnish with extra lemon slices and fresh parsley. I also like to serve it with a side of marinara sauce for dipping, if your guests are into that.
Storage Instructions
Store leftovers in an airtight container in the fridge for up to 3 days. The crust will soften over time, which is the downside of fried food.
Reheating
Don’t microwave it. That will make the crust soggy. Instead, reheat in the oven at 400°F (200°C) for 10-12 minutes, or in an air fryer at 375°F (190°C) for 5-7 minutes. This will help restore the crispiness. You can also reheat it in a skillet over medium heat, but it takes longer.
Freezing
You can freeze the breaded, uncooked chicken. Place the breaded cutlets on a baking sheet and freeze until solid, then transfer to a freezer bag. They’ll keep for up to 3 months. Fry from frozen, adding a couple of minutes to the cooking time.
Do not freeze the cooked chicken. The texture will be terrible.
Nutrition Information
I’m not a nutritionist, but here’s the breakdown if you’re tracking. Keep in mind that this is a fried dish, so it’s higher in calories and fat than a baked chicken breast.
| Per Serving (1 cutlet + sauce) | Amount |
|---|---|
| Calories | 450 |
| Protein | 35g |
| Carbs | 25g |
| Fat | 22g |
| Saturated Fat | 6g |
| Cholesterol | 120mg |
| Sodium | 400mg |
Look, this is comfort food. It’s crispy, rich, and delicious. It’s not a diet recipe. But it’s way better than takeout, and you control the ingredients. When I want to make it lighter, I use less oil and skip the butter sauce, but usually? I just enjoy it and move on.
Final Thoughts
So that’s my go-to crispy panko crusted chicken Milanese! I’ve probably talked your ear off at this point, but when you make a recipe this often, you have a lot to say about it.
This dish has saved weeknight dinners more times than I can count. It’s my answer to “what’s for dinner” when I want something special but don’t have hours to spend in the kitchen. My family is happy, my guests are impressed, and I’m happy because I’m not stressed about cooking.
Make it yours! Try different herbs, add some spice, or serve it with your favorite sides. The best recipes are the ones you adapt to your family’s tastes.
If you make this, drop a comment and let me know what you think! I love hearing how recipes turn out in your kitchen. And if something doesn’t work, tell me that too—I’m here to help troubleshoot.
Happy cooking! And I hope your kitchen smells half as good as mine does right now.
Frequently Asked Questions
Can I use regular breadcrumbs instead of panko?
You can, but the texture will be different. Regular breadcrumbs are finer and denser, so the crust won’t be as light and crispy. Panko is specifically designed to stay crunchy. If you must use regular breadcrumbs, try to crush them a bit to make them flakier, but I really recommend getting panko.
Why did my breading fall off the chicken?
This usually happens if the chicken wasn’t dry before breading, or if you didn’t press the breadcrumbs on firmly enough. Make sure to pat the chicken dry with paper towels before dredging in flour. Also, press the panko onto the chicken with your hands to ensure it sticks. If the breading is still loose, you can refrigerate the breaded chicken for 10 minutes before frying to help it set.
Can I bake this instead of frying?
You can, but it won’t be as crispy. If you want to bake it, place the breaded chicken on a wire rack over a baking sheet. Spray it lightly with olive oil spray and bake at 400°F (200°C) for 15-20 minutes, flipping halfway through. It will be healthier, but the crust won’t have that deep-fried crunch. For the best results, fry it.
How do I know when the oil is the right temperature?
If you don’t have a thermometer, drop a few panko crumbs into the oil. If they sizzle and turn golden in about 30 seconds, the oil is ready. If they sink to the bottom and don’t sizzle, it’s too cold. If they burn immediately, it’s too hot.
Can I make the lemon sauce ahead of time?
Yes, you can make the lemon butter sauce ahead of time and store it in the fridge. Reheat it gently in a small saucepan over low heat before serving. Just be careful not to boil it, or the butter might separate.
What cuts of chicken work best?
Boneless, skinless chicken breasts are the standard, but you can also use chicken thighs. Thighs are juicier and more flavorful, but they’re thicker, so you’ll need to pound them thinner. Just be aware that thigh meat has more fat, so it might cook a bit differently.
Can I use this method for fish?
Absolutely! This breading method works great for fish fillets like cod, tilapia, or salmon. Just reduce the frying time to 2-3 minutes per side, as fish cooks much faster than chicken. The lemon butter sauce pairs perfectly with fish too.
Pin This Recipe!
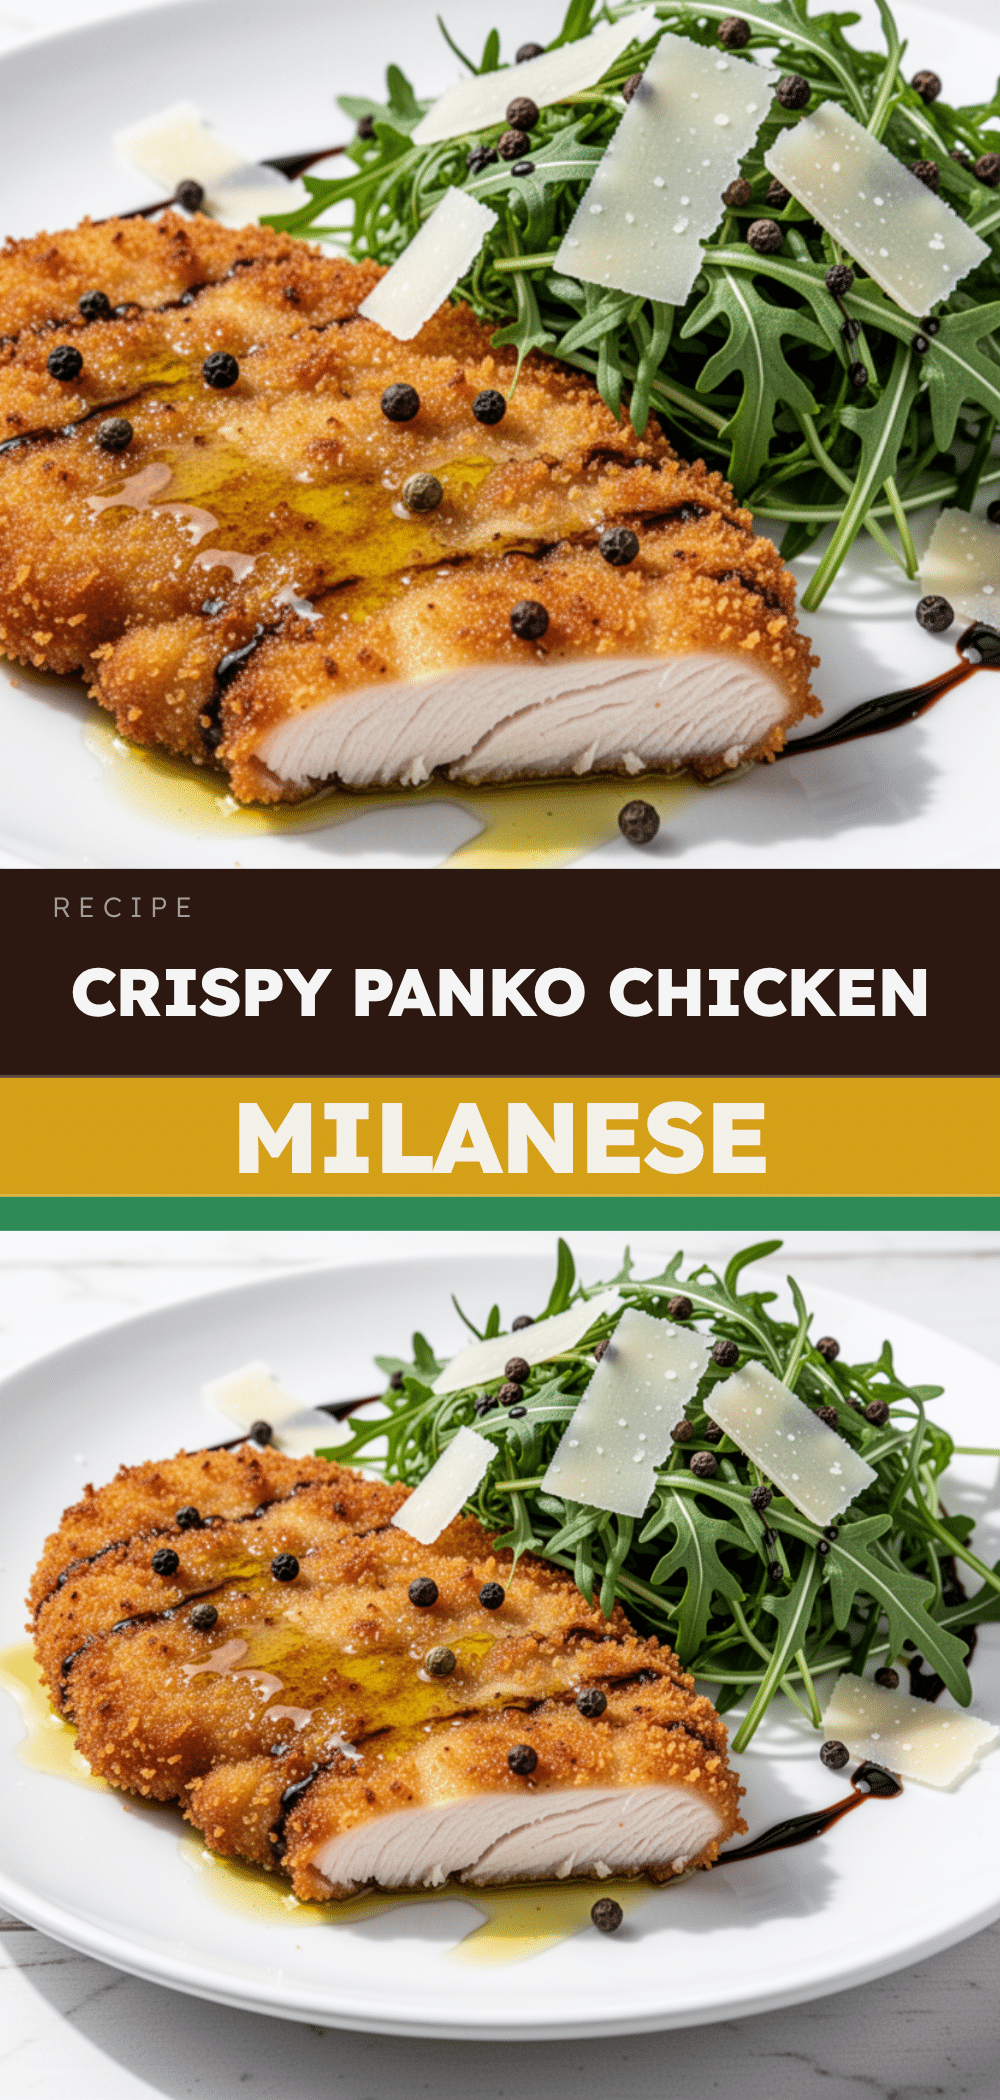
Crispy Panko Crusted Chicken Milanese
- Total Time: 20 minutes
- Yield: 4 servings 1x
Description
A quick, impressive, and crispy chicken dish featuring a shatteringly crisp panko crust and a bright lemon garlic butter sauce, ready in under 30 minutes.
Ingredients
- 2 large boneless, skinless chicken breasts (about 1.5 lbs / 680g)
- 2 cups Japanese-style panko breadcrumbs (160g)
- 1 cup all-purpose flour (120g)
- 2 large eggs, beaten
- Salt and black pepper, to taste
- 1 teaspoon garlic powder
- 3 tablespoons extra virgin olive oil
- 2 tablespoons unsalted butter
- 2 cloves garlic, minced
- 1 large lemon (juice and slices for garnish)
- 2 tablespoons fresh parsley, chopped
- Optional: ¼ cup grated Parmesan cheese
Instructions
- Place chicken breasts between plastic wrap or in a ziplock bag and pound to ¼-inch thickness using a meat mallet or rolling pin.
- Season chicken generously with salt and pepper on both sides.
- Set up a breading station with three shallow bowls: one with flour mixed with salt, pepper, and garlic powder; one with beaten eggs; and one with panko breadcrumbs mixed with salt and pepper.
- Dredge each chicken cutlet in flour, shaking off excess, then dip into the egg wash, and finally press firmly into the panko breadcrumbs to ensure an even coating.
- Heat olive oil in a large skillet over medium-high heat until hot but not smoking.
- Fry chicken cutlets in batches (do not overcrowd) for 3-4 minutes per side until deep golden brown and crispy. Ensure internal temperature reaches 165°F (74°C).
- Transfer fried chicken to a wire rack set over a baking sheet to keep the crust crisp.
- In the same skillet, reduce heat to medium-low and melt butter. Add minced garlic and cook for 30 seconds until fragrant.
- Remove skillet from heat and stir in lemon juice to create the sauce.
- Serve chicken immediately, spooning the lemon garlic butter sauce over the top and garnishing with fresh parsley and lemon slices.
Notes
For best results, use Japanese-style panko for maximum crunch. Pound chicken evenly to ensure consistent cooking. Do not put fried chicken on paper towels as it traps steam and makes the crust soggy; use a wire rack instead. For a gluten-free version, use gluten-free flour and panko. Leftovers can be reheated in the oven or air fryer to restore crispiness.
- Prep Time: 15 minutes
- Cook Time: 10 minutes
- Category: Main Course
- Cuisine: Italian
Nutrition
- Serving Size: 1 cutlet with sauce
- Calories: 450
- Sugar: 1
- Sodium: 400
- Fat: 22
- Saturated Fat: 6
- Carbohydrates: 25
- Protein: 35
Keywords: chicken milanese, panko chicken, crispy chicken, easy dinner, lemon garlic butter, weeknight dinner, Italian chicken recipe


