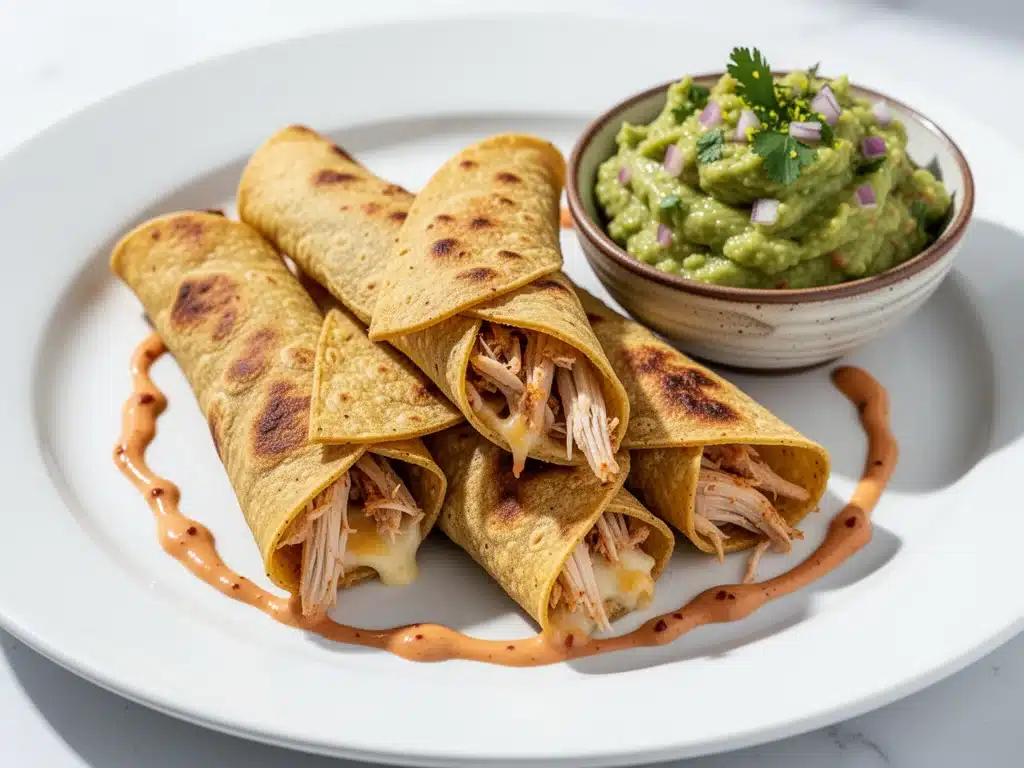
Last Tuesday, I was standing in my kitchen at 7:30 PM, staring into the abyss of my refrigerator. The light was flickering, and inside, there was nothing but a lonely container of leftover rotisserie chicken, a sad-looking avocado that was just ripe enough, and a stack of flour tortillas that had been sitting there since Sunday. My husband walked in, rubbed his eyes, and asked the question I dread most: “What’s for dinner?”
I wanted takeout. I really did. I was dreaming of those crispy, golden flautas from that Mexican place down the street—the ones that crunch so loud you have to eat them carefully so you don’t wake the neighbors. But then I looked at the clock. Ordering would take 45 minutes. Cooking? Maybe 20. And I had half the ingredients already.
So I did something I usually don’t do: I improvised. I shredded that chicken, mixed it with cumin and chili powder, rolled it up tight, and baked it until it was shatteringly crisp. I whipped up a quick guacamole while they cooked. When they came out of the oven, golden brown and steaming, I took one bite and froze. It was better. It was actually better than the takeout version.
Why? Because it was fresh. Because I controlled the oil (there was barely any). Because the guacamole wasn’t sitting in a plastic tub for three hours. That night, I realized I’d been overcomplicating my weeknight dinners. I didn’t need a complicated recipe; I needed Crispy Baked Chicken Flautas that actually worked.
Since then, I’ve made this easy takeout recipe at least a dozen times. I’ve tweaked the spice blend, tested different tortilla brands, and figured out the exact oven temperature that gives you that restaurant-style crunch without deep frying. And let me tell you, once you try these, you’re never going back to the delivery app.
Why You’ll Love This Crispy Baked Chicken Flautas Recipe
There are about ten reasons I keep making these flautas, but let’s be real—you’re here because you want dinner to work. You want something that feels fancy enough for guests but simple enough for a Tuesday night when you’re exhausted. Here’s why this recipe has earned a permanent spot in my weekly rotation:
- Zero Deep Frying Required — I know, I know. “Flautas” usually implies a deep fryer. But baking these with a light spray of oil gives you 95% of the crunch with 5% of the mess and 80% less guilt. My kitchen doesn’t smell like fried oil for days.
- Pantry-Friendly Ingredients — You probably have most of this already. Tortillas, canned beans or rotisserie chicken, spices, avocado. No trip to the specialty store needed. It’s the ultimate “use what you have” dinner.
- Stupid Simple Assembly — If you can spread peanut butter on a sandwich, you can make these. Fill, roll, bake. There’s no complex technique here. I’ve walked my teenage son through making them over FaceTime while I was at work.
- Kid-Approved Crunch — My kids are notorious picky eaters, but they love the texture of these. They’re crunchy, savory, and fun to dip. I’ve served these to my picky nephew, and he asked for the recipe. That’s a win.
- Makes Amazing Leftovers — And yes, they reheat well! I deliberately make extra because they taste great cold or room temp (great for lunchboxes) or reheated in the air fryer for 3 minutes to regain that crunch.
- Customizable for Everyone — Vegetarian? Use beans. Keto? Use low-carb wraps. Spicy lovers? Add jalapeños. This recipe bends to your family’s needs without falling apart.
This is my go-to when I need dinner to just work. No complicated techniques, no weird ingredients, just reliable, delicious food that makes everyone happy.
Ingredients You’ll Need
Here’s the best part: you probably have most of this already in your pantry or fridge. I’m particular about three ingredients here—the tortillas, the chicken, and the avocado—but the rest is basic pantry staples.
For the Chicken Filling
Rotisserie Chicken (2 cups / shredded) — This is my secret weapon. I buy a rotisserie chicken from the grocery store, shred the meat, and use it all. It’s moist and flavorful. If you want to cook it from scratch, poach 2 lbs of chicken breasts with a bay leaf and salt, then shred. But rotisserie saves so much time.
Refried Beans (½ cup) — Not just for tacos! A little bit of refried beans mixed into the chicken acts as a binder. It helps the filling stick together so your flautas don’t unravel in the oven. I use vegetarian refried beans, but regular works too.
Chili Powder (1 teaspoon) — This gives that classic Mexican flavor. Don’t confuse this with Mexican seasoning blend; chili powder is pure dried chilies. If you don’t have it, use paprika plus a pinch of cayenne.
Cumin (½ teaspoon) — Ground cumin adds that warm, earthy depth. It’s essential. I keep a dedicated bottle for this recipe because it’s used so often.
Garlic Powder (½ teaspoon) — Fresh garlic can burn quickly in a small amount of filling, so powder is safer and distributes evenly. But if you have fresh, mince 1 clove very finely.
Shredded Mexican Cheese Blend (½ cup) — I use a pre-shredded blend of cheddar, asadero, and Monterey Jack. It melts beautifully. You can grate your own if you prefer, but pre-shredded saves time.
For the Flautas
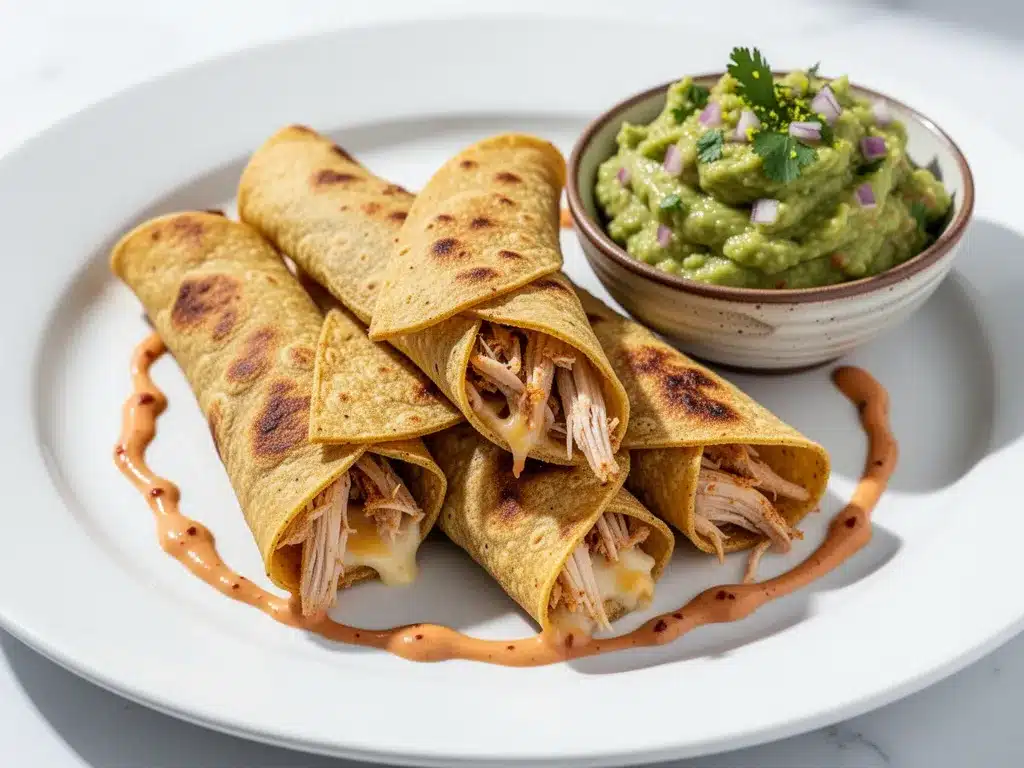
Flour Tortillas (8-10 small, 6-inch) — I prefer small flour tortillas for flautas because they’re easier to roll tightly. Corn tortillas are traditional, but they’re brittle and hard to roll without breaking. Flour gives you that flexible, chewy texture that holds up to baking. Look for “burrito size” if you want larger ones, but small is best for appetizers.
Vegetable Oil or Cooking Spray — You need a little fat to help them brown. I use a high-smoke point oil like avocado or vegetable oil. Brushing them lightly is better than pouring.
For the Guacamole
Ripe Avocados (2 medium) — They should yield slightly to gentle pressure. If they’re rock hard, they’re not ready. If they’re mushy, they’re overripe. Perfect is key here.
Lime Juice (2 tablespoons) — Freshly squeezed. Bottled lime juice tastes metallic and flat. It’s worth the extra 30 seconds to squeeze it yourself.
Cilantro (¼ cup, chopped) — Fresh cilantro adds brightness. If you hate cilantro (genetic thing, I get it), skip it or use parsley. It won’t be the same, but it’ll still work.
Jalapeño (1 small, minced) — Remove the seeds and ribs if you want less heat. I keep some seeds in for a little kick. Fresh is best, but pickled jalapeños work in a pinch.
Red Onion (2 tablespoons, finely diced) — Adds crunch and sharpness. I rinse the diced onion in cold water for a minute to mellow the bite. It’s a pro tip that makes a huge difference.
Salt (½ teaspoon, or to taste) — Avocados need salt to bring out the flavor. Taste as you go.
Equipment Needed
You don’t need fancy equipment for this. Here’s what I actually use:
- Baking Sheet — A standard 13×18 inch sheet. I line it with parchment paper for easy cleanup. Grease isn’t necessary if you use parchment.
- Parchment Paper — Essential for easy cleanup. The cheese can drip and burn onto the pan if you don’t use it.
- Small Bowl — For mixing the chicken filling.
- Mortar and Pestle or Fork — For mashing the avocados. I use a fork because it’s faster and I don’t want to wash a mortar.
- Pastry Brush or Spray Bottle — For applying oil to the tortillas. Brushing gives you more control over how much oil you use.
- Cutting Board and Knife — For dicing onions and jalapeños.
Optional but nice: An air fryer. If you have one, these cook in 8-10 minutes at 400°F and get even crispier. I’ll include instructions for that in the steps.
How to Make It: Step-by-Step
Alright, let’s make this! I’m walking you through exactly how I do it, including the little tricks I’ve picked up. This process takes about 20 minutes total, with most of that time in the oven.
Step 1: Prep the Oven and Pan (5 minutes)
Preheat your oven to 400°F (200°C). Line a large baking sheet with parchment paper. This is crucial. If you skip the parchment, the cheese and oil will stick to the pan, and you’ll be scrubbing for 20 minutes. I learned this the hard way on my first try. Now, I never cook without it.
Step 2: Make the Guacamole (10 minutes)
While the oven heats, make the guacamole. It’s best if the flavors can meld while the flautas bake. Cut the avocados in half, remove the pits, and scoop the flesh into a bowl. Mash it with a fork until it’s mostly smooth but still has some chunks. I like a little texture.
Add the lime juice, salt, diced red onion, minced jalapeño, and chopped cilantro. Stir gently to combine. Taste it. Does it need more salt? More lime? Adjust as needed. Cover it with plastic wrap, pressing the wrap directly onto the surface of the guacamole. This prevents it from browning. Yes, it looks silly, but it works.
Step 3: Mix the Chicken Filling (5 minutes)
In a medium bowl, combine the shredded rotisserie chicken, refried beans, chili powder, cumin, garlic powder, and half of the shredded cheese. Mix it all together with a spoon until it’s evenly coated. The mixture should be moist but not soupy. If it feels dry, add a splash of water or broth. If it’s too wet, add a bit more cheese or beans.
Pro Tip: Taste the mixture before rolling. Add more salt or chili powder if needed. You want the filling to be flavorful on its own.
Step 4: Roll the Flautas (10 minutes)
This is the hands-on part. Lay a tortilla on a clean surface. Place about 2-3 tablespoons of the chicken mixture in a line across the center, leaving about an inch of space on the sides. Sprinkle a little more shredded cheese on top of the filling—this acts as glue.
Roll the tortilla up tightly from the bottom. Fold in the sides as you roll to keep the filling inside. The key is a tight roll. If it’s loose, it will unravel in the oven. Place the rolled flauta seam-side down on the prepared baking sheet.
Repeat with the remaining tortillas and filling. You should get about 8-10 flautas. They should fit snugly on the baking sheet but not touch too much, so they brown evenly.
Step 5: Oil and Bake (15-20 minutes)
Brush the tops of the flautas lightly with vegetable oil. You don’t need to soak them; just a thin coat is enough to help them crisp up and turn golden brown. If you’re using a cooking spray, do a quick, even spray.
Place the baking sheet in the preheated oven. Bake for 15-20 minutes, flipping them halfway through. You want them to be golden brown and crisp on all sides. The cheese should be melted and bubbly, and the tortilla should be firm to the touch.
Visual Cue: They’re done when the edges of the tortilla are dark golden brown and they sound hollow when you tap them gently with a spatula.
Step 6: Serve Immediately
Remove from the oven and let them cool for 2-3 minutes. This lets the cheese set slightly so they hold together. Serve immediately with the guacamole, sour cream, salsa, and hot sauce. They’re best eaten right out of the oven.
Total Time: About 30 minutes (10 minutes prep, 20 minutes cooking)
Expert Tips & Tricks
Here’s everything I’ve learned from making these dozens of times. These tips will save you from my mistakes.
Keep Them Tight
The #1 reason flautas unravel is loose rolling. Start with a tight roll, fold the sides in firmly, and press down gently as you go. If they start to open up in the oven, just tuck them back in with a spatula. Don’t panic.
Don’t Skip the Oil
Because we’re baking, not frying, you need a little help to get that crunch. Don’t be shy with the oil brush. A thin, even coat is all you need. If you skip it, they’ll be soft and pale, not crispy and golden.
Use Parchment Paper
I cannot stress this enough. Parchment paper makes cleanup effortless. Without it, you’ll be scraping burnt cheese off your baking sheet. It’s a small step that saves you 10 minutes of scrubbing.
Make Ahead Strategy
You can roll the flautas ahead of time and store them in the fridge, covered with plastic wrap, for up to 24 hours. When you’re ready to cook, just brush with oil and bake. This is perfect for dinner parties or meal prep.
Air Fryer Option
If you have an air fryer, these cook faster and get crispier. Preheat to 400°F, arrange flautas in a single layer (you may need to cook in batches), and spray with oil. Cook for 8-10 minutes, flipping halfway. Check at 6 minutes to ensure they don’t burn.
Variations & Substitutions
Once you’ve nailed the basic version, here’s how you can mix it up. I’ve tried all of these, and they all work.
Vegetarian Version
Swap the chicken for black beans or pinto beans. Mash the beans slightly so they’re easier to spread. Add some corn kernels and diced bell peppers for extra texture. It’s just as satisfying.
Spicy Version
Add diced jalapeños or a dash of cayenne pepper to the chicken filling. Serve with a spicy salsa or chipotle mayo for dipping. Perfect if you like heat.
Cheesy Version
Double the cheese in the filling and sprinkle extra cheese on top before baking. For the ultimate indulgence, drizzle with nacho cheese sauce after baking.
Dietary Modifications
Gluten-Free: Use corn tortillas instead of flour. Note: Corn tortillas are more brittle, so roll them gently and don’t overfill. You may need to warm them slightly in the microwave before rolling to make them pliable.
Lower-Carb: Use low-carb tortillas or lettuce wraps. The texture will be different, but it’s a good option if you’re watching carbs.
Other Proteins
You can use shredded beef, pulled pork, or even tofu for the filling. Season it the same way, and it’ll work perfectly. I’ve made these with leftover Thanksgiving turkey, and they were amazing.
Serving & Storage
How to Serve: I usually serve these straight from the baking sheet at the dinner table—it looks rustic and stays warm. But here are other ways I’ve enjoyed them:
Side Dishes: A simple green salad with lime vinaigrette, Mexican rice, or black beans. Garlic bread is always a hit too.
Toppings Bar: When I have guests, I put out: sour cream, pico de gallo, sliced jalapeños, extra guacamole, and hot sauce. Everyone customizes their bowl.
Storage Instructions:
Refrigerator: Store leftovers in an airtight container for up to 3 days. The tortillas may soften, but that’s normal.
Reheating: Best method: Reheat in an air fryer or oven at 375°F for 5-7 minutes to regain crispiness. Microwave works but makes them soggy. If you must microwave, do it in 30-second intervals and let them sit for a minute.
Freezing: You can freeze uncooked flautas on a baking sheet, then transfer to a freezer bag. Bake from frozen, adding 5-10 minutes to the cooking time. Cooked flautas don’t freeze well because the tortillas get mushy.
Nutrition Information
I’m not a nutritionist, but here’s the breakdown if you’re tracking. Per serving (based on 4 servings, 2-3 flautas each):
- Calories: 380
- Protein: 22g
- Carbs: 35g
- Fiber: 6g
- Sugar: 2g
- Fat: 16g
- Saturated Fat: 5g
- Sodium: 650mg
What’s good: Decent protein from chicken and cheese, fiber from beans and tortillas. What to know: Higher in sodium due to cheese and beans. Use low-sodium beans and cheese to reduce. This is comfort food, so enjoy it in moderation.
Final Thoughts
So that’s my go-to crispy baked chicken flautas! I’ve probably talked your ear off at this point, but when you make a recipe this often, you have a lot to say about it.
This has saved weeknight dinners more times than I can count. It’s my answer to “what’s for dinner” when I’m tired, don’t want takeout, and still want something that tastes really good. My kids are happy, my husband’s happy, and I’m happy because I’m not stressed about cooking.
Make it yours! Try different add-ins, swap in your favorite vegetables, adjust the spice level. The best recipes are the ones you adapt to your family’s tastes.
If you make this, drop a comment and let me know what you think! I love hearing how recipes turn out in your kitchen. And if something doesn’t work, tell me that too—I’m here to help troubleshoot.
Happy cooking! And I hope your kitchen smells half as good as mine does right now.
Frequently Asked Questions
Can I use corn tortillas instead of flour?
Yes, but they’re more brittle. To prevent breaking, warm the tortillas in the microwave for 10-15 seconds before rolling. They’ll become pliable. Also, don’t overfill them. Flour tortillas are easier for beginners because they’re more forgiving.
Why did my flautas unravel in the oven?
Usually, the roll wasn’t tight enough, or the filling was too wet. Make sure you roll tightly and press the sides in. If the filling is too wet, add more cheese or beans to bind it. Also, place them seam-side down on the baking sheet to help them hold shape.
Can I make these ahead of time?
Yes! Roll them and store them in the fridge, covered with plastic wrap, for up to 24 hours. When ready to cook, brush with oil and bake as directed. You may need to add 2-3 minutes to the baking time if they’re cold from the fridge.
How do I keep the guacamole from browning?
Press plastic wrap directly onto the surface of the guacamole. This prevents air from reaching it, which causes oxidation (browning). It’s a simple trick that keeps it green for hours.
Can I freeze cooked flautas?
It’s not recommended. The tortillas will become soft and soggy when thawed. It’s better to freeze uncooked flautas and bake them fresh. If you must freeze cooked ones, reheat in the oven or air fryer to restore some crispiness.
What can I serve with flautas?
They pair well with Mexican rice, black beans, a simple salad, or corn on the cob. For drinks, try agua fresca or a margarita. They’re great for parties because they’re easy to eat as finger food.
Can I use leftover turkey or beef?
Absolutely! Any shredded meat works. Season it with the same spices (chili powder, cumin, garlic powder) to match the flavor profile. Leftover turkey from Thanksgiving makes excellent flautas!
Pin This Recipe!
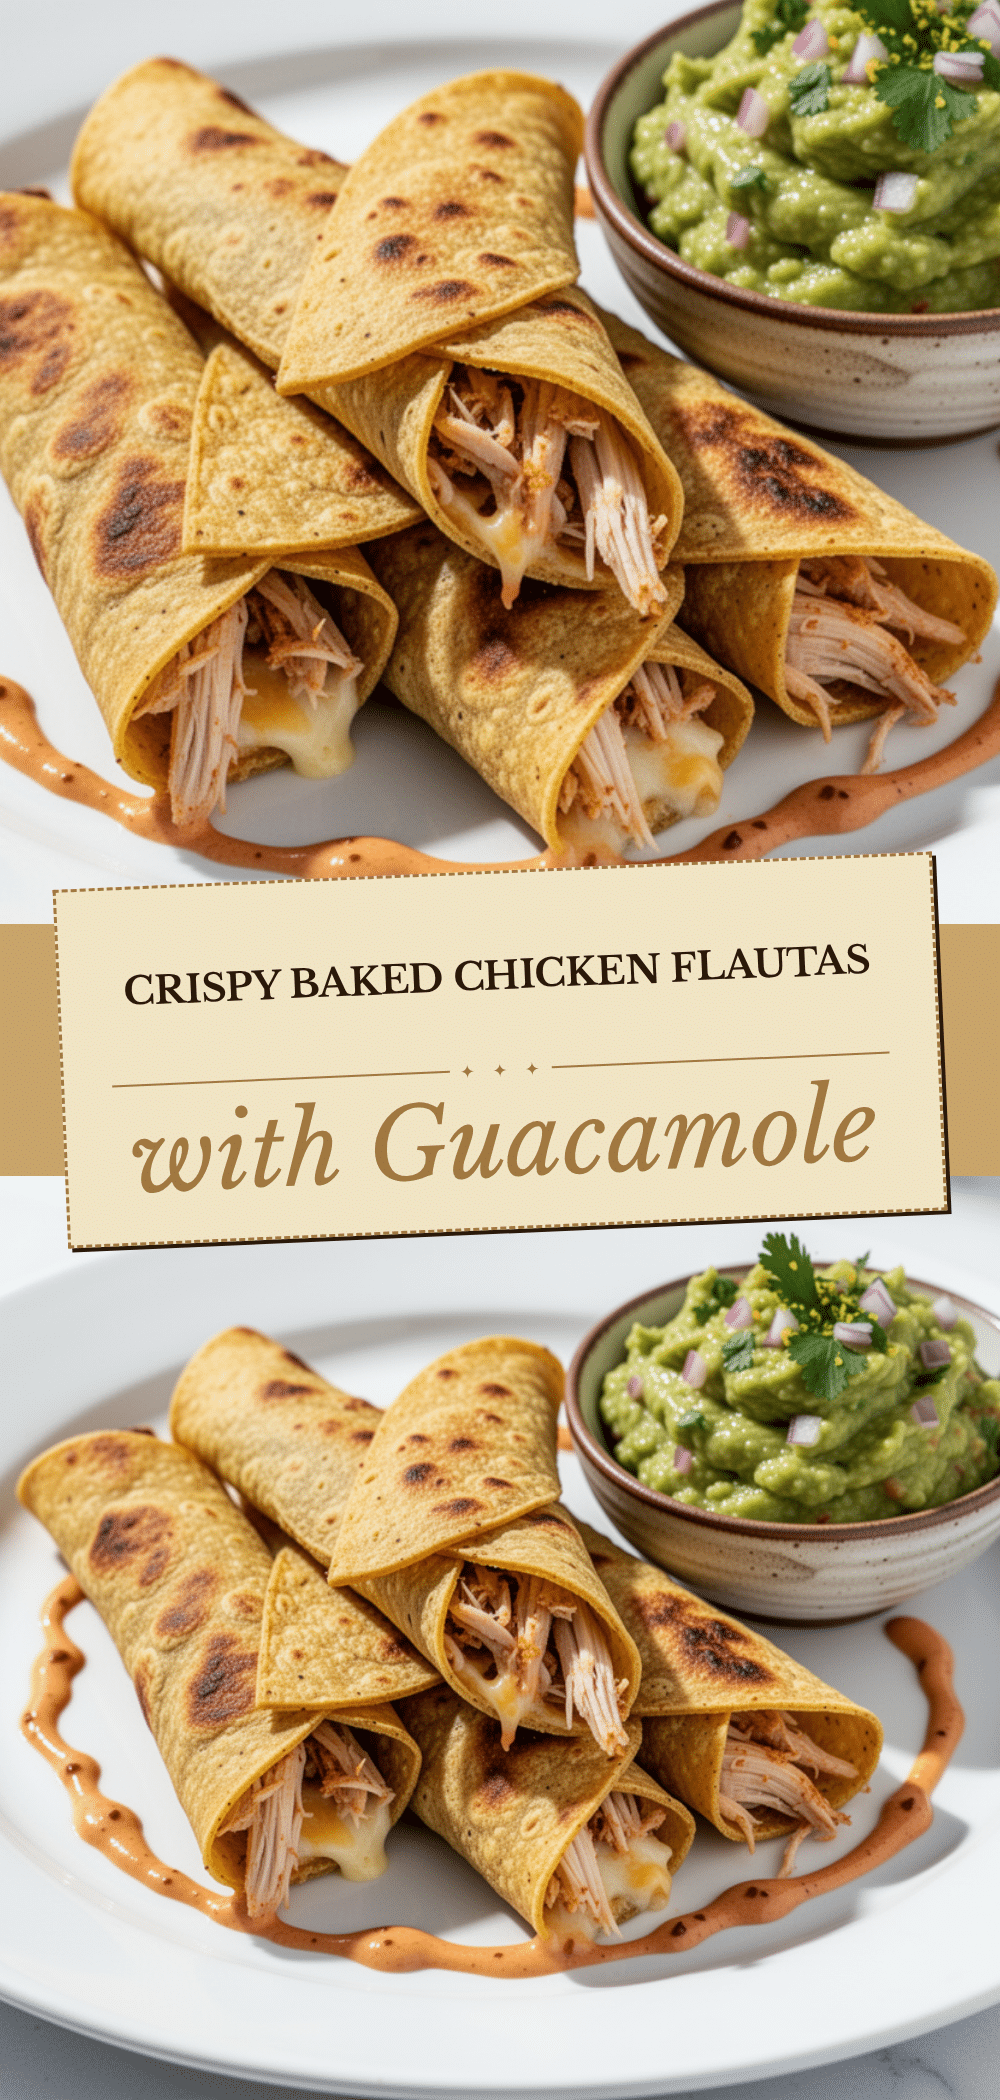
Crispy Baked Chicken Flautas: Easy Takeout Recipe
- Total Time: 30 minutes
- Yield: 4 servings 1x
Description
These crispy baked chicken flautas offer a restaurant-style crunch without the deep frying. Using rotisserie chicken and simple pantry ingredients, this easy weeknight dinner is customizable, kid-approved, and ready in about 30 minutes.
Ingredients
- 2 cups shredded rotisserie chicken
- 1/2 cup refried beans
- 1 teaspoon chili powder
- 1/2 teaspoon ground cumin
- 1/2 teaspoon garlic powder
- 1 cup shredded Mexican cheese blend (divided)
- 8–10 small flour tortillas (6-inch)
- Vegetable oil or cooking spray
- 2 medium ripe avocados
- 2 tablespoons fresh lime juice
- 1/4 cup chopped fresh cilantro
- 1 small jalapeño, minced
- 2 tablespoons finely diced red onion
- 1/2 teaspoon salt (divided)
Instructions
- Preheat oven to 400°F (200°C). Line a large baking sheet with parchment paper.
- Make the guacamole: Mash avocados in a bowl. Stir in lime juice, 1/2 teaspoon salt, diced red onion, minced jalapeño, and cilantro. Cover with plastic wrap touching the surface to prevent browning.
- Mix the filling: In a medium bowl, combine shredded chicken, refried beans, chili powder, cumin, garlic powder, and half of the cheese. Mix until evenly coated. Taste and adjust seasoning if needed.
- Roll the flautas: Place filling on the center of each tortilla. Sprinkle with remaining cheese. Roll tightly, folding in the sides, and place seam-side down on the baking sheet.
- Brush the tops of the flautas lightly with vegetable oil or spray with cooking spray.
- Bake for 15-20 minutes, flipping halfway through, until golden brown and crisp.
- Cool for 2-3 minutes before serving immediately with guacamole and desired toppings.
Notes
For best results, ensure the flautas are rolled tightly to prevent unraveling. Use parchment paper for easy cleanup. Corn tortillas can be used for a gluten-free version but require warming in the microwave to become pliable. Leftovers can be stored in the fridge for up to 3 days and reheated in an air fryer or oven to restore crispiness.
- Prep Time: 10 minutes
- Cook Time: 20 minutes
- Category: Main Course
- Cuisine: Mexican
Nutrition
- Serving Size: 2-3 flautas per serv
- Calories: 380
- Sugar: 2
- Sodium: 650
- Fat: 16
- Saturated Fat: 5
- Carbohydrates: 35
- Fiber: 6
- Protein: 22
Keywords: chicken flautas, baked flautas, easy dinner, rotisserie chicken recipes, Mexican appetizer, weeknight meals, crispy chicken, healthy takeout alternative


