
Last Tuesday, I was standing in my kitchen at 6:45 PM, staring into the open fridge like it held the secrets to the universe. Dinner? Still a blank slate. The kids were already complaining about being hungry, my husband was logging off work, and the only thing on my counter was a bag of shredded cheddar and a tube of refrigerated biscuit dough I’d bought on impulse.
I didn’t want to make another sad bowl of cereal. I didn’t want to order takeout. I wanted something warm, something that smelled like comfort, and something that didn’t require a five-hour prep time. So, I threw those biscuits in the oven, sprinkled them with extra cheese, and waited.
When they came out, golden and puffy and smelling like a bakery, my kid actually said, “Wow, did you make these?” Yes. I did. And they were gone in four minutes.
That was the moment I realized I’d been overcomplicating my weeknight sides. I’ve spent years chasing complicated recipes that require a stand mixer and three hours of rising time. But for real life—those chaotic Tuesday nights where you need food on the table before the power goes out—Classic Homestyle Cheddar Biscuits are the answer. They’re tender, cheesy, and ready in about 15 minutes. No fancy techniques. No stress. Just good, honest bread that makes everyone happy.
I’ve tested this recipe so many times now (probably 20+ times in the last six months alone) that I’ve got it down to a science. I’ve tweaked the butter, adjusted the cheese ratios, and figured out exactly how to get those flaky layers without needing to be a pastry chef. If you’re looking for a quick dinner side that actually tastes homemade, this is it. It’s the kind of biscuit you’ll want to keep in your freezer, even if you buy the canned kind.
Why You’ll Love This Cheddar Biscuit Recipe
There are about a dozen reasons I keep making these, but let’s be real: you probably just want to know why they’re better than the ones you’re used to. Here’s the deal.
Stupid Simple — Seriously, if you can mix flour and butter, you can make these. I’ve walked my teenage son through this recipe over FaceTime while he was at college. He nailed it on the first try. There’s no kneading, no rising time, and no special equipment.
Lightning Fast — 15 minutes from start to finish. That’s it. I make these on weeknights when I get home at 7 PM and realize I forgot to defrost chicken. They’re ready before the main course is even fully cooked.
Actually Flaky — Most quick biscuits turn out dense and bread-like. These? They’re tender with a nice crumb. I achieved this by using cold butter and a gentle touch. It’s the difference between a brick and a cloud.
Pantry-Friendly — You probably have 90% of these ingredients already. Flour, baking powder, salt, butter, milk, and cheese. That’s it. I keep sharp cheddar stocked specifically so I can throw these together on a whim.
Makes Amazing Leftovers — Okay, let’s be honest: they rarely last until the next day. But if they do, they’re amazing toasted in the morning with a little butter. I’ve even crumbled them into soup later in the week. They hold up surprisingly well.
Budget-Smart — Feeds 6-8 people for under $5. That’s less than a single side dish at a restaurant. It’s cheap, it’s filling, and it makes a meal feel more complete.
This is my go-to when I need dinner to just work. No complicated techniques, no weird ingredients, just reliable, delicious food that makes everyone happy. It pairs perfectly with everything from crispy chicken nuggets to slow-cooker stews.
Ingredients You’ll Need
Here’s the best part: you probably have most of this already. I’m particular about three ingredients here, and I’ll tell you exactly why they matter. Don’t skip the tips!
For the Dough Base
All-Purpose Flour (3 cups / 375g) — This is your foundation. I use regular all-purpose flour. Cake flour makes them too soft; bread flour makes them too chewy. For the best texture, use King Arthur or Gold Medal. I stick to Gold Medal because it’s consistent.
Unsalted Butter (½ cup / 113g, very cold) — This is non-negotiable. I use cold butter because the cold chunks create steam when they hit the oven, which creates those flaky layers. If your butter is soft, your biscuits will be dense. Cube it and throw it in the freezer for 10 minutes before using if you’re in a rush.
Baking Powder (1 tablespoon) — Fresh is key. If your baking powder is older than 6 months, it might not have enough lift. I keep a fresh canister specifically for baking. Old baking powder = flat biscuits. Trust me on this.
Salt (1 teaspoon) — Essential for flavor. Since we’re using unsalted butter, you need the salt to bring everything together. Don’t skip it.
Cold Whole Milk (1 cup / 240ml) — Whole milk makes them richer and more tender. I’ve tried skim milk, and it works, but the texture is slightly drier. If you’re out of milk, heavy cream works too, but you’ll need less of it (start with ½ cup).
For the Flavor

Sharp Cheddar Cheese (1½ cups / 150g, shredded) — This is the star. I use sharp cheddar because it has a stronger flavor that stands up to the flour. Mild cheddar is too subtle. Buy a block and shred it yourself. Pre-shredded cheese is coated in cellulose (potato starch) to prevent clumping, which stops it from melting smoothly. It makes a huge difference in texture.
Garlic Powder (½ teaspoon) — Optional, but I highly recommend it. It adds a savory depth that pairs perfectly with the cheese. It’s one of my secret tricks.
Chives (2 tablespoons, fresh or 1 tsp dried) — Fresh chives add a nice oniony bite. I grow them in a pot on my windowsill, so I always have some. If you don’t have chives, green onion or even dried parsley works.
For the Topping
Extra Butter (2 tablespoons, melted) — For brushing on top right after they come out of the oven. It gives them that golden, shiny crust and adds richness.
More Cheese (¼ cup) — Sprinkle this on top before baking. It gets crispy and golden, adding a nice crunch.
Equipment Needed
You don’t need fancy equipment for this. Here’s what I actually use.
Large Mixing Bowl — I use a 4-quart ceramic bowl. It’s heavy enough not to slide around. A glass bowl works too, but be careful if your dough is cold and the bowl is warm.
Fork or Pastry Cutter — I use a fork to cut in the butter. It’s fast and effective. A pastry cutter is nice if you have one, but not necessary. My hands work fine too, but they get cold.
Rolling Pin — I use a standard wooden rolling pin. It’s easy to grip. A marble rolling pin keeps things cooler, which is nice, but not required.
Biscuit Cutter or Glass — I use a 2.5-inch biscuit cutter. It gives uniform biscuits. If you don’t have one, a drinking glass works. Just dip the rim in flour so it doesn’t stick.
Baking Sheet — I use a half-sheet pan. It’s the standard size. I line it with parchment paper because cleanup is easier, and it prevents sticking.
Pastry Brush — For brushing the melted butter on top. I have a cheap silicone one from the dollar store. It works perfectly.
Small Bowl — For melting the topping butter. Microwave-safe is best.
Grater — For shredding the cheese. A box grater is standard. I use the large holes for a faster shred.
How to Make It: Step-by-Step
Alright, let’s make this! I’m walking you through exactly how I do it, including the little tricks I’ve picked up over the years.
Step 1: Prep Your Oven and Pan (2 minutes)
Preheat your oven to 425°F (220°C). This high heat is crucial for getting those biscuits to rise quickly. Line your baking sheet with parchment paper. I like to leave about 2 inches between each biscuit spot because they spread. If they’re too close, they’ll stick together and won’t brown nicely.
Step 2: Mix the Dry Ingredients (2 minutes)
In your large bowl, whisk together the flour, baking powder, salt, and garlic powder. I do this with a fork or a small whisk. Make sure the baking powder is evenly distributed. If you dump it in one spot, you’ll get bitter bites in your finished biscuit. Give it a good mix.
Step 3: Cut in the Butter (3-4 minutes)
Add the cold, cubed butter to the flour mixture. This is the most important step. Use your fork or pastry cutter to cut the butter into the flour until the mixture looks like coarse crumbs with some pea-sized pieces of butter remaining. You want to see visible chunks of butter. Those chunks are what create the flaky layers. Don’t overmix here. If the butter melts, your biscuits will be tough. Keep it cold and keep it chunky.
Step 4: Add the Wet Ingredients (2 minutes)
Make a well in the center of the flour mixture. Pour in the cold milk and the shredded cheddar cheese. Stir gently with a fork or your hands until the dough just comes together. It will look shaggy and messy. That’s good. Do not overmix. If you mix it until it’s smooth, the biscuits will be dense. Stop as soon as there are no dry patches left. It should hold together when you squeeze it.
Step 5: Shape the Dough (3 minutes)
Turn the dough out onto a lightly floured surface. Pat it out with your hands or a rolling pin to about ½-inch thickness. I pat it gently; I don’t roll it vigorously. Roll it up into a log shape, then cut it into 6-8 equal pieces. If you’re using a cutter, press straight down. Don’t twist the cutter! Twisting seals the edges and prevents the biscuit from rising properly. Just press and lift.
Step 6: Bake (12-15 minutes)
Place the biscuits on your prepared baking sheet. Brush the tops with melted butter and sprinkle with extra cheese. Bake for 12-15 minutes, or until they are golden brown on top and sound hollow when tapped on the bottom. I rotate the pan halfway through for even browning. If they’re browning too fast, cover them loosely with foil.
Step 7: Cool and Serve (2 minutes)
Let them cool on the pan for 5 minutes. This helps them set. Then serve warm. They’re best eaten right out of the oven, but they’re still good after cooling.
Total Time: About 15 minutes (5 minutes active, 12 minutes baking)
Expert Tips & Tricks
Here’s everything I’ve learned from making this dozens of times. These tips will save you from my mistakes.
Keep Everything Cold
This is the #1 tip. Cold butter, cold milk, cold bowl. If your kitchen is hot, work quickly. I even chill my flour in the freezer for 10 minutes if it’s summer. The temperature difference creates steam, which lifts the biscuits. I learned this the hard way with dense, flat biscuits that tasted like bread.
Don’t Overmix
Once you add the milk, mix as little as possible. The dough should look shaggy. Overmixing develops gluten, which makes biscuits tough. I want tender, not chewy. If your dough feels sticky, add a tiny bit more flour. If it’s too dry, add a teaspoon of milk.
Shred Your Own Cheese
Pre-shredded cheese doesn’t melt the same. It has anti-caking agents that prevent it from clumping in the bag, but they also stop it from melting smoothly in the biscuit. Grate a block of cheddar yourself. It takes 2 minutes and makes a huge difference in flavor and texture.
Use a Biscuit Cutter, Not a Knife
If you cut with a knife, you seal the edges. A round cutter creates clean edges that allow the biscuit to rise upward. If you don’t have a cutter, use a glass dipped in flour. Press straight down, no twisting.
Brush with Butter
Brushing the tops with melted butter before baking gives them a golden crust and rich flavor. It’s a small step that makes a big impact. I do this every time.
Variations & Substitutions
Once you’ve nailed the basic version, here’s how you can mix it up. I’ve tried all of these.
Jalapeño Cheddar
Add 1 diced jalapeño (seeds removed if you want less heat) to the dough. It adds a nice kick. This is my favorite variation for game day.
Bacon Cheddar
Cook 4 slices of bacon until crispy, crumble it, and mix it into the dough. It’s salty, smoky, and delicious. I make this for brunch sometimes.
Herb Cheddar
Add 1 teaspoon dried rosemary or thyme to the flour mixture. It adds an earthy, savory note. Great with soup.
Gluten-Free
Use a 1:1 gluten-free flour blend (like Bob’s Red Mill). The texture will be slightly different, but they still work. Add a teaspoon of xanthan gum if your blend doesn’t have it.
Dairy-Free
Use dairy-free butter (like Earth Balance) and dairy-free milk (like almond or oat). Use dairy-free cheddar shreds (like Violife). They melt differently, so the texture might be slightly denser, but they’re still tasty.
Vegetarian
The basic recipe is already vegetarian. Just ensure your cheese is vegetarian-friendly (some cheeses use animal rennet).
Serving & Storage
How to serve these babies. I usually serve them straight from the pan at the dinner table—it looks rustic and stays warm. But here are other ways I’ve enjoyed them:
Side Dishes:
- Soup: These are perfect with tomato soup or chili. I dip mine in the soup. It’s a classic combo.
- Casserole: I’ve used crumbled biscuits as a topping for green bean casserole. It’s like a shortcut stuffing.
- Breakfast: Serve with eggs and bacon. They’re great for brunch.
- Snack: Eat them plain with butter. Or spread cream cheese on them.
Toppings Bar:
When I have guests, I put out: extra cheddar, hot sauce, herb butter, and honey. Everyone customizes their biscuit.
Storage Instructions:
Refrigerator: Store in an airtight container for up to 3 days. They’ll dry out a bit, so reheat them.
Reheating: Best method: Oven at 350°F for 5-7 minutes. This restores the crispness. Microwave works but makes them chewy. If you microwave, do it for 10-15 seconds only.
Freezing: You can freeze unbaked biscuits. Place them on a baking sheet, freeze until solid, then transfer to a bag. Bake from frozen, adding 2-3 minutes to the baking time. You can also freeze baked biscuits. Reheat in the oven for best results.
Pro Tip: If leftovers are drying out, wrap them in a damp paper towel and microwave for 10 seconds. It steams them back to life.
Nutrition Information
I’m not a nutritionist, but here’s the breakdown if you’re tracking.
Per Serving (based on 8 biscuits):
| Nutrient | Amount |
|---|---|
| Calories | 280 |
| Protein | 8g |
| Carbs | 28g |
| Fiber | 1g |
| Sugar | 1g |
| Fat | 16g |
| Saturated Fat | 9g |
| Cholesterol | 35mg |
| Sodium | 450mg |
What’s Good:
- Decent protein from the cheese and flour.
- Calcium from the cheddar.
- Quick and easy, so you can control portions.
What to Know:
- Higher in calories from butter and cheese.
- Contains dairy and gluten.
- Moderate sodium (use low-sodium butter to reduce).
My Take:
Look, this is comfort food with butter and cheese. It’s not a diet recipe. But it’s way better than store-bought, costs less, and I know exactly what’s in it. When I want to make it lighter, I use less butter and more herbs. But usually? I just eat a reasonable portion and enjoy it.
Final Thoughts
So that’s my go-to Classic Homestyle Cheddar Biscuits! I’ve probably talked your ear off at this point, but when you make a recipe this often, you have a lot to say about it.
This has saved weeknight dinners more times than I can count. It’s my answer to “what’s for dinner” when I’m tired, don’t want takeout, and still want something that tastes really good. My kids are happy, my husband’s happy, and I’m happy because I’m not stressed about cooking.
Make it yours! Try different add-ins, swap in your favorite herbs, adjust the cheese. The best recipes are the ones you adapt to your family’s tastes. If you’re looking for other quick dinner ideas, check out my mini pizza bagels or sloppy joe sliders for more kid-friendly options.
If you make this, drop a comment and let me know what you think! I love hearing how recipes turn out in your kitchen. And if something doesn’t work, tell me that too—I’m here to help troubleshoot.
Happy cooking! And I hope your kitchen smells half as good as mine does right now.
Frequently Asked Questions
Can I use self-rising flour instead of all-purpose flour?
You can, but you need to adjust the recipe. Self-rising flour already has baking powder and salt in it. So, if you use 3 cups of self-rising flour, omit the baking powder and salt from the recipe. However, the salt levels in self-rising flour vary by brand, so the flavor might be slightly off. I prefer all-purpose flour so I can control the salt and leavening myself.
Why did my biscuits turn out flat?
This usually happens for one of three reasons: 1) The butter was too warm or melted before baking. 2) You overmixed the dough, which developed too much gluten. 3) Your baking powder was old and lost its potency. Make sure your butter is cold, mix gently, and use fresh baking powder.
Can I make these ahead of time?
Yes! You can shape the biscuits and freeze them on a baking sheet. Once frozen, transfer them to a bag. When you’re ready to bake, place them on the pan and bake from frozen, adding 2-3 minutes to the baking time. You can also make the dough and refrigerate it for up to 24 hours. Let it come to room temperature for 10 minutes before shaping.
Why did my biscuits taste bitter?
This is almost always due to uneven distribution of baking powder. If you dump the baking powder in one spot and don’t mix it well, you’ll get a bitter bite. Always whisk the dry ingredients together thoroughly before adding the wet ingredients.
Can I use sharp white cheddar or yellow cheddar?
Yes! Sharp white cheddar has the same flavor as sharp yellow cheddar, just a different color. It melts slightly differently, but the taste is identical. You can also use a blend of cheddars for a more complex flavor.
How do I reheat leftovers without them getting dry?
The oven is best. Preheat to 350°F and bake for 5-7 minutes. This restores the crispness. If you must use the microwave, wrap the biscuit in a damp paper towel and heat for 10-15 seconds. The steam helps keep them moist. Avoid the microwave for more than 20 seconds, or they’ll become tough.
Can I double this recipe?
Absolutely! Double everything and use your largest mixing bowl. The cooking times stay the same. I do this when I’m meal-prepping or feeding a crowd. Just make sure your baking sheets are big enough to hold all the biscuits with space between them.
Pin This Recipe!
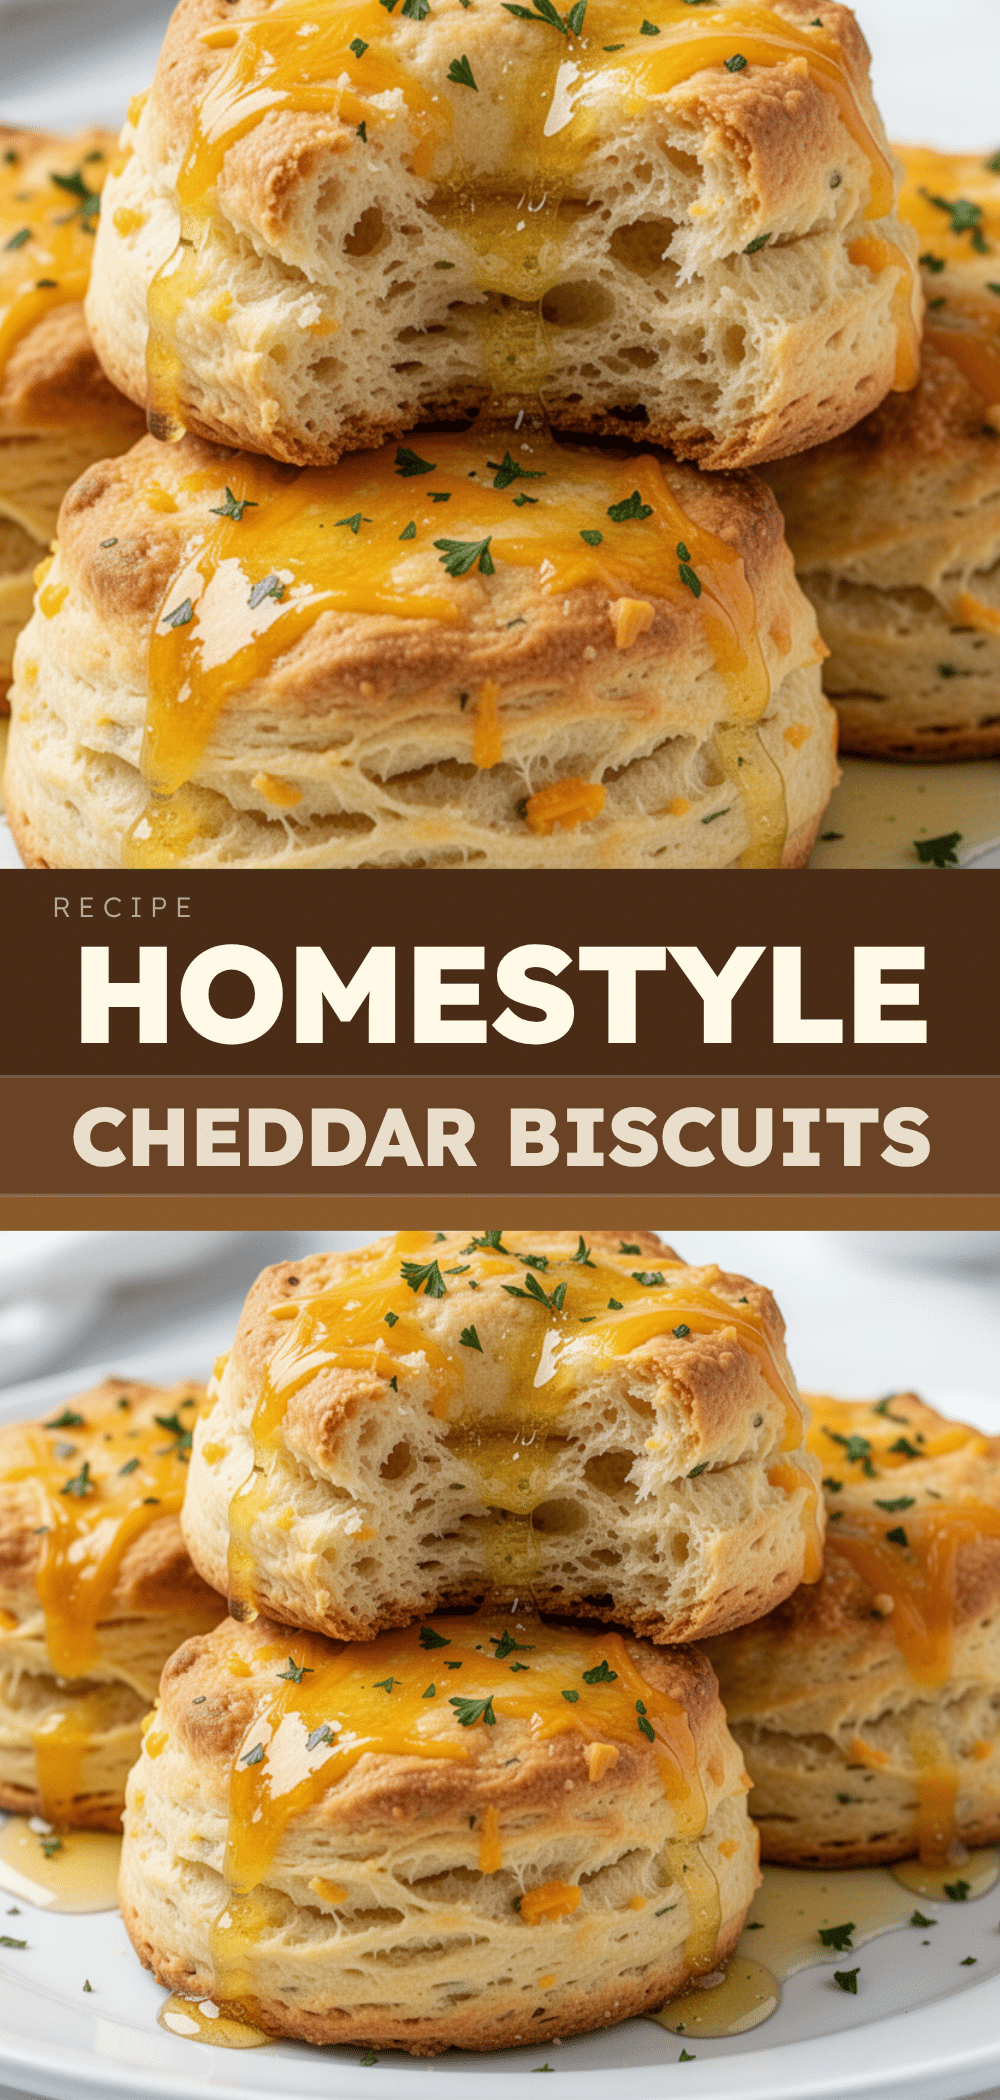

Classic Homestyle Cheddar Biscuits: Easy 15-Minute Dinner
- Total Time: 15 minutes
- Yield: 6-8 servings 1x
Description
Tender, cheesy, and ready in about 15 minutes, these classic homestyle cheddar biscuits are the perfect quick weeknight side dish. They require no fancy techniques or rising time, just simple pantry ingredients for a flaky, homemade result.
Ingredients
- 3 cups (375g) All-Purpose Flour
- 1 tablespoon Baking Powder
- 1 teaspoon Salt
- 1/2 cup (113g) Unsalted Butter, very cold and cubed
- 1 cup (240ml) Cold Whole Milk
- 1 1/2 cups (150g) Sharp Cheddar Cheese, shredded
- 1/2 teaspoon Garlic Powder
- 2 tablespoons Fresh Chives, chopped (or 1 tsp dried)
- 2 tablespoons Unsalted Butter, melted (for topping)
- 1/4 cup Sharp Cheddar Cheese, shredded (for topping)
Instructions
- Preheat oven to 425°F (220°C). Line a baking sheet with parchment paper.
- In a large mixing bowl, whisk together the flour, baking powder, salt, and garlic powder until evenly distributed.
- Add the cold, cubed butter to the flour mixture. Use a fork or pastry cutter to cut the butter into the flour until the mixture resembles coarse crumbs with some pea-sized pieces of butter remaining.
- Make a well in the center of the dry ingredients. Pour in the cold milk, shredded cheddar cheese, and chives. Stir gently with a fork or your hands until the dough just comes together and looks shaggy. Do not overmix.
- Turn the dough out onto a lightly floured surface. Pat it out to about 1/2-inch thickness. Roll the dough into a log shape and cut into 6-8 equal pieces. Alternatively, use a 2.5-inch biscuit cutter pressed straight down without twisting.
- Place the biscuits on the prepared baking sheet, leaving about 2 inches between each.
- Brush the tops of the biscuits with melted butter and sprinkle with the extra 1/4 cup of shredded cheese.
- Bake for 12-15 minutes, rotating the pan halfway through, until the biscuits are golden brown and sound hollow when tapped on the bottom.
- Let the biscuits cool on the pan for 5 minutes before serving warm.
Notes
Keep all ingredients cold for flaky layers. Shred your own cheese as pre-shredded cheese contains anti-caking agents that affect melting. Do not twist the biscuit cutter when cutting, as this seals the edges and prevents rising. For best results, use fresh baking powder.
- Prep Time: 5 minutes
- Cook Time: 12-15 minutes
- Category: Side Dish
- Cuisine: American
Nutrition
- Serving Size: 1 biscuit
- Calories: 280
- Sugar: 1
- Sodium: 450
- Fat: 16
- Saturated Fat: 9
- Carbohydrates: 28
- Fiber: 1
- Protein: 8
Keywords: cheddar biscuits, quick dinner, weeknight meals, homemade biscuits, easy side dish, comfort food, gluten-free option


