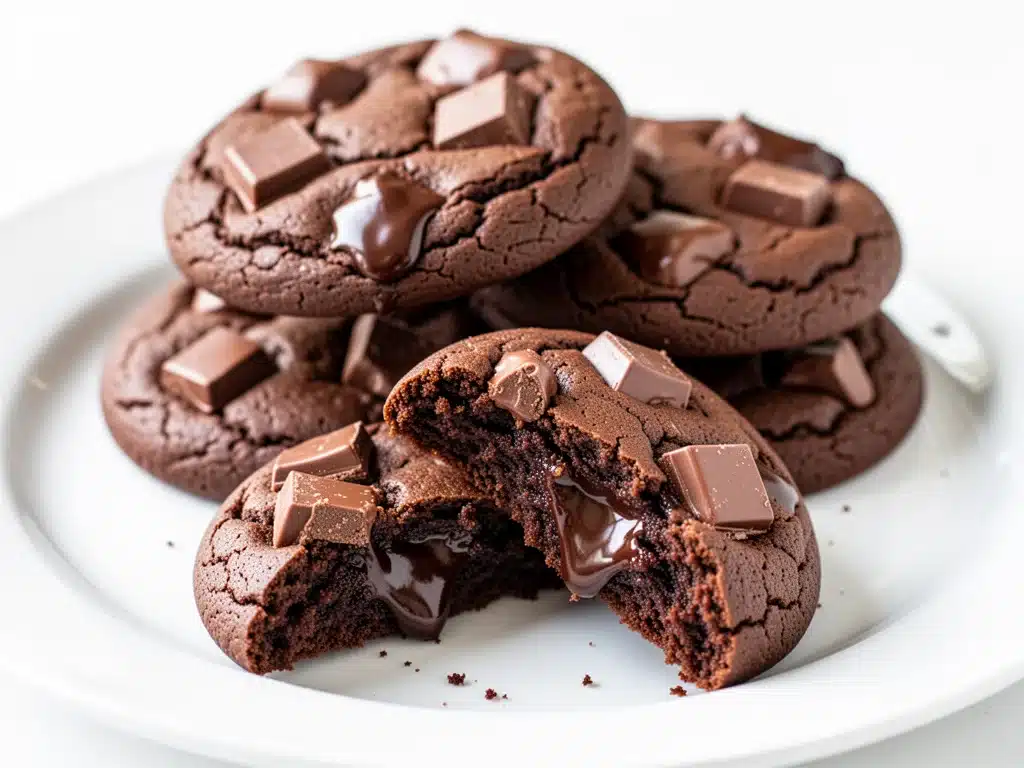
Three weeks ago, I was standing in my kitchen at 11 PM, staring at a bag of chocolate chips that had been sitting in my pantry since last Christmas. I wasn’t hungry, exactly. I was just… bored. You know that feeling? When you’re tired but you can’t sleep, and the only thing that makes sense is baking something sweet?
I decided to make cookies. Not the thin, crispy, Instagram-perfect kind that break into perfect shards. I wanted the good stuff. The kind with a crisp edge that gives way to a center so soft and chewy it feels like a warm hug. The kind that stays moist three days later. The kind that makes your kids beg for “just one more” right before dinner.
I pulled out my go-to recipe for Chewy Double Chocolate Chunk Cookies everyone always asks for. I’ve made these hundreds of times, but I had to check the blog just to make sure I had the ratios right. And honestly? That’s the truth. When something works this well, you don’t trust your memory. You trust the recipe that saved your weeknight dessert game a dozen times over.
What I love about these cookies is that they don’t try too hard. They aren’t fancy. They don’t have exotic spices or complicated techniques. They are just pure, unadulterated chocolate. And that’s why they work. That’s why my neighbors keep asking for the recipe. That’s why my husband hides the last one in the back of the fridge so I don’t eat it.
If you’ve been searching for the ultimate chocolate cookie recipe, stop looking. This is it. It’s simple, it’s delicious, and it’s going to become your new favorite comfort food.
Why You’ll Love This Recipe
There are a thousand cookie recipes out there. So why this one? Why Chewy Double Chocolate Chunk Cookies everyone always asks for? Here’s the real talk.
They’re Actually Chewy (Not Crispy) — Most chocolate cookie recipes turn out crisp or cakey. This one uses a specific ratio of brown sugar to butter that creates that dense, fudgy texture. I’ve tested this with white sugar, with brown sugar, with both. The double brown sugar method is the winner. It’s moist, it’s tender, and it stays that way for days.
Only 5 Main Ingredients — Seriously. Butter, sugar, eggs, flour, and chocolate. That’s it. No fancy flours, no exotic extracts, no weird stabilizers. If you can measure flour, you can make these. I’ve made these while juggling a toddler on my hip and a phone call. It’s that easy.
Chunky Chocolate, Not Chips — I’m picky about my chocolate. Chips are fine for mac-and-cheese, but for cookies? You need chunks. I chop my own bars because I want irregular pieces that melt into pockets of goo. It makes the cookie look rustic and homemade, not mass-produced.
They Keep for Days — This is huge for me. I hate when cookies go stale by Tuesday. These cookies actually get better on day two. The flavors meld, the texture softens, and they become even more fudgy. I often make them on Sunday and they’re gone by Wednesday, but if they survive? They’re still perfect.
Crowd-Pleasing Simplicity — I’ve served these to my picky nephew, my chocolate-obsessed daughter, and even my husband’s boss (who claims to hate “sweet” things). Everyone loved them. It’s the universal language of chocolate that everyone speaks.
This recipe is my answer to “what’s for dessert?” when I don’t want to stress. It’s reliable, it’s delicious, and it makes my kitchen smell like heaven. If you’re looking for a treat that just works, this is it.
Ingredients You’ll Need
Here’s the thing: I’m not going to lie to you. This recipe looks simple, but the quality of your ingredients matters. Especially the chocolate. Here’s what I use and why.
For the Dough
Unsalted Butter (1 cup / 225g, softened) — I use salted butter sometimes, but unsalted lets me control the salt level. The butter needs to be softened, not melted. If you microwave it, stop before it looks liquid. It should be cool to the touch but squishable. Melted butter makes flat, greasy cookies. Softened butter makes chewy, thick cookies.
Brown Sugar (2 cups / 400g, packed) — Yes, two cups. This is the key to the chew. Brown sugar has molasses in it, which adds moisture and flavor. I use light brown sugar, but dark brown works too if you want a deeper, more caramel-like taste. Don’t skimp on the amount. The sugar ratio is what creates the texture.
Granulated Sugar (½ cup / 100g) — This adds the crisp edge. If you skip it, the cookies will be too cakey. I like the contrast between the crisp edge and the soft center.
Eggs (2 large, room temperature) — Room temperature eggs emulsify better with the butter and sugar. If your eggs are cold, they’ll seize the butter. I take them out of the fridge 30 minutes before I start. If I forget, I put them in a bowl of warm water for 5 minutes.
Vanilla Extract (2 teaspoons) — Use real vanilla, not imitation. It makes a huge difference in the flavor depth. I use McCormick because it’s consistent and affordable.
All-Purpose Flour (2 ¼ cups / 280g) — Don’t use cake flour or bread flour. AP flour gives the right balance of structure and tenderness. Measure it correctly! Spoon it into the cup and level it off. Don’t scoop straight from the bag, or you’ll pack it down and get dry cookies.
Baking Soda (1 teaspoon) — This helps the cookies spread and brown. Make sure it’s fresh. If your baking soda is old, it won’t work, and your cookies will be dense bricks.
Salt (1 teaspoon) — Even though these are sweet, salt is crucial. It balances the sugar and enhances the chocolate flavor. I use kosher salt because it’s easier to measure.
For the Chocolate
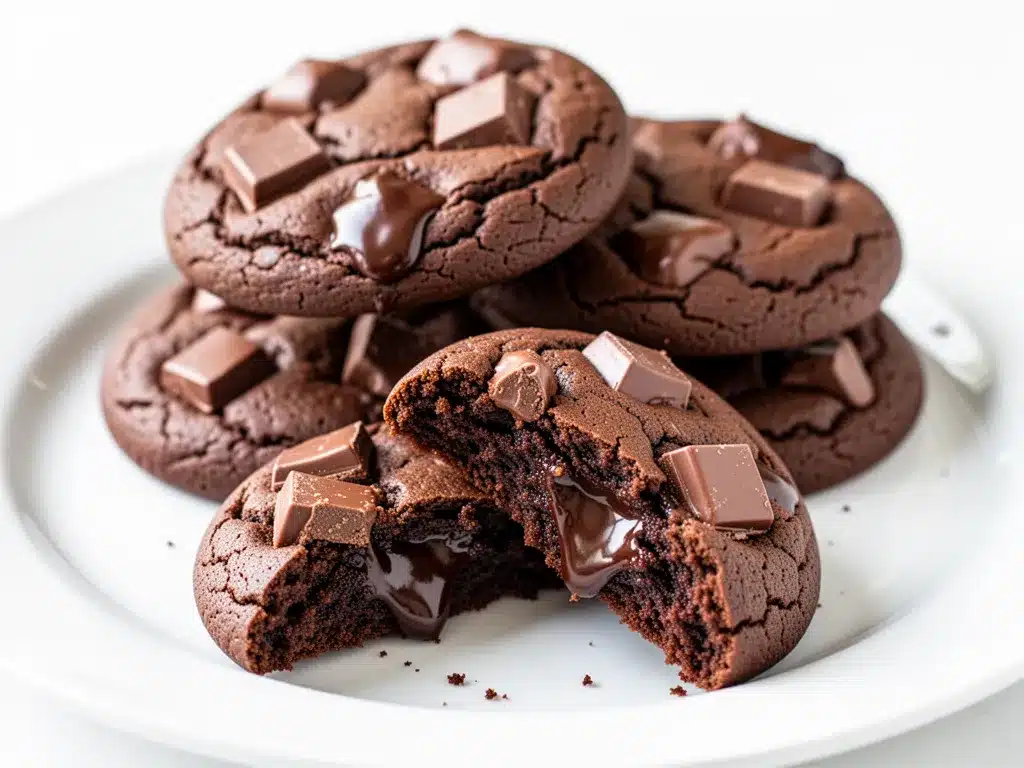
Dark Chocolate Bars (8 oz / 225g) — I use Ghirardelli 60% Cacao bars. They’re widely available and have the perfect balance of sweet and bitter. I chop them into irregular chunks. I don’t measure the chunks; I just chop until I have about 2 cups. You can use milk chocolate if you prefer sweeter cookies, but I find dark chocolate stands up better to the sugar.
Chocolate Chips (1 cup / 170g) — I add these for those little pockets of melted chocolate that you find in every bite. I use semi-sweet chips. They melt nicely without overpowering the chunks.
Flaky Sea Salt (for topping) — Optional, but highly recommended. A sprinkle of flaky salt on top right after baking contrasts beautifully with the sweet chocolate. It makes them taste gourmet.
Equipment Needed
You don’t need fancy gadgets for this. Here’s what I actually use.
Mixing Bowls — I use two large bowls. One for wet ingredients, one for dry. A stand mixer bowl works too, but I like mixing by hand to feel the texture.
Electric Mixer — I use a hand mixer because it’s faster for creaming butter and sugar. A stand mixer works fine, but you have to scrape the bowl often. A wooden spoon works if you have strong arms.
Baking Sheets — I use two half-sheet pans. I prefer light-colored aluminum pans because they promote even browning. Dark pans can burn the bottoms. I line them with parchment paper. I don’t grease the pans; the parchment is enough.
Parchment Paper — This is non-negotiable. It prevents sticking and makes cleanup a breeze. I never use foil or unlined pans for these cookies.
Cooling Rack — I transfer the cookies to a wire rack after baking. This stops the cooking process and keeps the bottoms from getting soggy.
Sharp Knife — For chopping the chocolate bars. A chef’s knife works best. I chop on a cutting board, then scrape the chunks into the dough.
Measuring Cups and Spoons — I use metal measuring cups for dry ingredients and glass for wet. Accuracy matters in baking.
How to Make It: Step-by-Step
Alright, let’s bake. I’m going to walk you through exactly how I do it, including the little tricks I’ve picked up over the years.
Step 1: Prep Your Chocolate and Oven (5 minutes)
Preheat your oven to 350°F (175°C). Line your baking sheets with parchment paper. While the oven heats, chop your chocolate bars into chunks. I aim for pieces that are about ½ inch to 1 inch. They don’t need to be uniform. Throw them into a bowl along with the chocolate chips. Set aside.
Step 2: Cream the Butter and Sugars (3 minutes)
In a large bowl, beat the softened butter, brown sugar, and granulated sugar together. Use your electric mixer on medium-high speed. Beat for about 2-3 minutes until the mixture is light, fluffy, and pale in color. This step is crucial. It incorporates air, which helps the cookies rise slightly and become chewy. Don’t rush this. If it looks dense, keep beating.
Step 3: Add Eggs and Vanilla (2 minutes)
Add the eggs one at a time, beating well after each addition. Scrape down the sides of the bowl with a spatula. Add the vanilla extract. Mix until just combined. The mixture should look smooth and glossy.
Step 4: Mix Dry Ingredients (1 minute)
In a separate medium bowl, whisk together the flour, baking soda, and salt. This ensures the baking soda is evenly distributed, so you don’t get bitter spots.
Step 5: Combine Wet and Dry (2 minutes)
Gradually add the dry ingredients to the wet ingredients. Mix on low speed or by hand until just combined. Do not overmix. Once the flour disappears, stop. Overmixing develops gluten, which makes cookies tough. You want tender, not chewy in a bad way.
Step 6: Fold in Chocolate (2 minutes)
Use a spatula to fold in the chocolate chunks and chips. Be gentle. You want to distribute them evenly without crushing them. The dough will look thick and heavy. This is normal.
Step 7: Scoop and Chill (Optional but Recommended)
Scoop the dough into balls, about 2 tablespoons each. I use a small ice cream scoop for uniformity. Place them on the prepared baking sheets, spacing them about 2 inches apart. They will spread.
Pro Tip: If you have time, chill the dough for 30 minutes. This prevents over-spreading and intensifies the flavor. If you’re in a hurry, you can bake immediately. I often skip this step, but chilling is better.
Step 8: Bake (10-12 minutes)
Bake for 10-12 minutes. The edges should be set and lightly golden, but the centers should still look soft and slightly underbaked. This is the secret to chewy cookies. They continue to cook on the hot pan after you take them out. If you bake them until they look firm in the oven, they’ll be dry later.
Step 9: Cool and Top (5 minutes)
Let the cookies sit on the baking sheet for 5 minutes. This allows them to set. Then, transfer them to a cooling rack. If you’re using flaky sea salt, sprinkle it on right after baking, while the chocolate is still melting.
Expert Tips & Tricks
Here’s everything I’ve learned from making these cookies dozens of times. These tips will save you from my mistakes.
Chill the Dough
I can’t stress this enough. Chilling the dough solidifies the butter, which means the cookies spread less. This gives you a thicker, chewier cookie instead of a flat, crispy one. If you’re impatient, freeze them for 15 minutes. It works.
Underbake Intentionally
This is the #1 mistake people make. They wait until the cookie looks done. Don’t. Pull them out when the edges are set but the center looks soft. They will firm up as they cool. Overbaked cookies are dry cookies. I’d rather underbake than overbake.
Use Real Chocolate
I know chocolate bars are more expensive than chips, but the flavor difference is night and day. Chopped bars create irregular pockets of chocolate that melt differently. It’s worth the extra effort. I chop while watching TV. It’s therapeutic.
Measure Flour Correctly
Scoop-and-level is a myth in baking. If you scoop the cup into the bag, you pack the flour down. Use 20% more flour than you think you need. Spoon the flour into the cup and level it with a knife. This ensures the right ratio.
Don’t Skip the Salt
Salt enhances chocolate. It’s science. If you skip it, the cookies will taste flat and overly sweet. I even add a pinch of salt to the chocolate chunks if I’m feeling fancy.
Storage is Key
Store cookies in an airtight container at room temperature for up to 5 days. Add a slice of bread to the container. The cookies will absorb the moisture from the bread and stay soft. This is a grandma trick that actually works.
Variations & Substitutions
Once you’ve nailed the basic version, here’s how you can mix it up. I’ve tried all of these.
Peanut Butter Chunk
Add ½ cup of peanut butter chips along with the chocolate. Or swirl 2 tablespoons of peanut butter into each dough ball before baking. My kids love this version.
Red Velvet
Replace 2 tablespoons of flour with cocoa powder and add 1 teaspoon of red food coloring. It’s a fun twist for holidays.
White Chocolate Macadamia
Swap the dark chocolate for white chocolate chunks and add 1 cup of macadamia nuts. It’s rich and tropical.
Gluten-Free
Use a 1:1 gluten-free flour blend. I’ve used Bob’s Red Mill and it works great. Add ¼ teaspoon of xanthan gum if your blend doesn’t have it.
Vegan
Replace butter with vegan butter sticks (not tub margarine). Use flax eggs (1 tbsp ground flax + 3 tbsp water per egg). Use dairy-free chocolate chips. They’re surprisingly good.
Spicy
Add ½ teaspoon of cayenne pepper to the dry ingredients. It adds a subtle kick that pairs well with chocolate. Great for adults.
Serving & Storage
How to serve these bad boys? Warm, obviously. But here are other ways I’ve enjoyed them.
With Milk
Classic. Cold milk is the best friend of a warm cookie. I prefer 2% milk, but whole milk is richer.
With Ice Cream
Serve a warm cookie with a scoop of vanilla bean ice cream. Drizzle with caramel. It’s dessert for two.
For Parties
I make a batch of 48 cookies for potlucks. They disappear in minutes. I package them in cellophane bags with a ribbon. They look homemade and thoughtful.
Storage
Store in an airtight container at room temperature for up to 5 days. Add a slice of bread to keep them soft. For longer storage, freeze the dough balls. Bake from frozen, adding 1-2 minutes to the bake time. They freeze beautifully.
Reheating
If you have leftovers (unlikely), microwave a cookie for 10-15 seconds. It will be soft and gooey again. Don’t overheat, or it’ll get tough.
Nutrition Information
I’m not a nutritionist, but here’s the breakdown if you’re tracking. This is per cookie, based on 36 cookies.
Calories: 180
Protein: 2g
Carbs: 24g
Fiber: 1g
Sugar: 16g
Fat: 10g
Saturated Fat: 6g
Cholesterol: 25mg
Sodium: 120mg
Look, this is a treat. It’s high in sugar and fat. But it’s also made with real ingredients. It’s better than store-bought cookies that have preservatives. When I make these, I enjoy one or two and call it a day. It’s a special occasion cookie, not a daily snack. That’s how I keep it balanced.
Final Thoughts
So that’s my Chewy Double Chocolate Chunk Cookies everyone always asks for. I’ve probably talked your ear off at this point, but when you make a recipe this often, you have a lot to say about it.
This recipe has saved my dessert game more times than I can count. It’s my answer to “what’s for dessert?” when I’m tired, don’t want to bake anything complicated, and still want something that tastes really good. My kids are happy, my husband’s happy, and I’m happy because I’m not stressed about cooking.
Make it yours! Try different chocolates, add nuts, or sprinkle sea salt. The best recipes are the ones you adapt to your family’s tastes. If you make this, drop a comment and let me know what you think! I love hearing how recipes turn out in your kitchen. And if something doesn’t work, tell me that too—I’m here to help troubleshoot.
Happy baking! And I hope your kitchen smells half as good as mine does right now.
Frequently Asked Questions
Can I use melted butter instead of softened butter?
You can, but the texture will be different. Melted butter makes thinner, crispier cookies. Softened butter makes thicker, chewier cookies. If you use melted butter, let it cool completely before adding it to the sugar. I prefer softened butter for this recipe.
Why did my cookies spread too much?
Usually, this means the butter was too soft or melted, or the dough wasn’t chilled. Make sure your butter is room temperature, not liquid. Also, chill the dough for at least 30 minutes. If your kitchen is hot, chill the baking sheets before scooping.
Can I freeze the dough?
Yes! Scoop the dough into balls and freeze them on a baking sheet. Once frozen, transfer to a freezer bag. Bake from frozen, adding 1-2 minutes to the bake time. They freeze beautifully for up to 3 months.
Can I use milk chocolate instead of dark chocolate?
Yes, but the cookies will be sweeter. I recommend using semi-sweet or bittersweet chocolate to balance the sugar in the dough. If you use milk chocolate, reduce the granulated sugar by 2 tablespoons.
How do I keep the cookies soft?
Underbake them slightly. Pull them out when the edges are set but the center is still soft. Store them in an airtight container with a slice of bread. The bread releases moisture, which keeps the cookies soft.
Can I make these gluten-free?
Yes, use a 1:1 gluten-free flour blend. I’ve used Bob’s Red Mill and it works great. Make sure your chocolate chips are certified gluten-free, as some contain wheat starch.
What’s the best chocolate to use?
I recommend Ghirardelli 60% Cacao bars. They have a good balance of sweet and bitter. You can also use Lindt baking bars. Avoid chocolate chips for the chunks; chop your own bars for the best texture.
Pin This Recipe!

Chewy Double Chocolate Chunk Cookies
- Total Time: 25 minutes
- Yield: 36 cookies 1x
Description
These chewy double chocolate chunk cookies are made with just 5 main ingredients for a dense, fudgy texture with crisp edges. They stay moist for days and are perfect for any occasion.
Ingredients
- 1 cup (225g) unsalted butter, softened
- 2 cups (400g) packed light brown sugar
- ½ cup (100g) granulated sugar
- 2 large eggs, room temperature
- 2 teaspoons vanilla extract
- 2 ¼ cups (280g) all-purpose flour
- 1 teaspoon baking soda
- 1 teaspoon kosher salt
- 8 oz (225g) dark chocolate bars, chopped into chunks
- 1 cup (170g) semi-sweet chocolate chips
- Flaky sea salt, for topping (optional)
Instructions
- Preheat oven to 350°F (175°C). Line two half-sheet baking pans with parchment paper.
- Chop dark chocolate bars into ½ to 1-inch chunks and combine with chocolate chips in a bowl.
- In a large bowl, beat softened butter, brown sugar, and granulated sugar on medium-high speed for 2-3 minutes until light, fluffy, and pale.
- Add eggs one at a time, beating well after each addition. Scrape down the bowl sides. Add vanilla extract and mix until combined.
- In a separate medium bowl, whisk together flour, baking soda, and salt.
- Gradually add dry ingredients to wet ingredients, mixing on low speed or by hand until just combined. Do not overmix.
- Fold in chocolate chunks and chips gently with a spatula.
- Scoop dough into 2-tablespoon balls and place on prepared baking sheets, spacing 2 inches apart. (Optional: Chill dough for 30 minutes for thicker cookies).
- Bake for 10-12 minutes until edges are set and lightly golden, but centers still look soft.
- Let cookies sit on the baking sheet for 5 minutes to set, then transfer to a cooling rack. Sprinkle with flaky sea salt immediately after baking if desired.
Notes
For best results, use softened butter, not melted. Chill the dough for 30 minutes to prevent spreading and enhance flavor. Underbake slightly to ensure a chewy texture. Store in an airtight container with a slice of bread to keep soft for up to 5 days. Dough can be frozen for up to 3 months.
- Prep Time: 15 minutes
- Cook Time: 10-12 minutes
- Category: Dessert
- Cuisine: American
Nutrition
- Serving Size: 1 cookie
- Calories: 180
- Sugar: 16
- Sodium: 120
- Fat: 10
- Saturated Fat: 6
- Carbohydrates: 24
- Fiber: 1
- Protein: 2
Keywords: chocolate cookies, double chocolate, chewy cookies, easy dessert, 5 ingredient cookies, homemade cookies, chocolate chunk cookies


