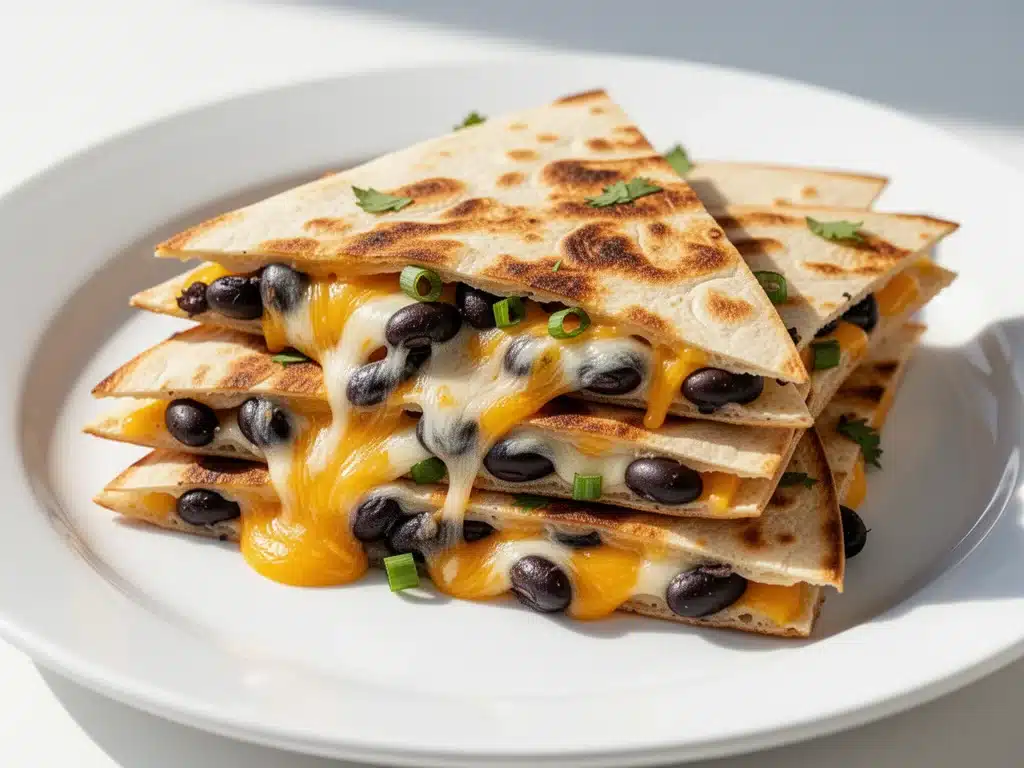
It was 6:45 PM on a Tuesday in September, and the house was in that specific state of chaos that only exists when the school year has just started. My oldest was hunting for a missing soccer cleat, my youngest was crying because their backpack zipper was broken, and I was staring into an open fridge that contained exactly three sad stalks of celery, a jar of pickles, and a block of cheddar cheese that had been there since July.
I didn’t have time to roast vegetables. I didn’t have the energy to chop fresh herbs. And I definitely didn’t have the patience to explain to two hungry, cranky kids why dinner was “healthy” when they could see clearly that it involved no cheese. That’s when I decided to make the Back to School Cheesy Quesadilla Triangles with Black Beans.
I’ve made this recipe at least forty times since August. Forty. It’s not because I’m lazy, though let’s be honest, it is lazy. It’s because this specific combination of ingredients hits every single requirement for a successful weeknight dinner: it’s fast, it’s cheap, it’s packed with protein, and it’s universally loved by picky eaters. I’ve watched my kids devour these triangles so quickly that I’ve had to start making them in double batches just to get a moment of peace.
Before this year, I used to stress about getting dinner on the table by 7 PM. Now, I just grab a tortilla, some beans, and cheese, and I know dinner is handled. This isn’t just a snack; it’s a reliable, sturdy meal that stands up to the demands of busy evenings. If you’re drowning in after-school activities and feeling like your only option is ordering takeout, this recipe is your lifeline.
Why You’ll Love This Weeknight Winner
There are a million things you can throw together in ten minutes, but very few of them actually satisfy everyone at the table. This Back to School Cheesy Quesadilla Triangles with Black Beans is different. It’s not just “quick food”; it’s actually good food that happens to be fast.
- Zero Fuss Cooking — Seriously, if you can flip a pancake, you can make this. There’s no complex technique, no simmering sauce, no delicate timing. You assemble, you heat, you cut. I’ve taught my seven-year-old to make these solo, and they turn out perfect every time.
- Protein-Packed — A lot of quick meals are just carbs and cheese. The black beans add a serious protein boost that keeps you full longer. My husband, who usually complains that “kids’ food” isn’t filling, actually asks for seconds of these.
- Costs Pennies — Tortillas, canned beans, block cheese. You can make this for under $2 per serving. That is significantly cheaper than a single slice of pizza delivery, and it’s way healthier. I keep the staples stocked specifically so I can pull this off on a whim.
- Customizable Chaos — My picky eater wants it plain. My adventurous eater wants jalapeños and corn. This recipe accommodates both without me having to cook two separate dinners. I make one big sheet, and we each build our own triangle.
- Freezer Friendly — I make a huge batch on Sunday, freeze the assembled (uncooked) quesadillas, and just throw them in the pan during the week. It feels like I’m cheating, but it’s just smart meal planning.
This is the dish I make when I’m exhausted, when the kids are hungry, and when I need a win. It’s reliable, it’s delicious, and it gets us through the hardest weeknight rushes.
Ingredients You’ll Need
The beauty of this Back to School Cheesy Quesadilla Triangles with Black Beans is that you likely have most of this in your pantry right now. I’m not asking you to go to the store for anything exotic. Here’s exactly what I use and why.
The Base
Flour Tortillas (8-inch size, 8-10 count) — I use large flour tortillas. Small ones are for appetizers; these are for dinner. I prefer the ones with a bit of butter in them because they get crispier and more flavorful. If you need gluten-free, I’ve tested the store-brand GF tortillas, and they hold up surprisingly well, though they need a lower heat to avoid burning.
Black Beans (1 can, 15oz, drained and rinsed) — Canned is fine here. You’re not making a bean dip; you just need texture and protein. Rinsing them is non-negotiable. If you don’t rinse them, your quesadilla will be salty and slimy. I use a fine-mesh strainer to get them dry. Dry beans are key to a crispy quesadilla.
The Cheese & Flavor
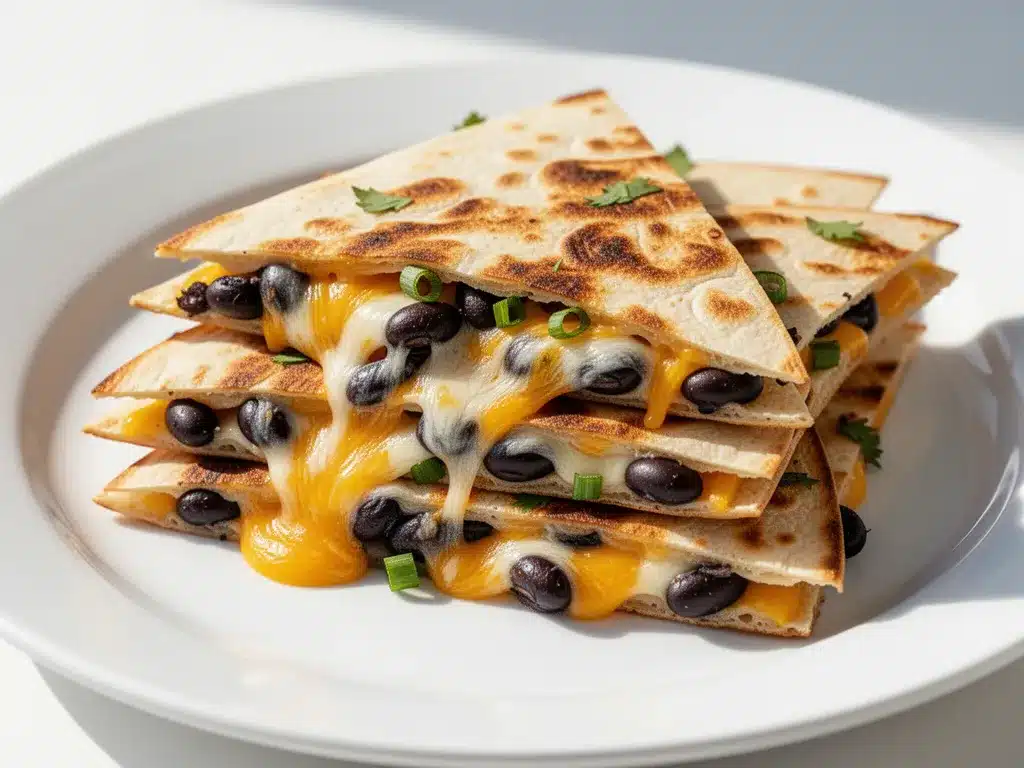
Shredded Cheddar (2 cups, or block cheese you shred yourself) — I buy a block of sharp cheddar and shred it myself. Pre-shredded cheese is coated in cellulose to keep it from clumping, and that coating stops it from melting smoothly. Your quesadilla will be chewy and weird if you use the bagged stuff. It takes two minutes to shred a block, and it makes a world of difference.
Monterey Jack (1 cup, shredded) — I mix this with the cheddar. Cheddar has the flavor, but Monterey Jack has the melt. You want that gooey, stretchy cheese pull. If you can’t find Monterey Jack, Mozzarella works in a pinch, though it’s milder.
Taco Seasoning (1 teaspoon) — Just a little kick. I use a low-sodium blend so I can control the salt. If you have homemade taco seasoning, use that. It’s better. But if you’re running on fumes, the packet mix works.
Green Onions (2-3 stalks, chopped) — This adds a fresh, oniony bite that cuts through the richness of the cheese. I use the white parts for cooking and the green parts for garnish, but honestly, chopped up together is fine. If you hate onions, skip it, but I don’t recommend it.
The Cooking Fat
Butter (2 tablespoons, softened) — I butter the outside of the tortillas. Not oil. Butter. It gives that golden-brown, nutty crust that makes you think you’re at a fancy Mexican restaurant. If you’re dairy-free, use a neutral oil or vegan butter, but butter is the secret weapon here.
Optional Add-Ins
Corn (½ cup, frozen or canned) — Sweetness balances the savory beans. I throw in frozen corn straight from the bag; it thaws in the heat of the pan.
Jalapeños (2 tablespoons, sliced) — For the kids who like heat. I keep a jar of pickled jalapeños in the fridge for this purpose. It’s a game-changer for flavor.
Equipment Needed
You don’t need anything fancy. In fact, fancy equipment might get in the way. Here’s what I actually use in my kitchen.
Large Non-Stick Skillet — This is your main tool. A 12-inch skillet is ideal because it lets you cook two quesadillas at once. I have a well-seasoned cast iron skillet that I also use, but non-stick is easier for beginners because you don’t have to worry about the cheese sticking to the bottom. If you only have an 8-inch pan, you’ll need to cook in batches, which is fine.
Spatula — A wide, thin metal spatula is best. It slides under the quesadilla easily without breaking it. I’ve broken a few tortillas with a clumsy wooden spoon in the early days. Don’t make my mistakes. Get a good metal spatula.
Cutting Board & Sharp Knife — You need to cut these into triangles. A sharp knife makes clean cuts. A dull knife squishes the cheese out the sides and makes a mess. I keep a small utility knife just for this.
Pastry Brush or Paper Towel — For buttering the tortillas. I usually dip a paper towel into the softened butter and wipe it over the tortilla. It’s faster than brushing and gives even coverage.
Colander — For rinsing the beans. Essential. Do not skip this step.
How to Make It: Step-by-Step
Alright, let’s get cooking. This process is straightforward, but there are a few tricks to get that perfect golden crust and melted cheese center.
Step 1: Prep Your Beans (2 minutes)
Open your can of black beans and dump them into a colander. Rinse them under cold water until the water runs clear. Shake the colander vigorously to remove as much water as possible. You want the beans dry. Wet beans = soggy quesadilla. I usually pat them dry with a paper towel if I’m in a rush. This is the most important step for texture.
Step 2: Mix the Filling (1 minute)
In a small bowl, combine the drained black beans, half of the shredded cheese, the taco seasoning, and the chopped green onions. Mix it gently. You don’t want to mash the beans; you just want them coated in seasoning and cheese. This mixture is your filling. Set it aside.
Step 3: Assemble the Quesadillas
Lay a tortilla flat on your cutting board. Spread a generous layer of the bean mixture over half of the tortilla. Sprinkle the remaining cheese over the beans. The cheese acts as the glue, so don’t be shy with it. Fold the empty half of the tortilla over the filling to create a half-moon shape. Press down gently with your hand to help it stick.
Step 4: Butter the Outside
Take your paper towel with softened butter and wipe the top side of the folded quesadilla. Then, carefully flip the quesadilla over with your hands or a spatula, and butter the other side. You want a thin, even layer of butter covering the entire exterior. This is what browns.
Step 5: Cook the Quesadilla (3-4 minutes per side)
Heat your skillet over medium heat. Once it’s warm, place the quesadilla in the pan. Cook for 2-3 minutes. Don’t touch it! Let it get golden brown. You’ll hear the sizzle change pitch when it’s ready to flip. When the bottom is a deep golden brown, slide your spatula under and flip it confidently. Cook the other side for another 2-3 minutes until golden and the cheese is fully melted. If the cheese isn’t melting, your heat is too high. Lower it slightly.
Step 6: Cut and Serve
Transfer the cooked quesadilla to a cutting board. Let it rest for 30 seconds. This lets the cheese set slightly so it doesn’t slide out when you cut. Use your sharp knife to cut the half-moon into three triangles. Yes, three. It’s fun, it’s manageable, and it’s perfect for little hands.
Repeat with the remaining tortillas. Serve immediately with salsa, sour cream, or guacamole on the side.
Expert Tips & Tricks
I’ve made these enough times to know what goes wrong and how to fix it. Here’s the inside scoop.
Control the Heat — Medium heat is the sweet spot. High heat burns the tortilla before the cheese melts. Low heat makes the tortilla soggy. If you’re unsure, start at medium and adjust. You want a steady, gentle sizzle.
Don’t Overfill — It’s tempting to pile on the beans, but if the quesadilla is too heavy, it will burst open in the pan. Keep the filling layer thin. You can always add more sauce on top.
The Resting Period — I know it’s hard to wait, but letting the quesadilla rest for 30 seconds after cooking prevents the cheese from running out everywhere. It makes cutting much cleaner.
Freezing Strategy — I assemble the quesadillas, wrap them individually in plastic wrap, and stack them in a freezer bag. When I need dinner, I throw the frozen quesadilla directly into the pan. It takes about 2 minutes longer to cook, and you don’t have to thaw it. This is my Sunday prep secret.
Crispy Corn — If you add corn, make sure it’s thawed and dry. Wet corn steams the tortilla. I usually toss the corn into the pan for a minute before adding the quesadilla to crisp it up, then remove it, cook the quesadilla, and add the corn back in at the end.
Variations & Substitutions
Once you master the basic version, you can tweak it to fit your pantry or dietary needs. I’ve tried all of these.
Chicken Version — Add 1 cup of shredded rotisserie chicken to the bean mixture. It makes it heartier. My husband loves this version. It’s basically a chicken enchilada in quesadilla form.
Veggie Loaded — Add diced bell peppers and spinach to the bean mix. The spinach wilts instantly in the pan. It’s an easy way to sneak veggies into my kids’ diets without them noticing.
Spicy Kick — Use pepper jack cheese instead of Monterey Jack, and add diced jalapeños to the filling. This is for the heat lovers.
Gluten-Free — Swap the flour tortillas for corn tortillas. Note: Corn tortillas are smaller and more fragile. You may need to use two per quesadilla or be very gentle with the flipping. They also don’t get as crispy with butter, so use oil instead.
Bean-Free — If your kids hate beans, just use more cheese and add ground beef or turkey. The structure remains the same.
Serving & Storage
How to Serve — I serve these straight from the pan with wedges of lime and a side of cool sour cream. The contrast of hot, crispy quesadilla and cool cream is perfect. For a full meal, serve with a simple side salad or some roasted sweet potato fries.
Leftovers — Store leftovers in an airtight container in the fridge for up to 3 days. They are best reheated in a skillet to regain crispiness. The microwave makes them chewy and soft, which is fine if you’re in a rush, but the texture isn’t the same.
Freezing — As mentioned, these freeze beautifully. Wrap individually and freeze for up to 3 months. Reheat in the oven at 350°F for 10-15 minutes for the best texture.
Nutrition Information
I’m not a nutritionist, but here’s the breakdown if you’re tracking. Per serving (based on 4 quesadillas, cut into 3 triangles each, so 12 triangles total, 3 triangles per person):
| Nutrient | Amount |
|---|---|
| Calories | 320 |
| Protein | 14g |
| Carbs | 38g |
| Fat | 12g |
| Fiber | 6g |
| Sodium | 450mg |
It’s a balanced meal with good protein from the beans and cheese, and fiber to keep you full. If you want to lighten it up, use low-fat cheese and skip the butter on the outside (though you lose some crispiness). But honestly? It’s a treat. Enjoy it.
Final Thoughts
So that’s my go-to Back to School Cheesy Quesadilla Triangles with Black Beans. It’s simple, it’s cheap, and it gets dinner on the table when you have zero energy left. I love that it uses pantry staples and still feels like a real meal. My kids ask for it regularly, which is the highest compliment I can give.
Make it yours! Add what you have, skip what you don’t. The best part of cooking is making it work for your family. If you make this, let me know how it goes in the comments. I love hearing your tips and variations.
Frequently Asked Questions
Can I use canned refried beans instead of whole black beans?
You can, but the texture will be different. Refried beans are softer and creamier, so they won’t give you those distinct bean bites. They also hold more moisture, so your quesadilla might get soggy faster. If you use refried beans, spread them very thinly and maybe add a little extra cheese to absorb the moisture. Whole beans are better for structure.
Why did my quesadilla burn?
Usually, this means the heat was too high. Tortillas burn quickly. If you’re using a powerful stove, lower the heat to medium-low. You want the cheese to melt before the tortilla chars. If the tortilla is browning too fast but the cheese isn’t melted, cover the pan with a lid for a minute to trap the heat and melt the cheese without burning the outside.
Can I make these in the oven?
Yes! Place assembled quesadillas on a baking sheet, brush with butter, and bake at 400°F for 8-10 minutes, flipping halfway through. They’ll be crispier but less “fried” tasting. This is a good option if you’re making a huge batch for a party.
How do I keep the triangles from falling apart?
Make sure you’re using enough cheese as glue. Also, don’t overfill. And let them rest for 30 seconds after cooking. If they’re still falling apart, your tortillas might be old or dry. Use fresh, soft tortillas.
Can I use corn tortillas?
Yes, but they are more fragile. You may need to use two small corn tortillas per quesadilla to prevent breaking. They also don’t crisp up the same way with butter, so you might need to use a little oil in the pan. They are a great gluten-free option, just handle with care.
What’s the best cheese to use?
A mix of Cheddar (for flavor) and Monterey Jack (for melt) is ideal. Sharp Cheddar has more flavor but doesn’t melt as well on its own. Monterey Jack is mild but melts beautifully. Using both gives you the best of both worlds. Avoid pre-shredded cheese!
Pin This Recipe!
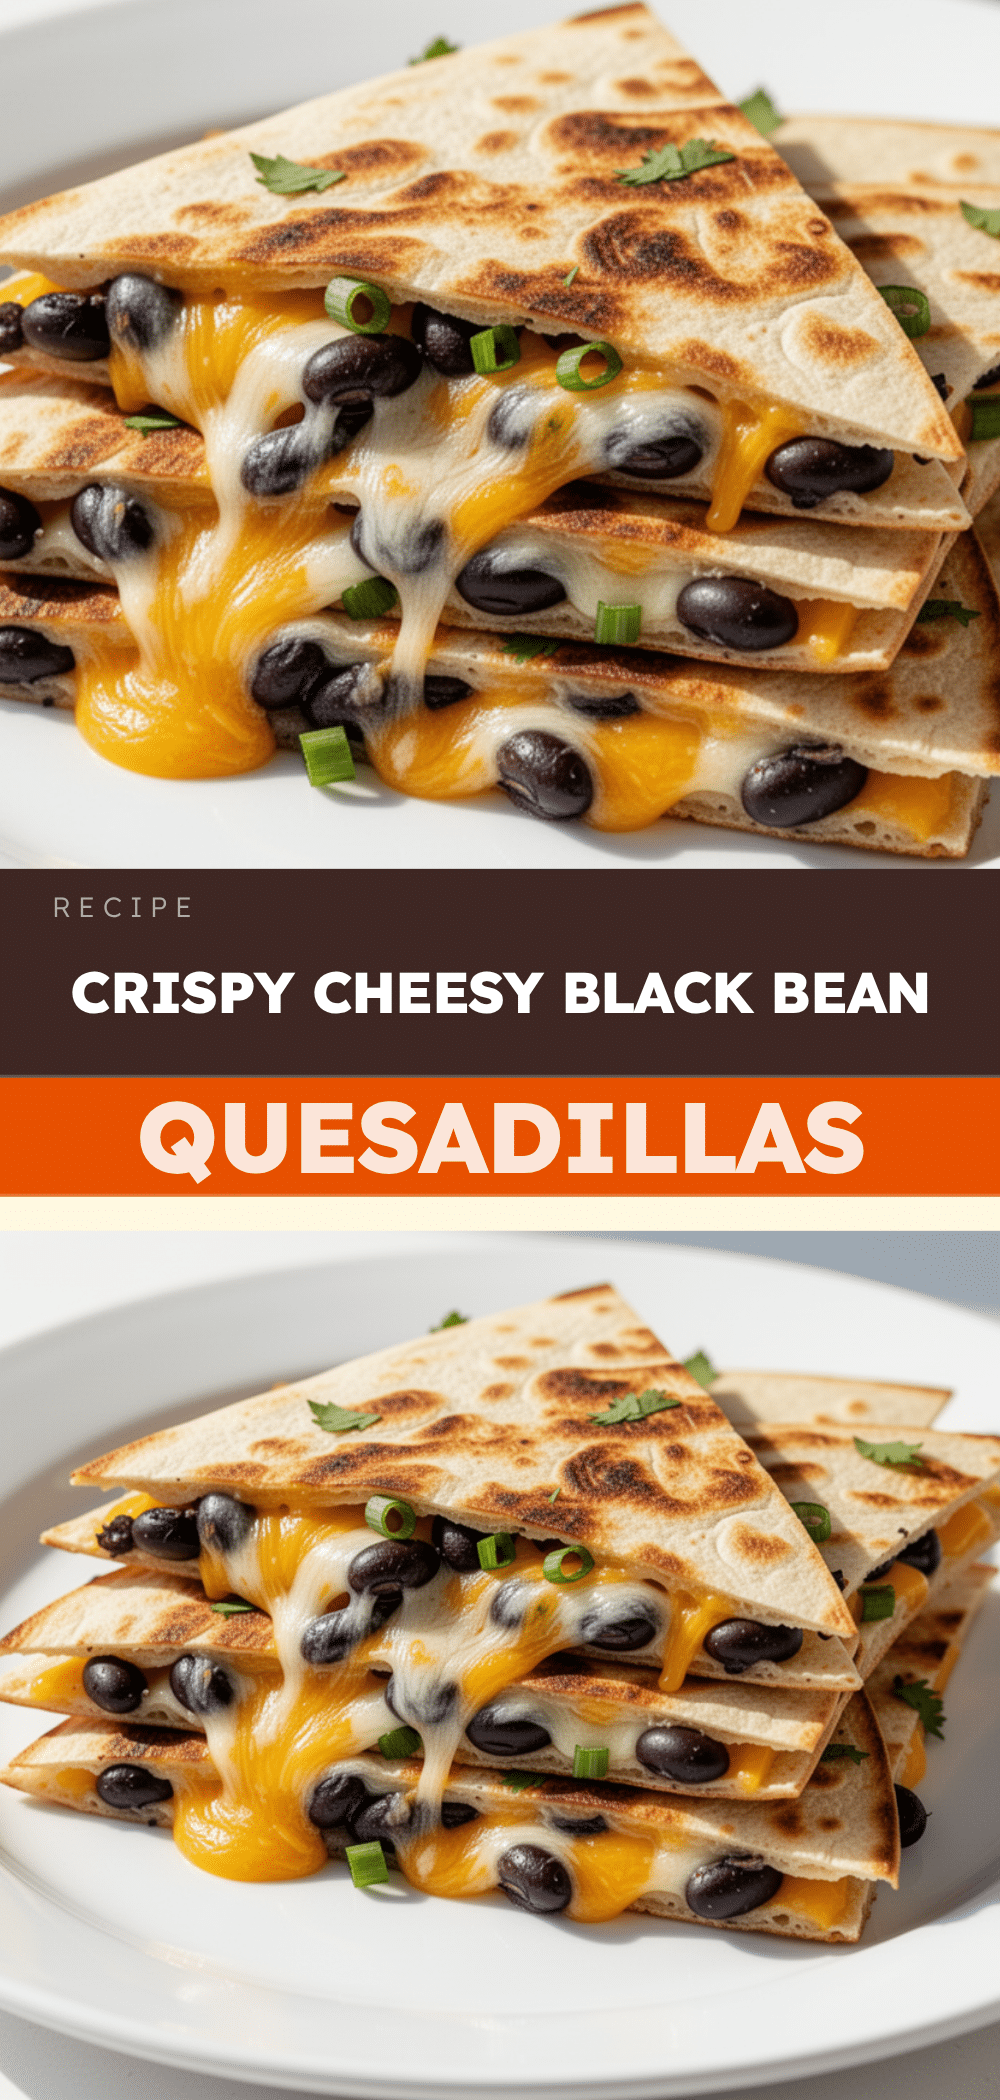
Back to School Cheesy Quesadilla Triangles with Black Beans
- Total Time: 15 minutes
- Yield: 4 servings 1x
Description
A fast, cheap, and protein-packed weeknight dinner featuring crispy tortillas filled with seasoned black beans and a blend of cheddar and Monterey Jack cheese.
Ingredients
- 8–10 large flour tortillas (8-inch)
- 1 can (15oz) black beans, drained and rinsed
- 2 cups shredded sharp cheddar cheese
- 1 cup shredded Monterey Jack cheese
- 1 teaspoon taco seasoning (low-sodium)
- 2–3 green onions, chopped
- 2 tablespoons softened butter
- Optional: ½ cup corn (frozen or canned)
- Optional: 2 tablespoons sliced jalapeños
Instructions
- Drain and rinse the black beans in a colander. Shake vigorously to remove excess water and pat dry with a paper towel to ensure crispiness.
- In a small bowl, combine the dried black beans, half of the shredded cheese, taco seasoning, and chopped green onions. Mix gently to coat without mashing the beans.
- Lay a tortilla flat on a cutting board. Spread the bean mixture over half of the tortilla, then sprinkle the remaining cheese over the beans.
- Fold the empty half of the tortilla over the filling to create a half-moon shape and press gently to seal.
- Using a paper towel dipped in softened butter, wipe a thin, even layer of butter over the entire exterior of the quesadilla on both sides.
- Heat a large non-stick skillet over medium heat. Place the quesadilla in the pan and cook for 2-3 minutes without moving it, until the bottom is golden brown.
- Flip the quesadilla carefully with a spatula and cook the other side for another 2-3 minutes until golden and the cheese is melted.
- Transfer to a cutting board and let rest for 30 seconds to allow the cheese to set.
- Cut the half-moon into three triangles and serve immediately.
Notes
Dry beans are crucial for a crispy quesadilla; do not skip rinsing and drying. Use block cheese shredded yourself for better melting than pre-shredded varieties. Control heat at medium to prevent burning the tortilla before the cheese melts. Letting the quesadilla rest for 30 seconds prevents cheese from sliding out when cutting. These can be frozen assembled and cooked directly from frozen.
- Prep Time: 5 minutes
- Cook Time: 10 minutes
- Category: Main Course
- Cuisine: Mexican
Nutrition
- Serving Size: 3 triangles per pers
- Calories: 320
- Sugar: 2
- Sodium: 450
- Fat: 12
- Saturated Fat: 6
- Carbohydrates: 38
- Fiber: 6
- Protein: 14
Keywords: quesadilla, black beans, weeknight dinner, back to school meals, quick recipes, cheesy quesadilla, family friendly, budget meals


