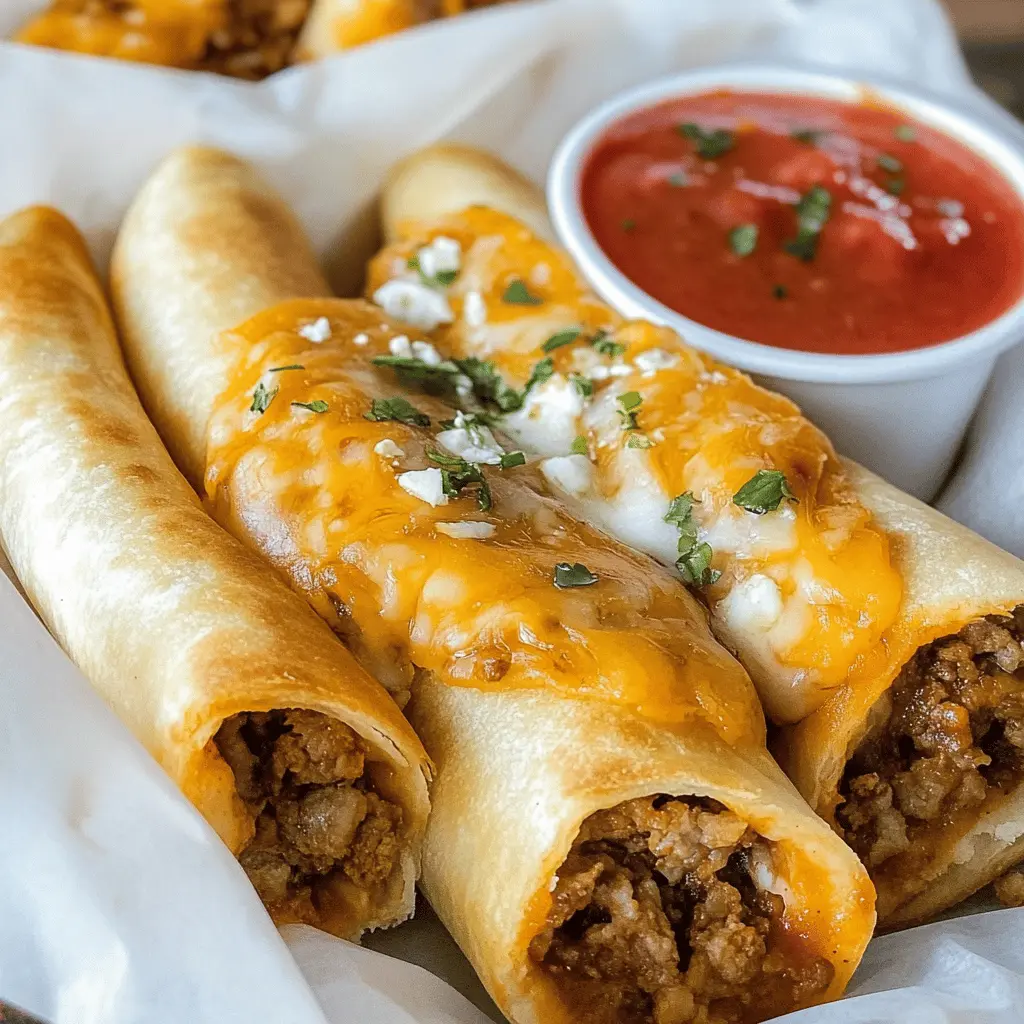
These Cheesy Taco Sticks are a fun and tasty twist on your favorite tacos! With gooey cheese, seasoned meat, and crispy bread, they’re perfect for snacks or dinner.
Trust me, it’s hard to eat just one! They make a great game day treat, and I love dipping them in salsa or guacamole. Who can resist cheesy goodness? 😋
Key Ingredients & Substitutions
Ground Beef: This is your main protein source. You can substitute it with ground turkey or chicken for a leaner option. I like mixing half ground beef and half black beans for a meatless twist that adds great texture.
Taco Seasoning: Store-bought is convenient, but you can make your own with chili powder, cumin, paprika, garlic powder, and onion powder. I always keep the homemade mix on hand for taco night!
Cheddar and Monterey Jack Cheese: These cheeses melt beautifully. If you’re looking for dairy-free options, try using vegan cheese alternatives available in stores. Personally, I love adding a bit of pepper jack for some spice!
Pizza Dough: Refrigerated pizza dough is easy to work with, but you could also use puff pastry for a flaky version or tortillas for a lighter option. I often use whole wheat tortillas for some added fiber.
Salsa and Sour Cream: These are fantastic for dipping. If you’re avoiding dairy, consider using guacamole or a dairy-free sour cream alternative. I like to mix some salsa with avocado for a creamy dip!
How Can I Successfully Seal the Taco Sticks?
Sealing the taco sticks properly is key to keeping the filling inside as they bake. Here’s how to do it:
- After placing the filling on one side of the dough, gently fold it over to cover the filling completely.
- Press down firmly on the edges to seal them. It helps to wet your fingers with a little water before pressing, as this makes the dough stick better.
- If you want extra insurance that they won’t open up while baking, use a fork to crimp the edges. This adds a nice decorative touch too!
Remember not to overfill the sticks, as this can make sealing tricky. Enjoy making your cheesy taco sticks with these tips!

How to Make Cheesy Taco Sticks?
Ingredients You’ll Need:
For The Taco Filling:
- 1 pound ground beef
- 1 packet taco seasoning
- 1 cup shredded cheddar cheese
- 1 cup shredded Monterey Jack cheese
For The Dough:
- 1 can refrigerated pizza dough (or tortilla wraps)
- 1 tablespoon olive oil
For Seasoning:
- 1 teaspoon garlic powder
- 1 teaspoon onion powder
- Salt and pepper to taste
For Serving (Optional):
- Salsa for dipping
- Sour cream for serving
How Much Time Will You Need?
This recipe takes about 10 minutes of prep time and 20 minutes of baking time. In total, you’ll need around 30 minutes to have these delicious cheesy taco sticks ready to enjoy!
Step-by-Step Instructions:
1. Preheat the Oven:
Start by preheating your oven to 400°F (200°C). This will get it nice and hot, perfect for baking your taco sticks!
2. Brown the Beef:
In a large skillet over medium heat, add the ground beef. Cook it until it’s browned and no longer pink, stirring occasionally. If there’s any excess grease, drain it out carefully.
3. Add Seasoning:
Next, sprinkle in the taco seasoning along with the garlic powder, onion powder, salt, and pepper. Stir everything together and cook for an additional 2-3 minutes, just until it’s heated through and smells amazing!
4. Mix in the Cheeses:
Remove the skillet from the heat and stir in both the shredded cheddar and Monterey Jack cheeses. Keep mixing until the cheeses melt and fully blend with the beef filling.
5. Prepare the Dough:
On a floured surface (or just unroll your tortilla), roll out the pizza dough. Cut it into rectangles about 4×6 inches. These will be the bases for your taco sticks!
6. Fill the Taco Sticks:
Take 2-3 tablespoons of the cheesy beef filling and place it on one side of each rectangle. Fold the other half over the top and press the edges to seal them. You can crimp the edges with a fork if you want to make sure they’re sealed tight!
7. Brush and Sprinkle:
Brush the tops of your taco sticks with olive oil. If you’d like, sprinkle a little extra garlic powder on top for some added flavor!
8. Bake Them:
Place the taco sticks on a baking sheet lined with parchment paper. Bake them in the preheated oven for about 15-20 minutes, or until they’re golden brown and look delicious.
9. Cool and Serve:
Once they’re baked, carefully remove them from the oven and let them cool for a few minutes. This will help them set and make them easier to handle.
10. Enjoy!
Serve your warm cheesy taco sticks with salsa and sour cream for dipping, if you’d like. Enjoy your tasty treat!
Can I Use Ground Turkey Instead of Ground Beef?
Absolutely! Ground turkey is a great lean substitute for ground beef in this recipe. Just make sure to cook it thoroughly until no longer pink, and you might want to season a bit more, as turkey can be milder in flavor than beef.
What Can I Use Instead of Pizza Dough?
If you don’t have pizza dough, tortillas work perfectly! You can also use puff pastry or crescent roll dough for a flakier version. Just keep in mind that baking times might vary slightly, so keep an eye on them as they cook!
How Do I Store Leftover Cheesy Taco Sticks?
Store any leftovers in an airtight container in the fridge for up to 3 days. To reheat, place them in the oven at 350°F (175°C) for about 10 minutes or until warmed through. This will help restore their crispy texture.
Can I Freeze These Taco Sticks?
Yes, you can freeze them! Before baking, place the assembled taco sticks on a baking sheet and freeze until solid. Then transfer them to a freezer-safe bag or container. Bake directly from frozen, adding a few extra minutes to the cooking time.